Guide to Using VS Code Copilot with ZenMux
Overview
Visual Studio Code Copilot is an AI programming assistant from Microsoft integrated into the VS Code editor. It provides intelligent suggestions, auto-completion, and code generation as you write code. With ZenMux, you can use your own API key to power VS Code Copilot, enjoying a more flexible and cost-effective AI programming experience.
Usage Tips
- Ensure your VS Code version is up to date.
- Have your ZenMux API key ready.
- It is recommended to read the full guide first to understand the detailed configuration steps.
Quick Start
Start your ZenMux Copilot journey in just a few simple steps:
- Install Visual Studio Code version 1.104.0 or higher.
- 📥 Install Extension: Click here to install the plugin.
- 💬 Open Copilot: Open the GitHub Copilot Chat interface in VS Code.
- ⚙️ Manage Models: Click the model selector below the chat input box and choose "Manage Models...".
- ✅ Select ZenMux: Click "Add Models" and select the "ZenMux" provider.
- 🔑 Configure Key: Enter your ZenMux API Key (the key will be securely stored locally).
- 🎯 Pick Model: Select the specific models you wish to use in the model selector.
Detailed Configuration Instructions
1. Version Requirements
Ensure your VS Code version is 1.104.0 or higher. You can check your current version in the following ways:
GUI Method:
- macOS: Click menu bar Code > About Visual Studio Code
- Windows/Linux: Click menu bar Help > About
Command Line Method:
bashcode --version
Version Check
- If the command line shows a version lower than 1.104.0
- Or the GUI shows a version that does not meet the requirements
- Please go to the VS Code Official Website to download the latest version
If you cannot update directly, consider:
- Updating using a package manager (like Homebrew)
- Downloading and manually installing the latest version
- Contacting your IT support team for assistance with the upgrade
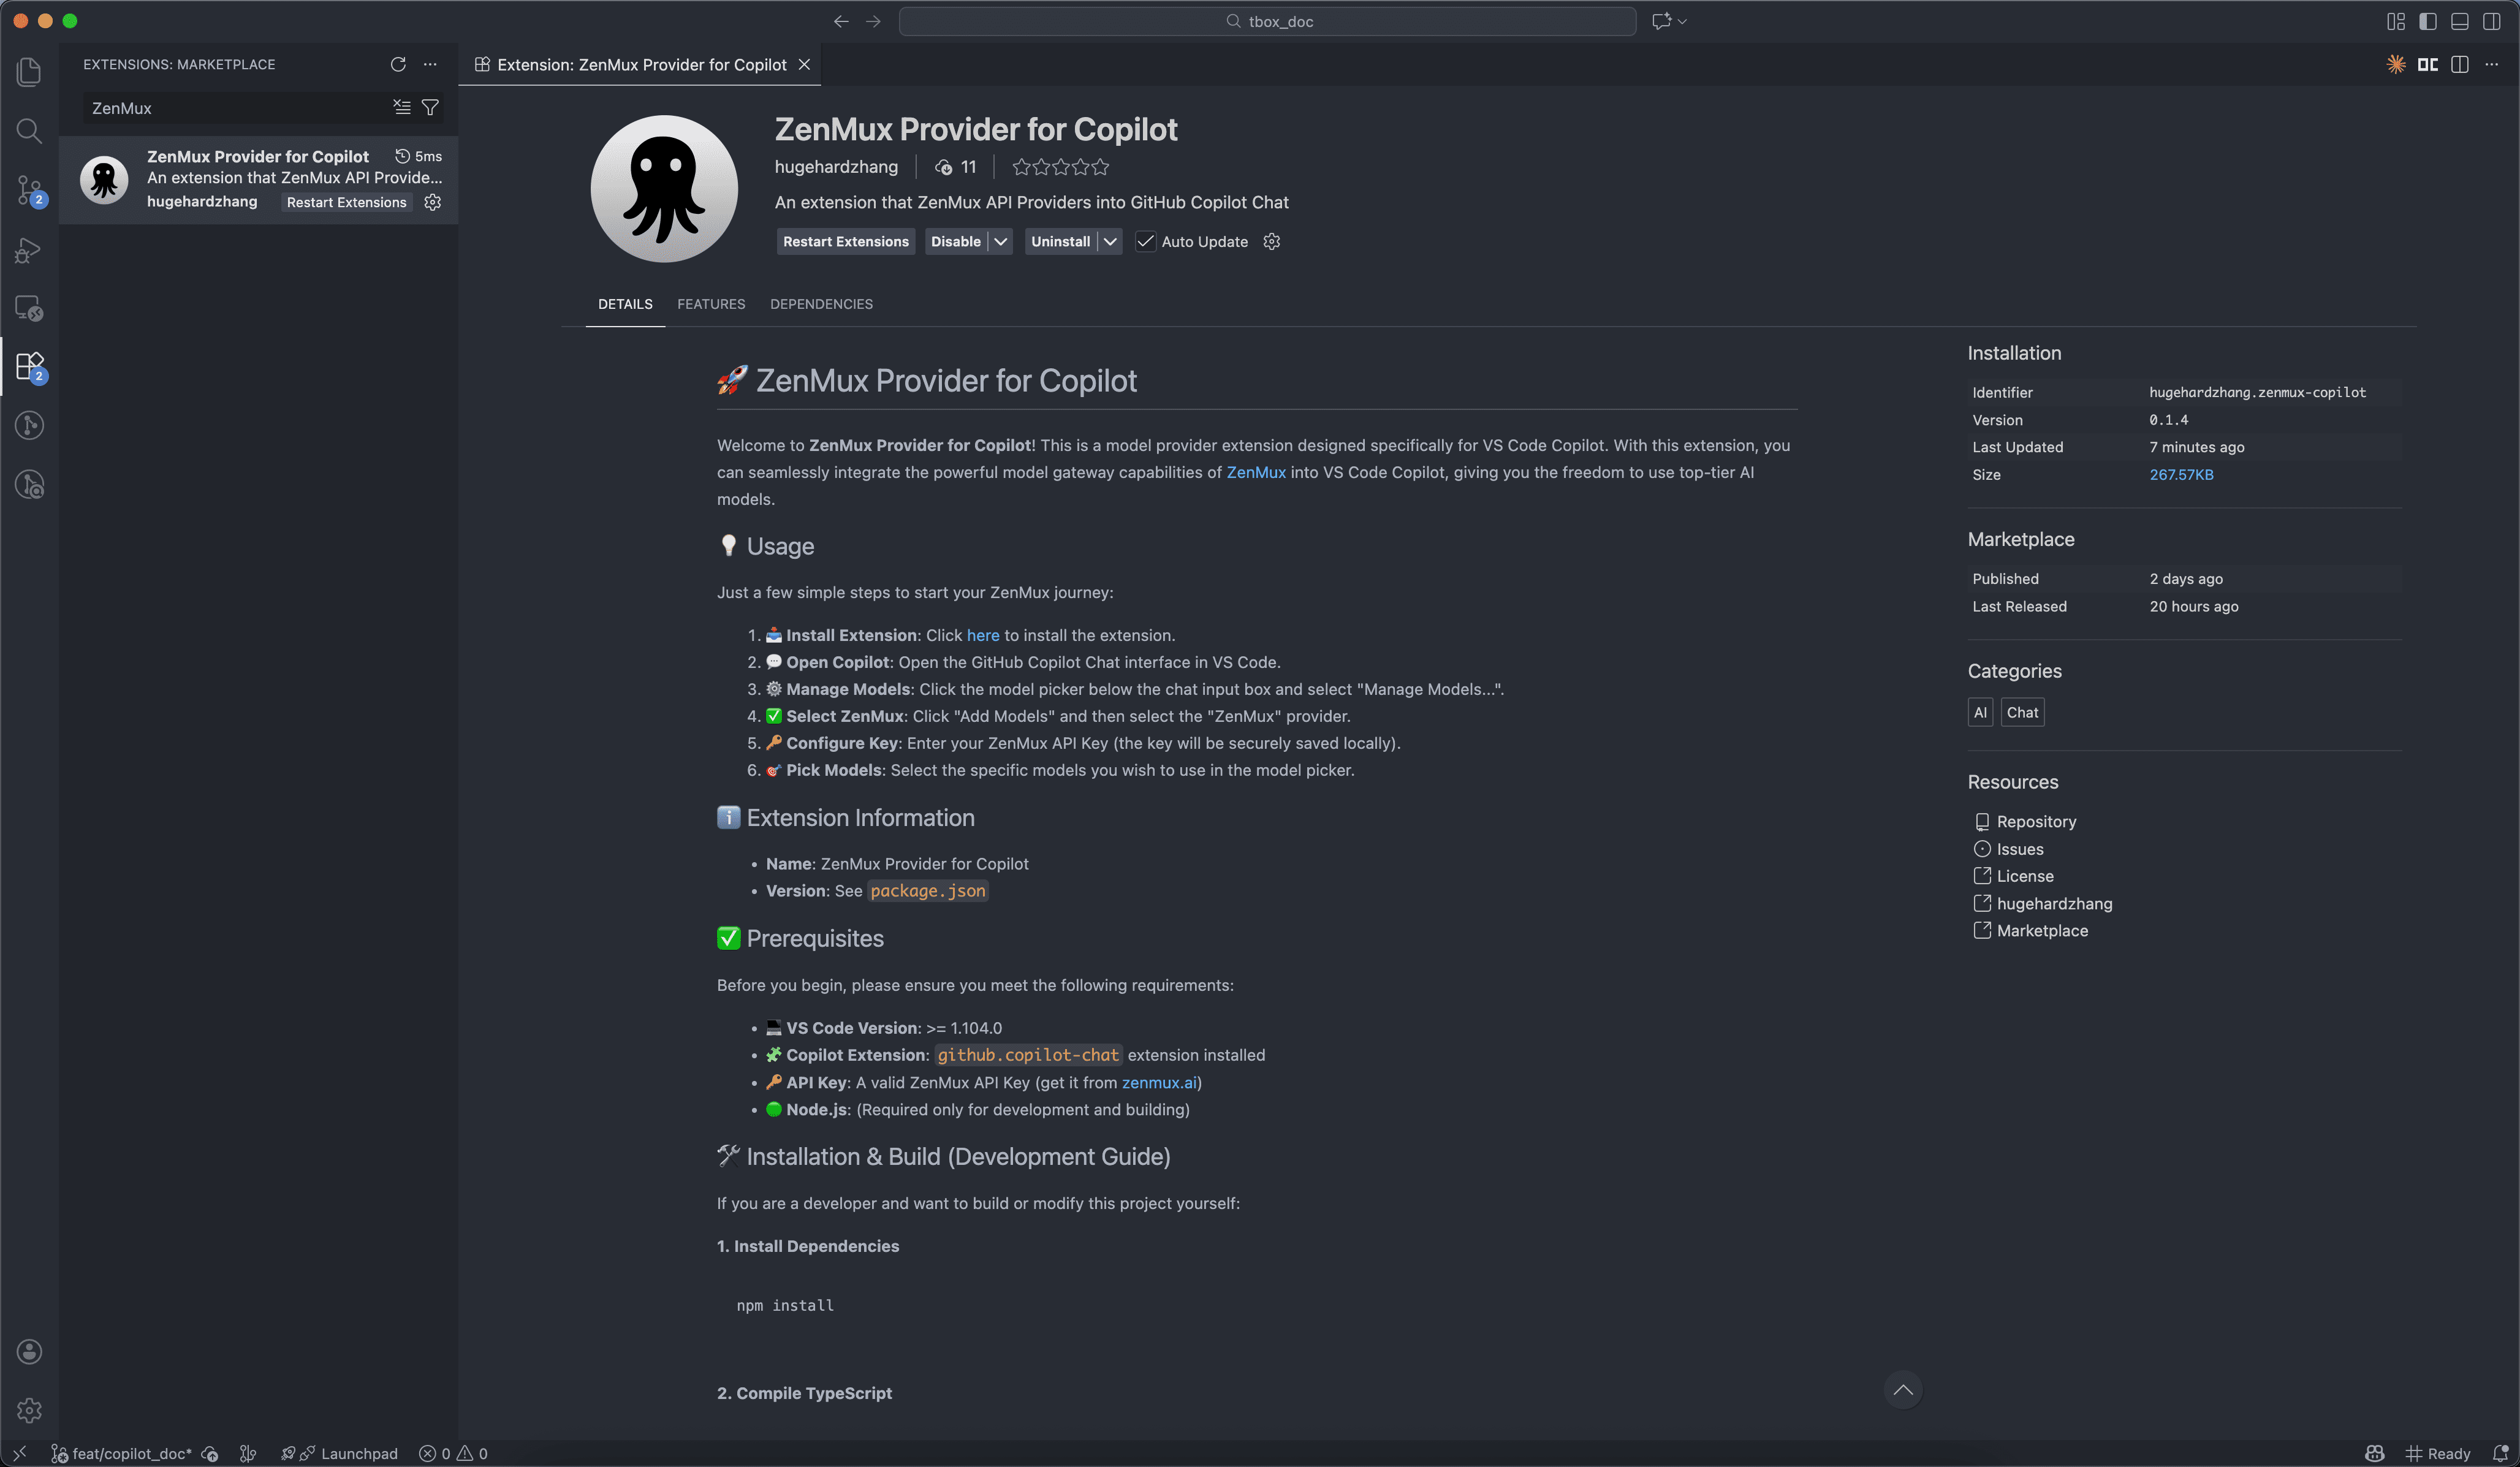
2. Install ZenMux Copilot Extension
There are two ways to install:
Method 1: Via VS Code Marketplace
- Open VS Code.
- Click the Extensions icon in the left activity bar (or use shortcut
Cmd+Shift+X/Ctrl+Shift+X). - Type "ZenMux" in the search box.
- Find the extension published by
hugehardzhangand click Install.
Method 2: Direct Link Installation
- Click ZenMux Copilot Extension Page.
- Click the Install button; the browser will prompt to open VS Code.
- Confirm installation in VS Code.
3. Open Copilot Chat Interface
After installation, you can open Copilot Chat in any of the following ways:
- Click the Copilot Chat icon in the left activity bar.
- Use shortcut
Cmd+Shift+I(macOS) orCtrl+Shift+I(Windows/Linux). - Press
Cmd+Shift+P/Ctrl+Shift+Pto open the Command Palette and type "Chat: Focus on Chat View".
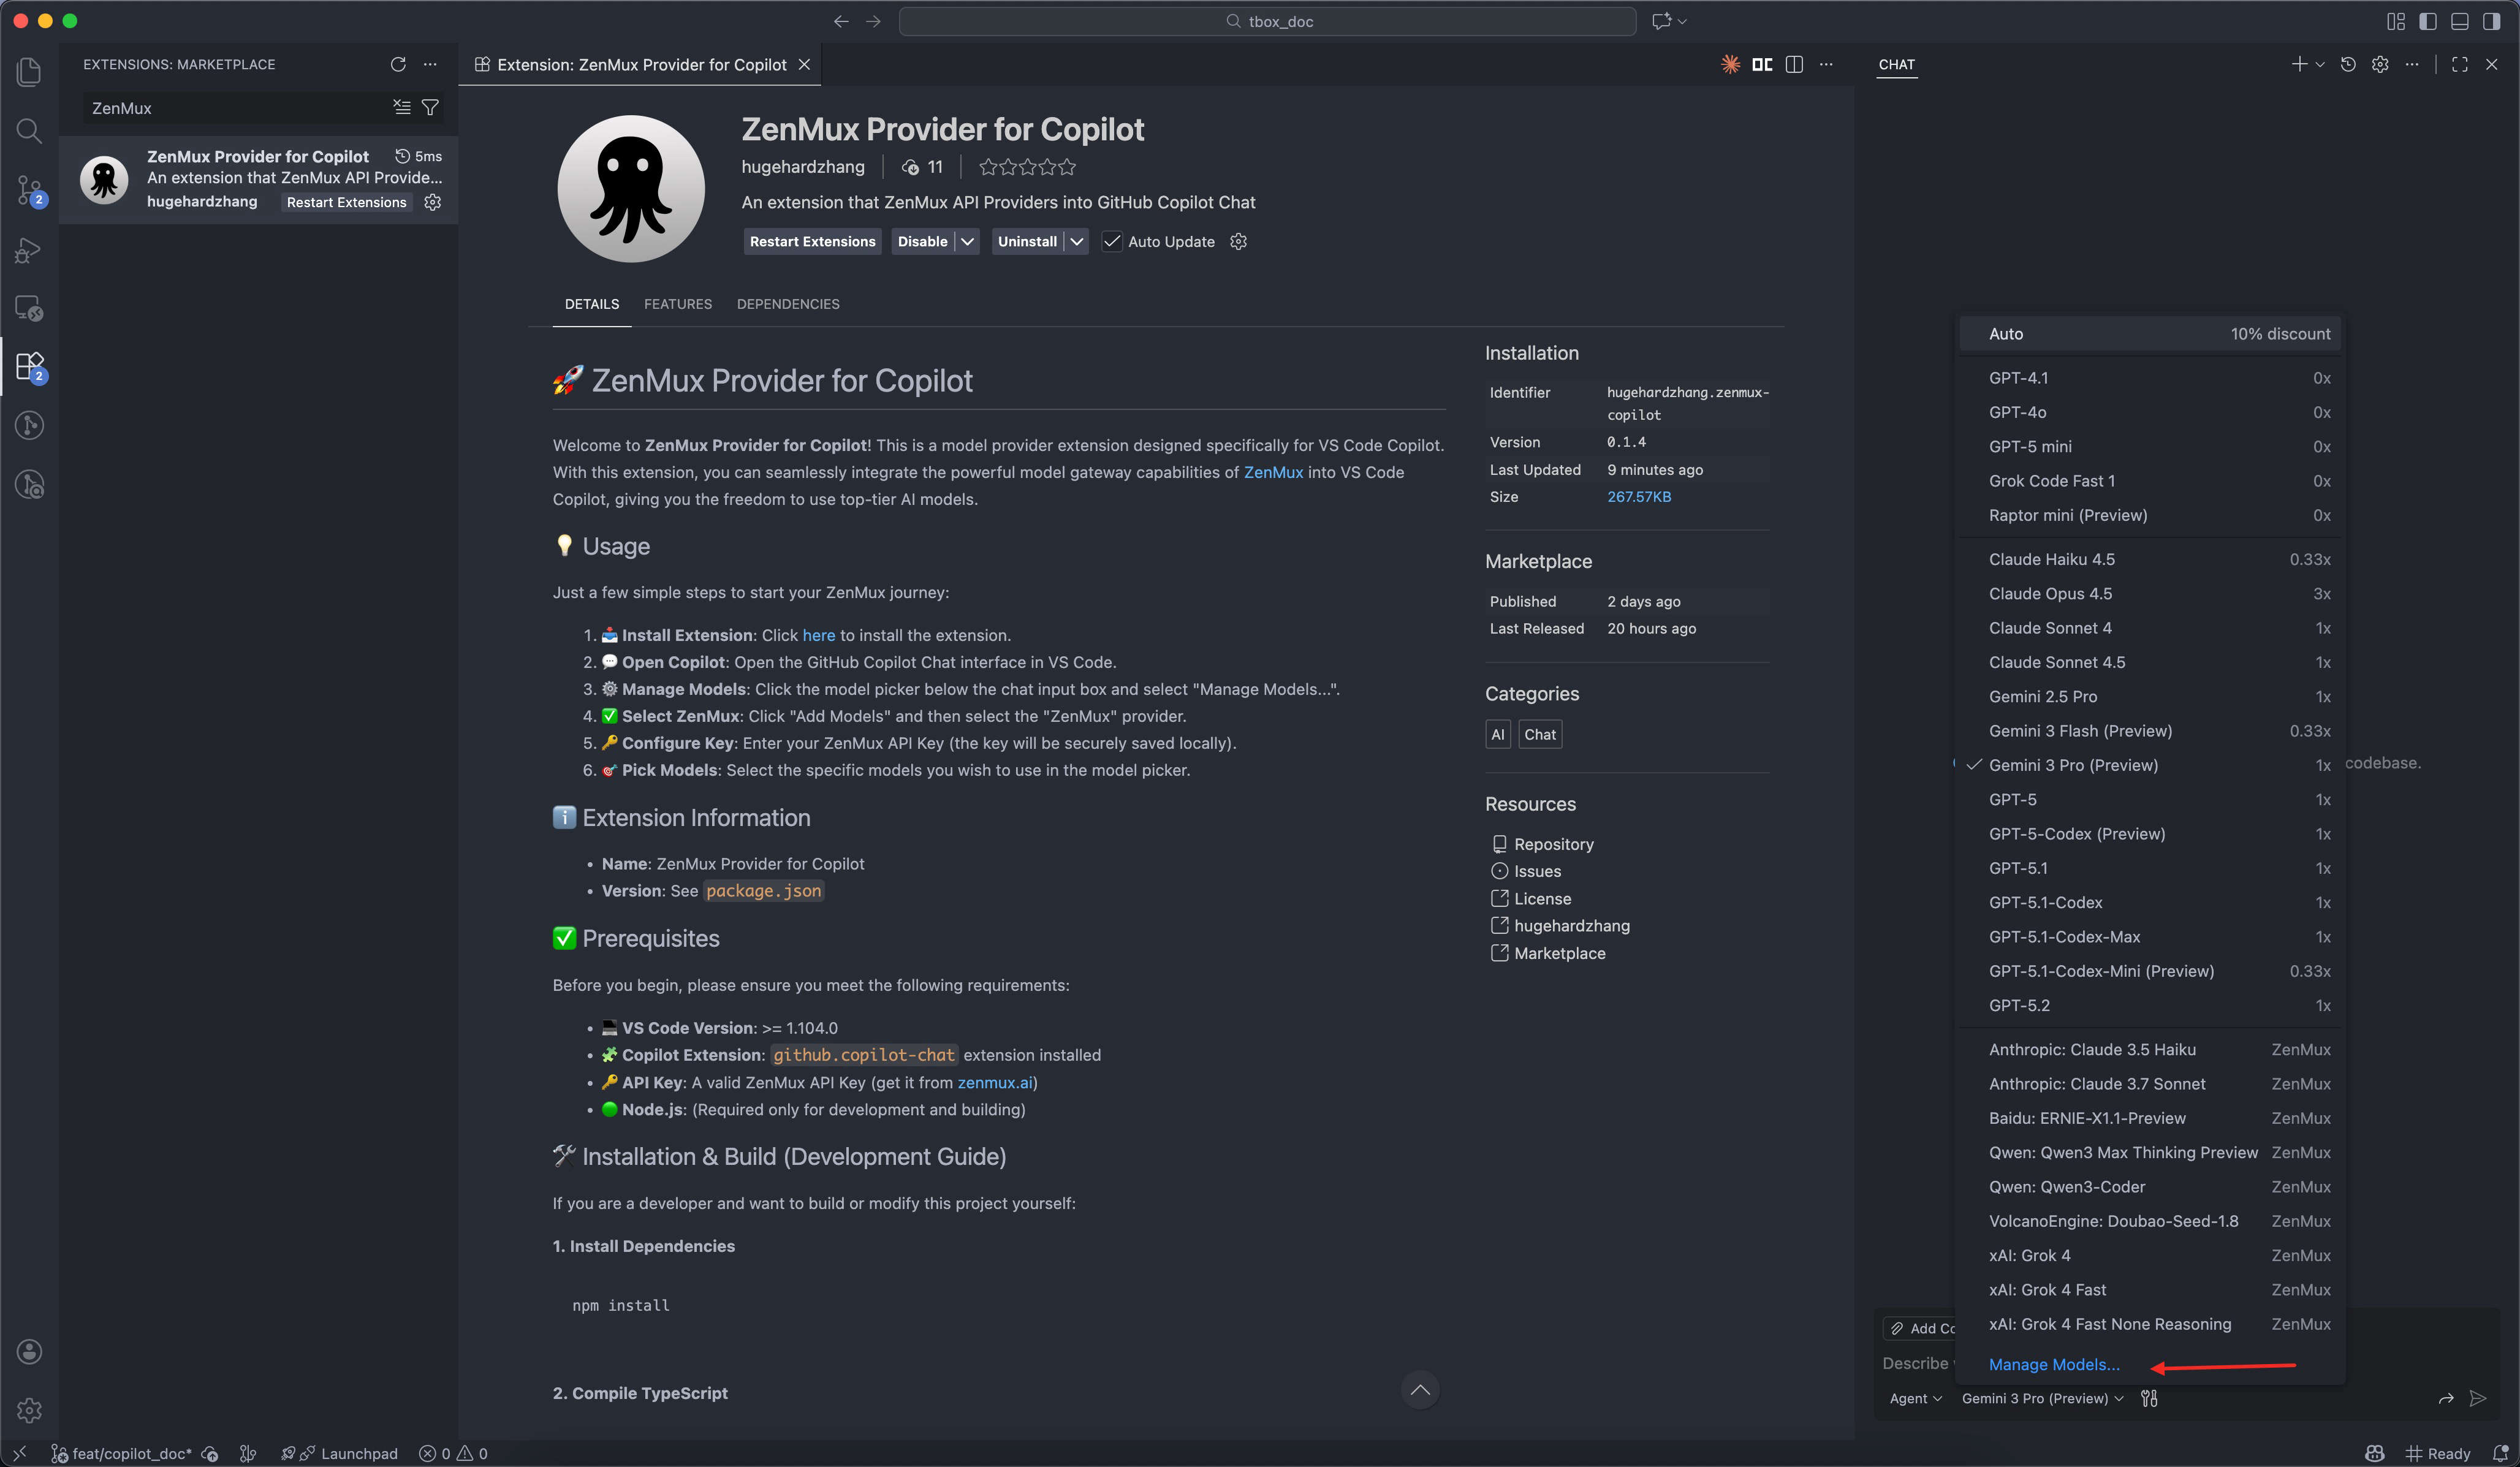
4. Manage and Configure Models
In the Copilot Chat interface:
- Find the Model Selector above the chat input box (usually displays the currently selected model name).
- Click the model selector and choose "Manage Models..." from the dropdown menu.
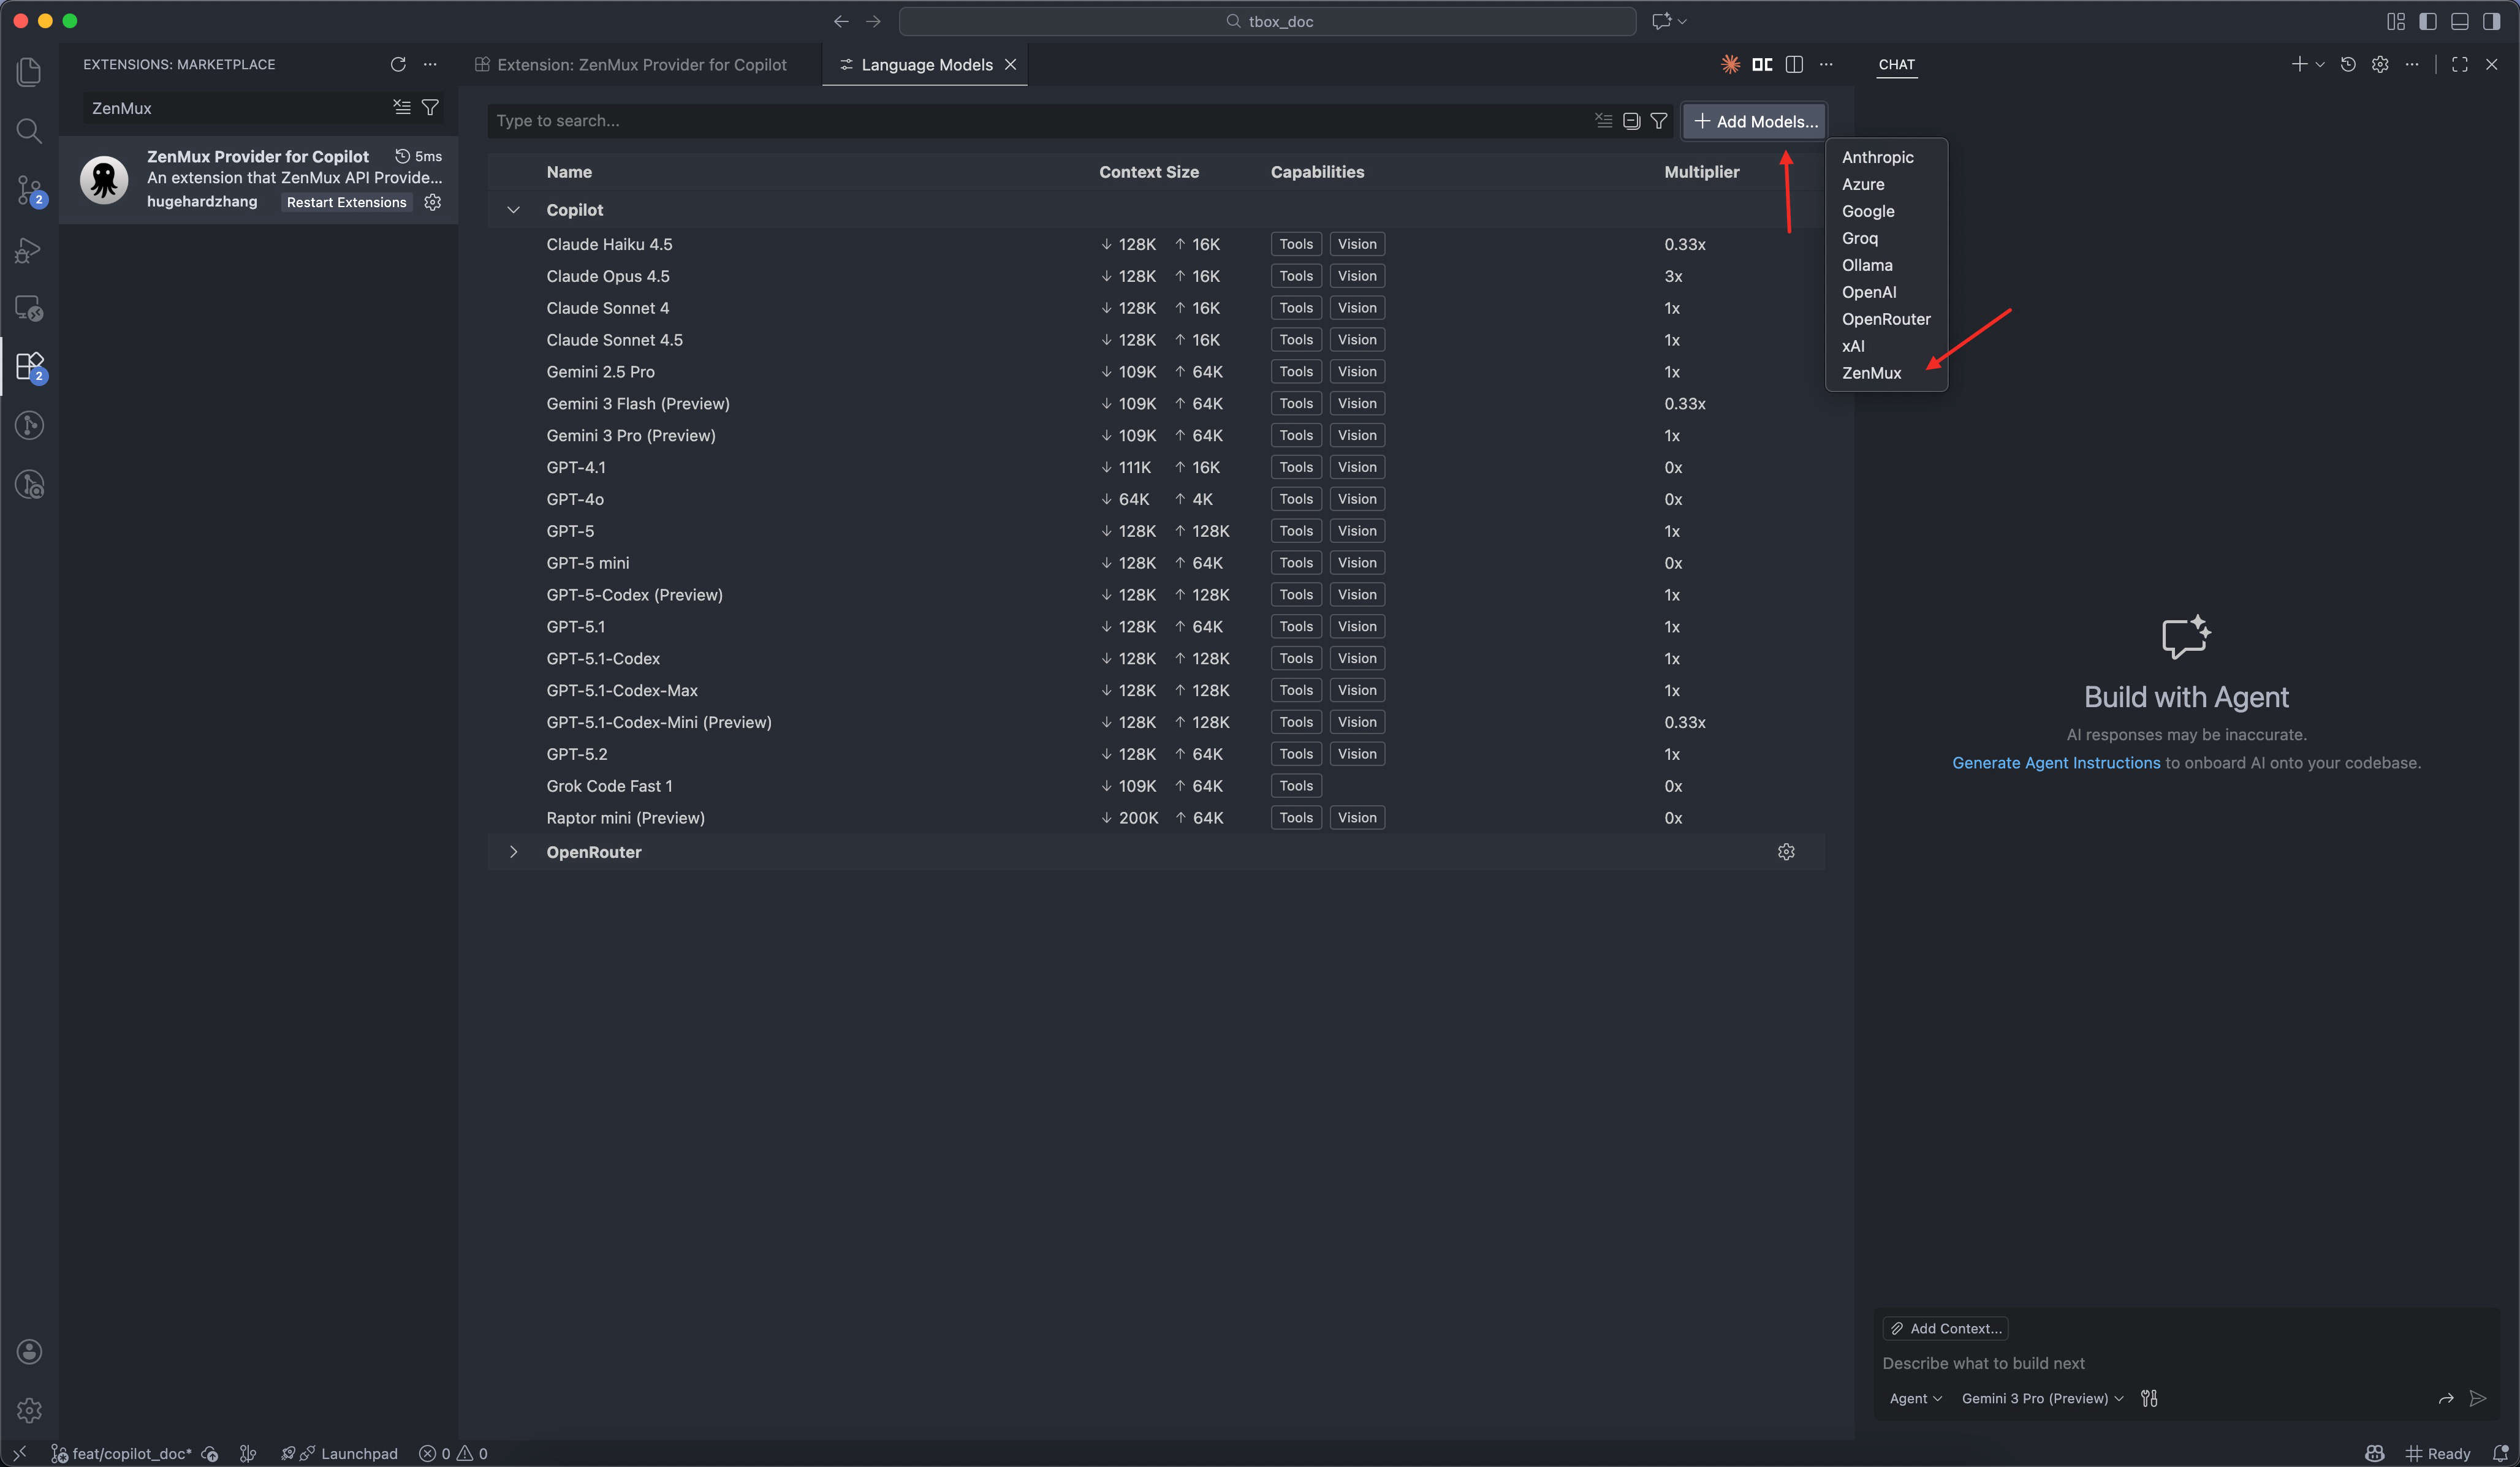
- In the pop-up model management interface, click the "Add Models" button.
- Find and select "ZenMux" from the provider list.
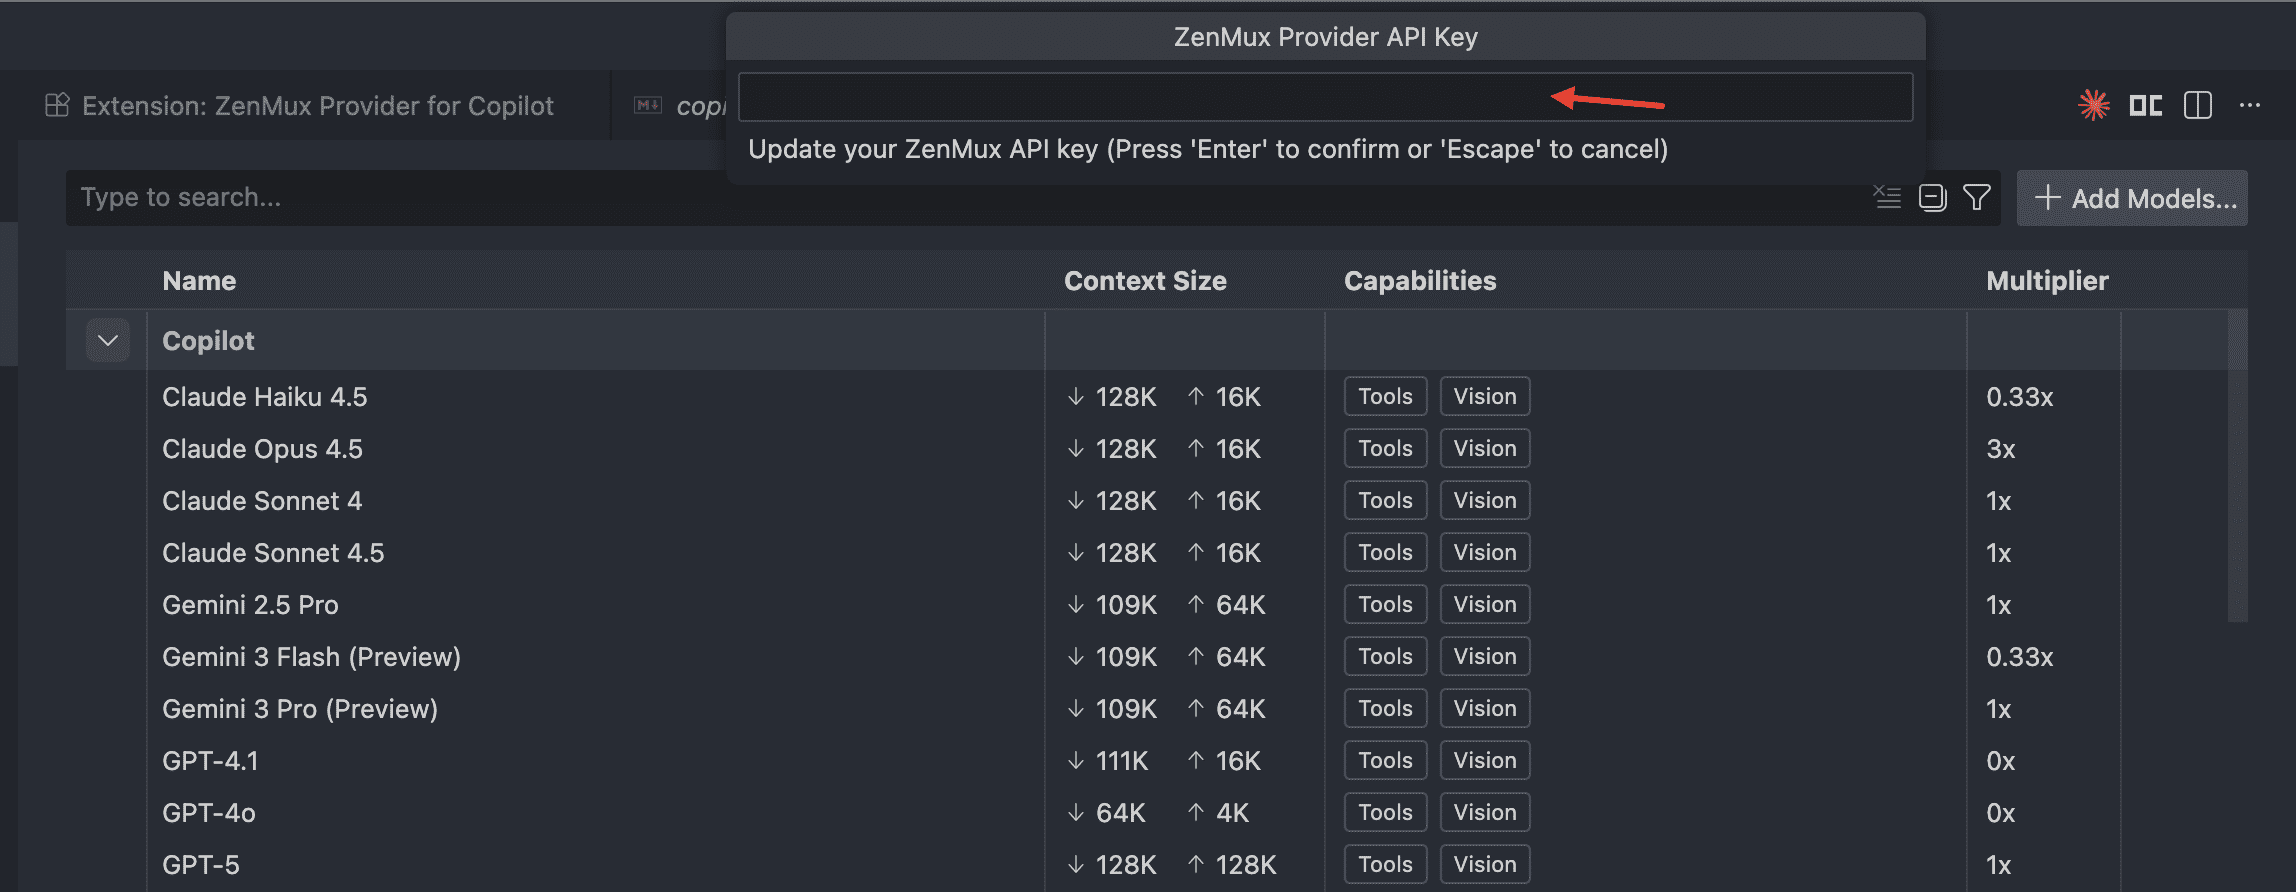
5. Configure API Key
- After selecting ZenMux, you will see an API Key input box.
- Enter your ZenMux API Key (if you don't have one, please visit https://zenmux.ai to register and get one).
- The API key will be securely encrypted and stored locally; it will not be uploaded to any server.
Security Note
Your API key is stored only in the VS Code configuration on your local computer using an encrypted storage mechanism. Please keep your key safe and do not share it with others.
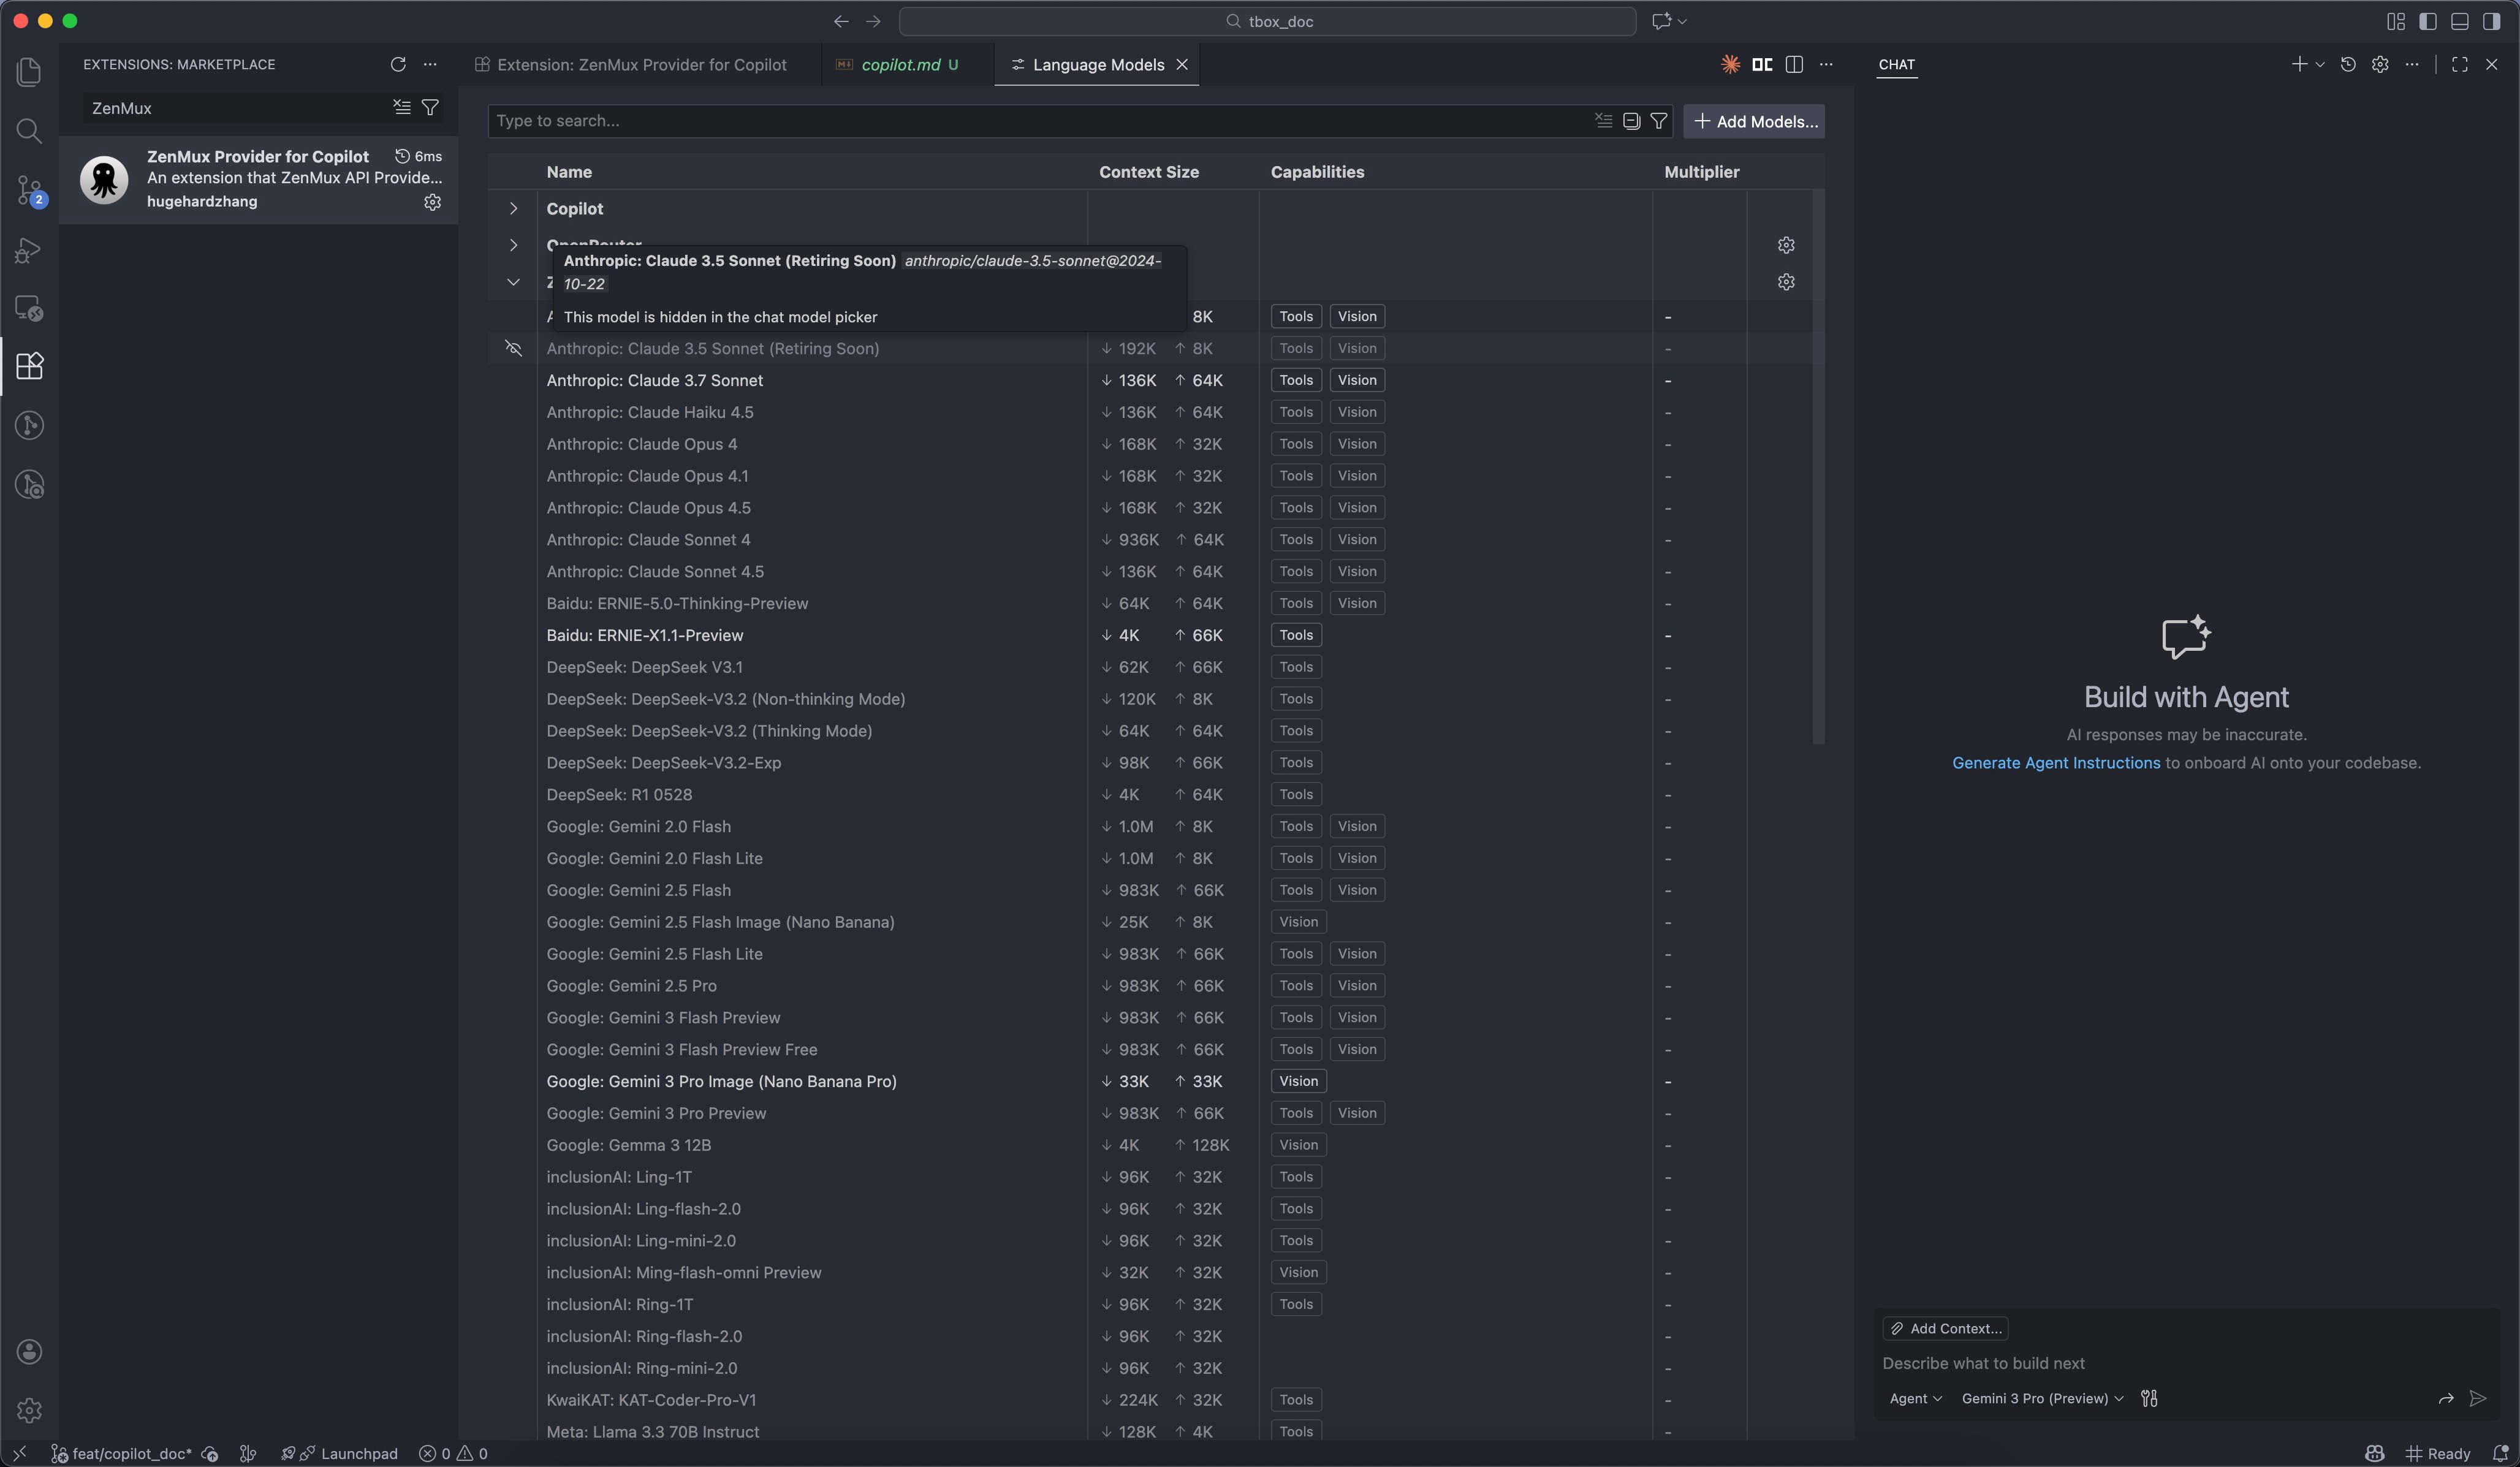
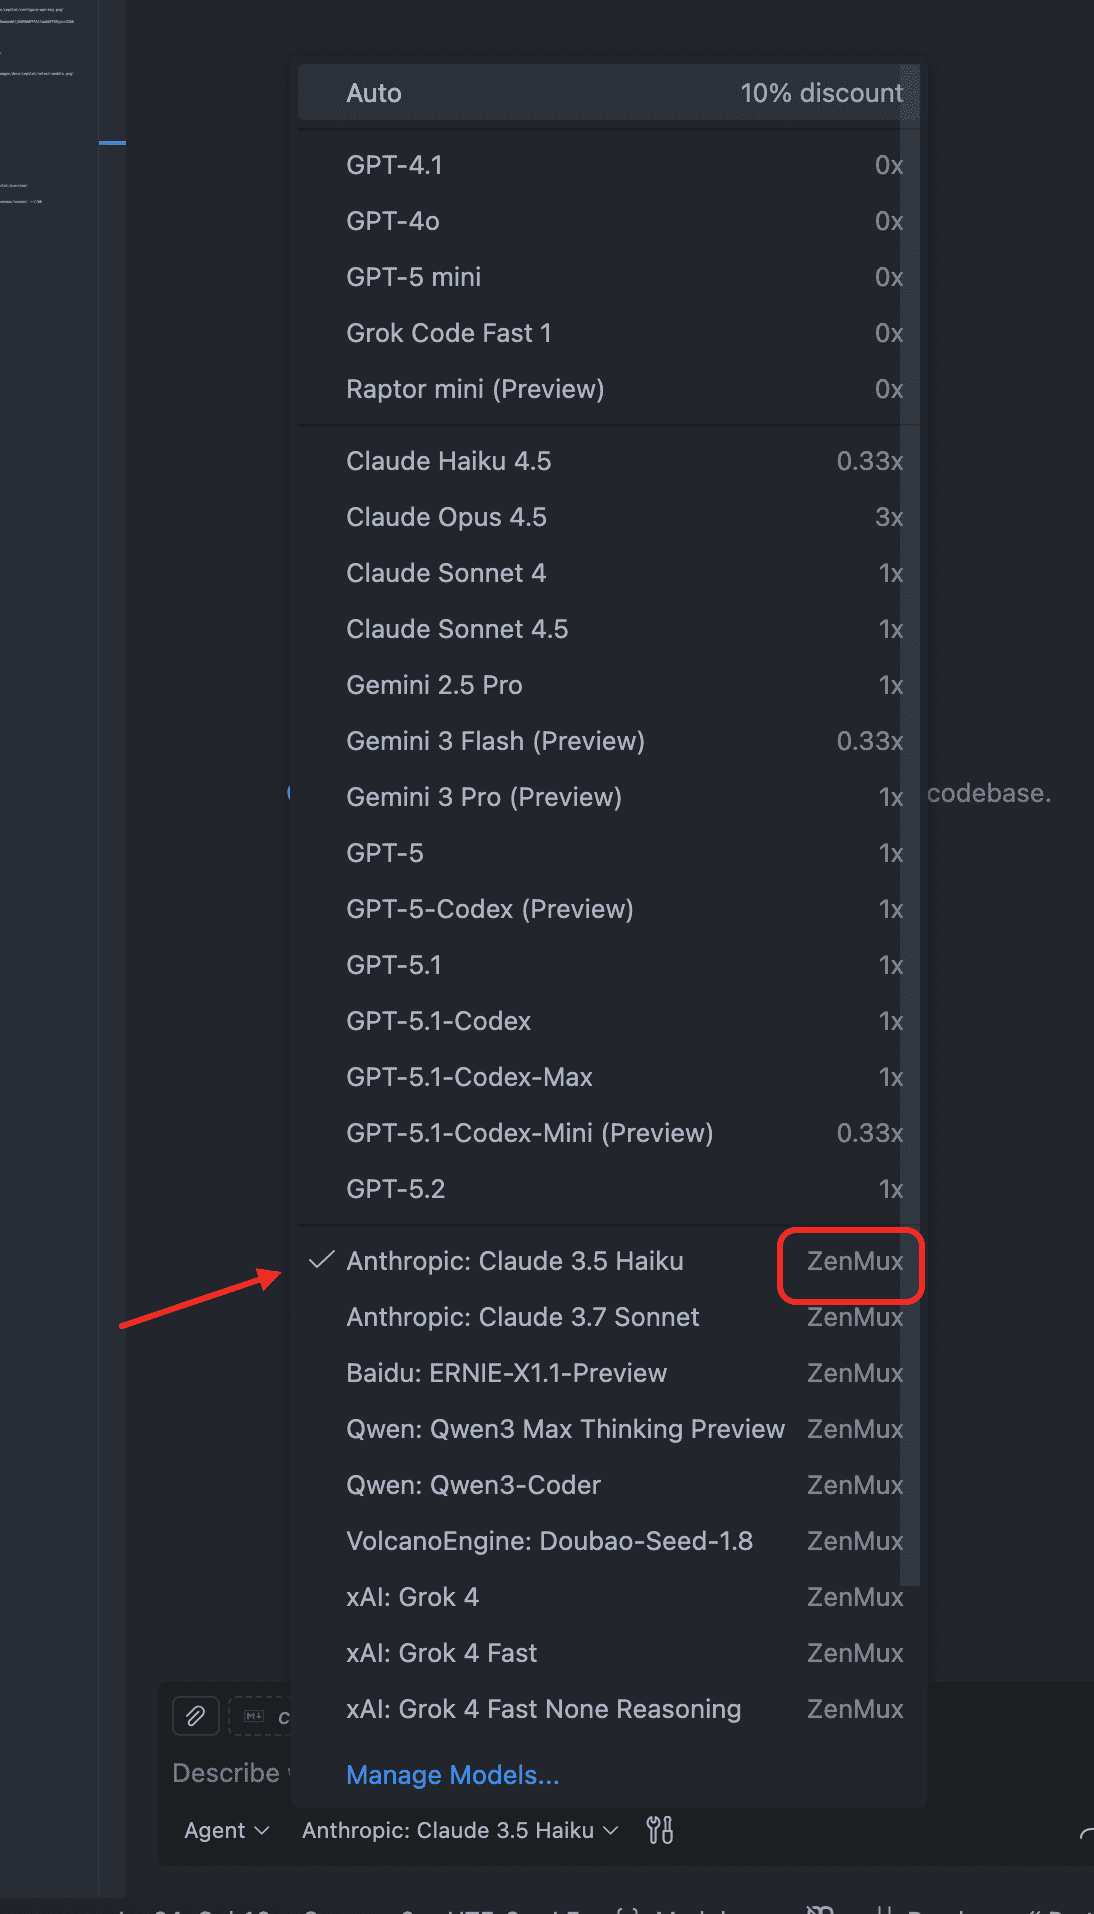
6. Select Available Models
After configuring the key, you can select the models you want to display in the model selector:
- ✅ Check the models you want to use (multiple selection supported).
- Recommended models include:
- gpt-4o: Excellent comprehensive capabilities, fast response speed.
- gpt-4-turbo: More cost-effective, suitable for daily use.
- gemini-pro: Google's advanced model with strong code understanding capabilities.
7. Start Using
Once configured, you can:
- Switch between different ZenMux models in the model selector.
- Get intelligent completion suggestions while typing code in the editor.
- Use the Chat interface to converse with AI and get programming help.
Keyboard Shortcuts
Shortcut Usage Instructions
- Shortcuts can greatly improve your coding efficiency.
- Shortcuts differ slightly between operating systems; please note the distinction.
| Action | macOS | Windows/Linux | Usage Scenario |
|---|---|---|---|
| Open Chat | Cmd+Shift+I | Ctrl+Shift+I | Quickly open the AI chat interface |
| Inline Chat | Cmd+I | Ctrl+I | Interact with AI directly in the current code line |
| Accept Suggestion | Tab | Tab | Accept code completion recommended by AI |
| Reject Suggestion | Esc | Esc | Cancel the current code suggestion |
| Next Suggestion | Option+] | Alt+] | View the next available code suggestion |
| Previous Suggestion | Option+[ | Alt+[ | View the previous available code suggestion |
| Trigger Completion | Option+\ | Alt+\ | Manually trigger AI code completion |
Shortcut Notes
- Some shortcuts may conflict with system or other software shortcuts.
- If conflicts occur, you can customize shortcuts in VS Code settings.
Resource Links
Changelog
If you have questions or suggestions, feel free to provide feedback via GitHub Issues.