CC-Switch Guide for ZenMux
CC-Switch is an open-source, cross-platform desktop tool designed to centrally manage configuration for AI coding assistants. It supports managing provider settings for four major coding tools—Claude Code, Codex, Gemini CLI, and OpenCode—so you can switch API providers in one click through a visual interface, without manually editing environment variables or JSON files.
Compatibility Notes
CC-Switch can manage four coding tools: Claude Code, Codex, Gemini CLI, and OpenCode. By configuring ZenMux as a provider in CC-Switch, you can:
- Visual management: No more manual edits to environment variables and config files—complete everything in a GUI
- One-click switching: Switch instantly between ZenMux and other providers without restarting your terminal
- Unified configuration: Configure ZenMux once and sync it to multiple coding tools
- Automatic failover: Automatically switch to a backup provider if the primary provider is unavailable
- Request monitoring: View request logs and usage statistics in real time
CC-Switch supports both the Anthropic protocol and the OpenAI protocol, both of which integrate seamlessly with ZenMux.
Install CC-Switch
macOS
brew tap farion1231/ccswitch
brew install --cask cc-switch1. Download the latest macOS ZIP from the CC-Switch Releases page:
https://github.com/farion1231/cc-switch/releases
2. Unzip it and drag CC-Switch.app into the Applications folder
3. On first launch, you may see “Developer cannot be verified”. Go to:
System Settings → Privacy & Security → click “Open Anyway”Windows
1. Download the latest .msi installer from the CC-Switch Releases page:
   https://github.com/farion1231/cc-switch/releases

2. Double-click the .msi file and follow the prompts to complete installation1. Download the latest portable .zip from the CC-Switch Releases page:
https://github.com/farion1231/cc-switch/releases
2. Extract to any directory and double-click CC-Switch.exe to runLinux
# After downloading the .deb package from the Releases page
sudo dpkg -i cc-switch_*.deb1. Download the .AppImage file from the Releases page
2. Grant execute permission: chmod +x CC-Switch_*.AppImage
3. Double-click to run or execute in a terminal: ./CC-Switch_*.AppImage💡 Web UI (Headless/SSH Environments)
CC-Switch also provides a Web UI version for servers without a GUI or for SSH remote environments. Download the Linux x64 tar.gz package from the Releases page, extract it, and run it. The default port is 17666.
Get a ZenMux API Key
Before configuring CC-Switch, you’ll need a ZenMux API Key. ZenMux offers two billing options—choose based on your use case:
✅ Use cases: personal development, learning/exploration, vibe coding
✅ Features: fixed monthly fee, predictable cost, 5–10x price leverage
✅ API Key format: sk-ss-v1-xxx

How to get it:
1. Visit the subscription management page: https://zenmux.ai/platform/subscription
2. Choose a plan (Pro $20/month, Max $100/month, Ultra $200/month)
3. After subscribing, create a subscription API key on the page

For details, see: Subscription Plan Guide
📚 https://docs.zenmux.ai/guide/subscription✅ Use cases: production environments, commercial products, enterprise apps
✅ Features: no rate limits, production-grade stability, billed by actual usage
✅ API Key format: sk-ai-v1-xxx
How to get it:
1. Visit the pay-as-you-go page: https://zenmux.ai/platform/pay-as-you-go
2. Top up your account (top-ups automatically include 20% bonus credits)
3. Create an API key in the "Pay As You Go API Keys" section
For details, see: Pay-as-you-go Guide
📚 https://docs.zenmux.ai/guide/pay-as-you-go💡 Important: Choose the Correct API Key Type
- Personal development/learning → use a Subscription API Key (
sk-ss-v1-xxx) for lower, better value cost - Production/commercial projects → use a Pay-as-you-go API Key (
sk-ai-v1-xxx) for higher stability and no limits
Subscription keys are not allowed for production use. Violations may result in account restrictions.
Configure the ZenMux Provider
Step 1: Open Provider Management
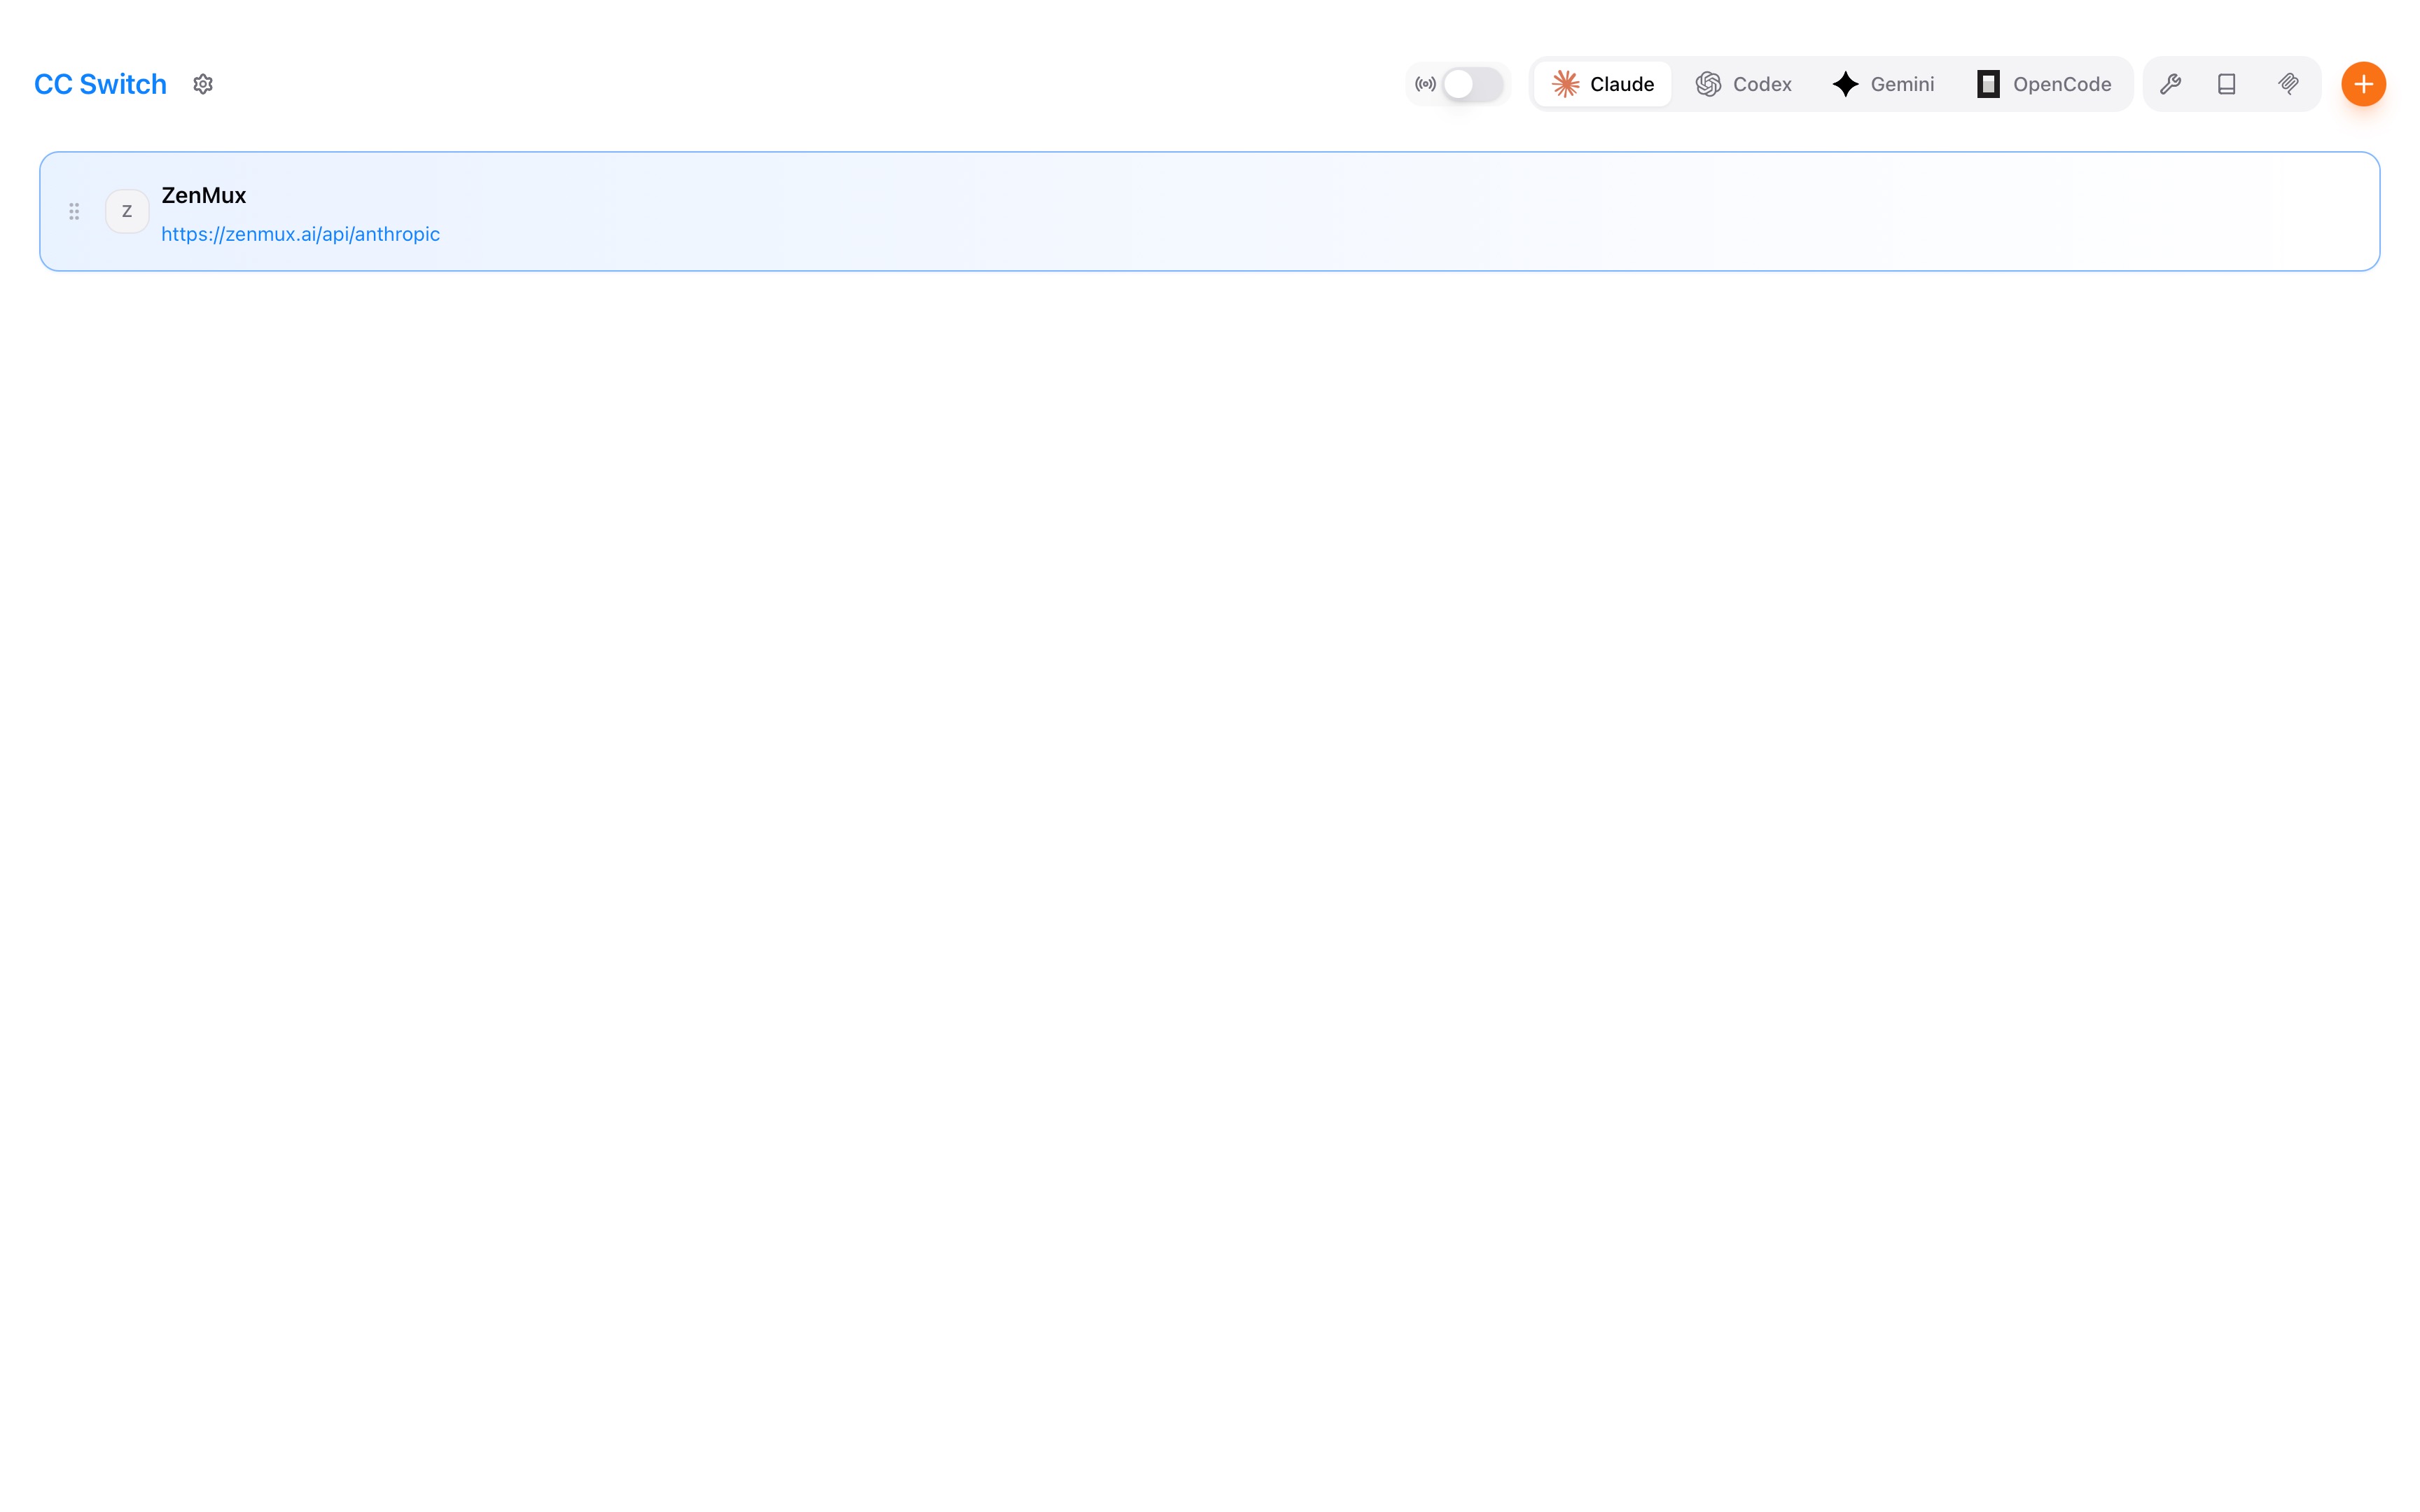
After launching CC-Switch, select the coding tool you want to configure in the top navigation bar (e.g., Claude Code) to open the provider management page.
💡 First Launch
On first launch, CC-Switch automatically imports your existing local Claude Code / Codex / Gemini CLI / OpenCode configuration as the default provider—no manual migration required.
Step 2: Add the ZenMux Provider

Click Add Provider and fill in the following configuration:
Claude Code Configuration (Anthropic Protocol)
| Setting | Value | Notes |
|---|---|---|
| Provider Name | ZenMux | Custom name for easy identity |
| Base URL | https://zenmux.ai/api/anthropic | ZenMux Anthropic-compatible endpoint |
| API Key | sk-ss-v1-xxx or sk-ai-v1-xxx | Your ZenMux API key |
Configure Model Mapping to map Claude Code’s three speed tiers to models on ZenMux:
| Tier | Recommended Model | Notes |
|---|---|---|
| Haiku (Fast) | anthropic/claude-haiku-4.5 | Fast completions, simple tasks |
| Sonnet (Balanced) | anthropic/claude-sonnet-4.5 | Recommended for daily development; best value |
| Opus (Powerful) | anthropic/claude-opus-4.5 | Complex architecture, large refactors |
💡 Flexible Model Selection
With ZenMux, you can map not only to Claude models, but also to models from other providers. For example:
- Haiku tier →
volcengine/doubao-seed-code(Doubao coding model) - Sonnet tier →
openai/gpt-5.2(GPT-5.2) - Opus tier →
google/gemini-3-pro-preview(Gemini 3 Pro)
For more models that support the Anthropic protocol, see the ZenMux model list.
JSON Config Example (Copy & Paste)
{
"env": {
"ANTHROPIC_AUTH_TOKEN": "<ZENMUX_API_KEY>",
"ANTHROPIC_BASE_URL": "https://zenmux.ai/api/anthropic",
"ANTHROPIC_DEFAULT_HAIKU_MODEL": "anthropic/claude-haiku-4.5",
"ANTHROPIC_DEFAULT_OPUS_MODEL": "anthropic/claude-opus-4.5",
"ANTHROPIC_DEFAULT_SONNET_MODEL": "anthropic/claude-sonnet-4.5",
"ANTHROPIC_MODEL": "anthropic/claude-opus-4.5",
"API_TIMEOUT_MS": "30000000",
"CLAUDE_CODE_DISABLE_NONESSENTIAL_TRAFFIC": "1"
}
}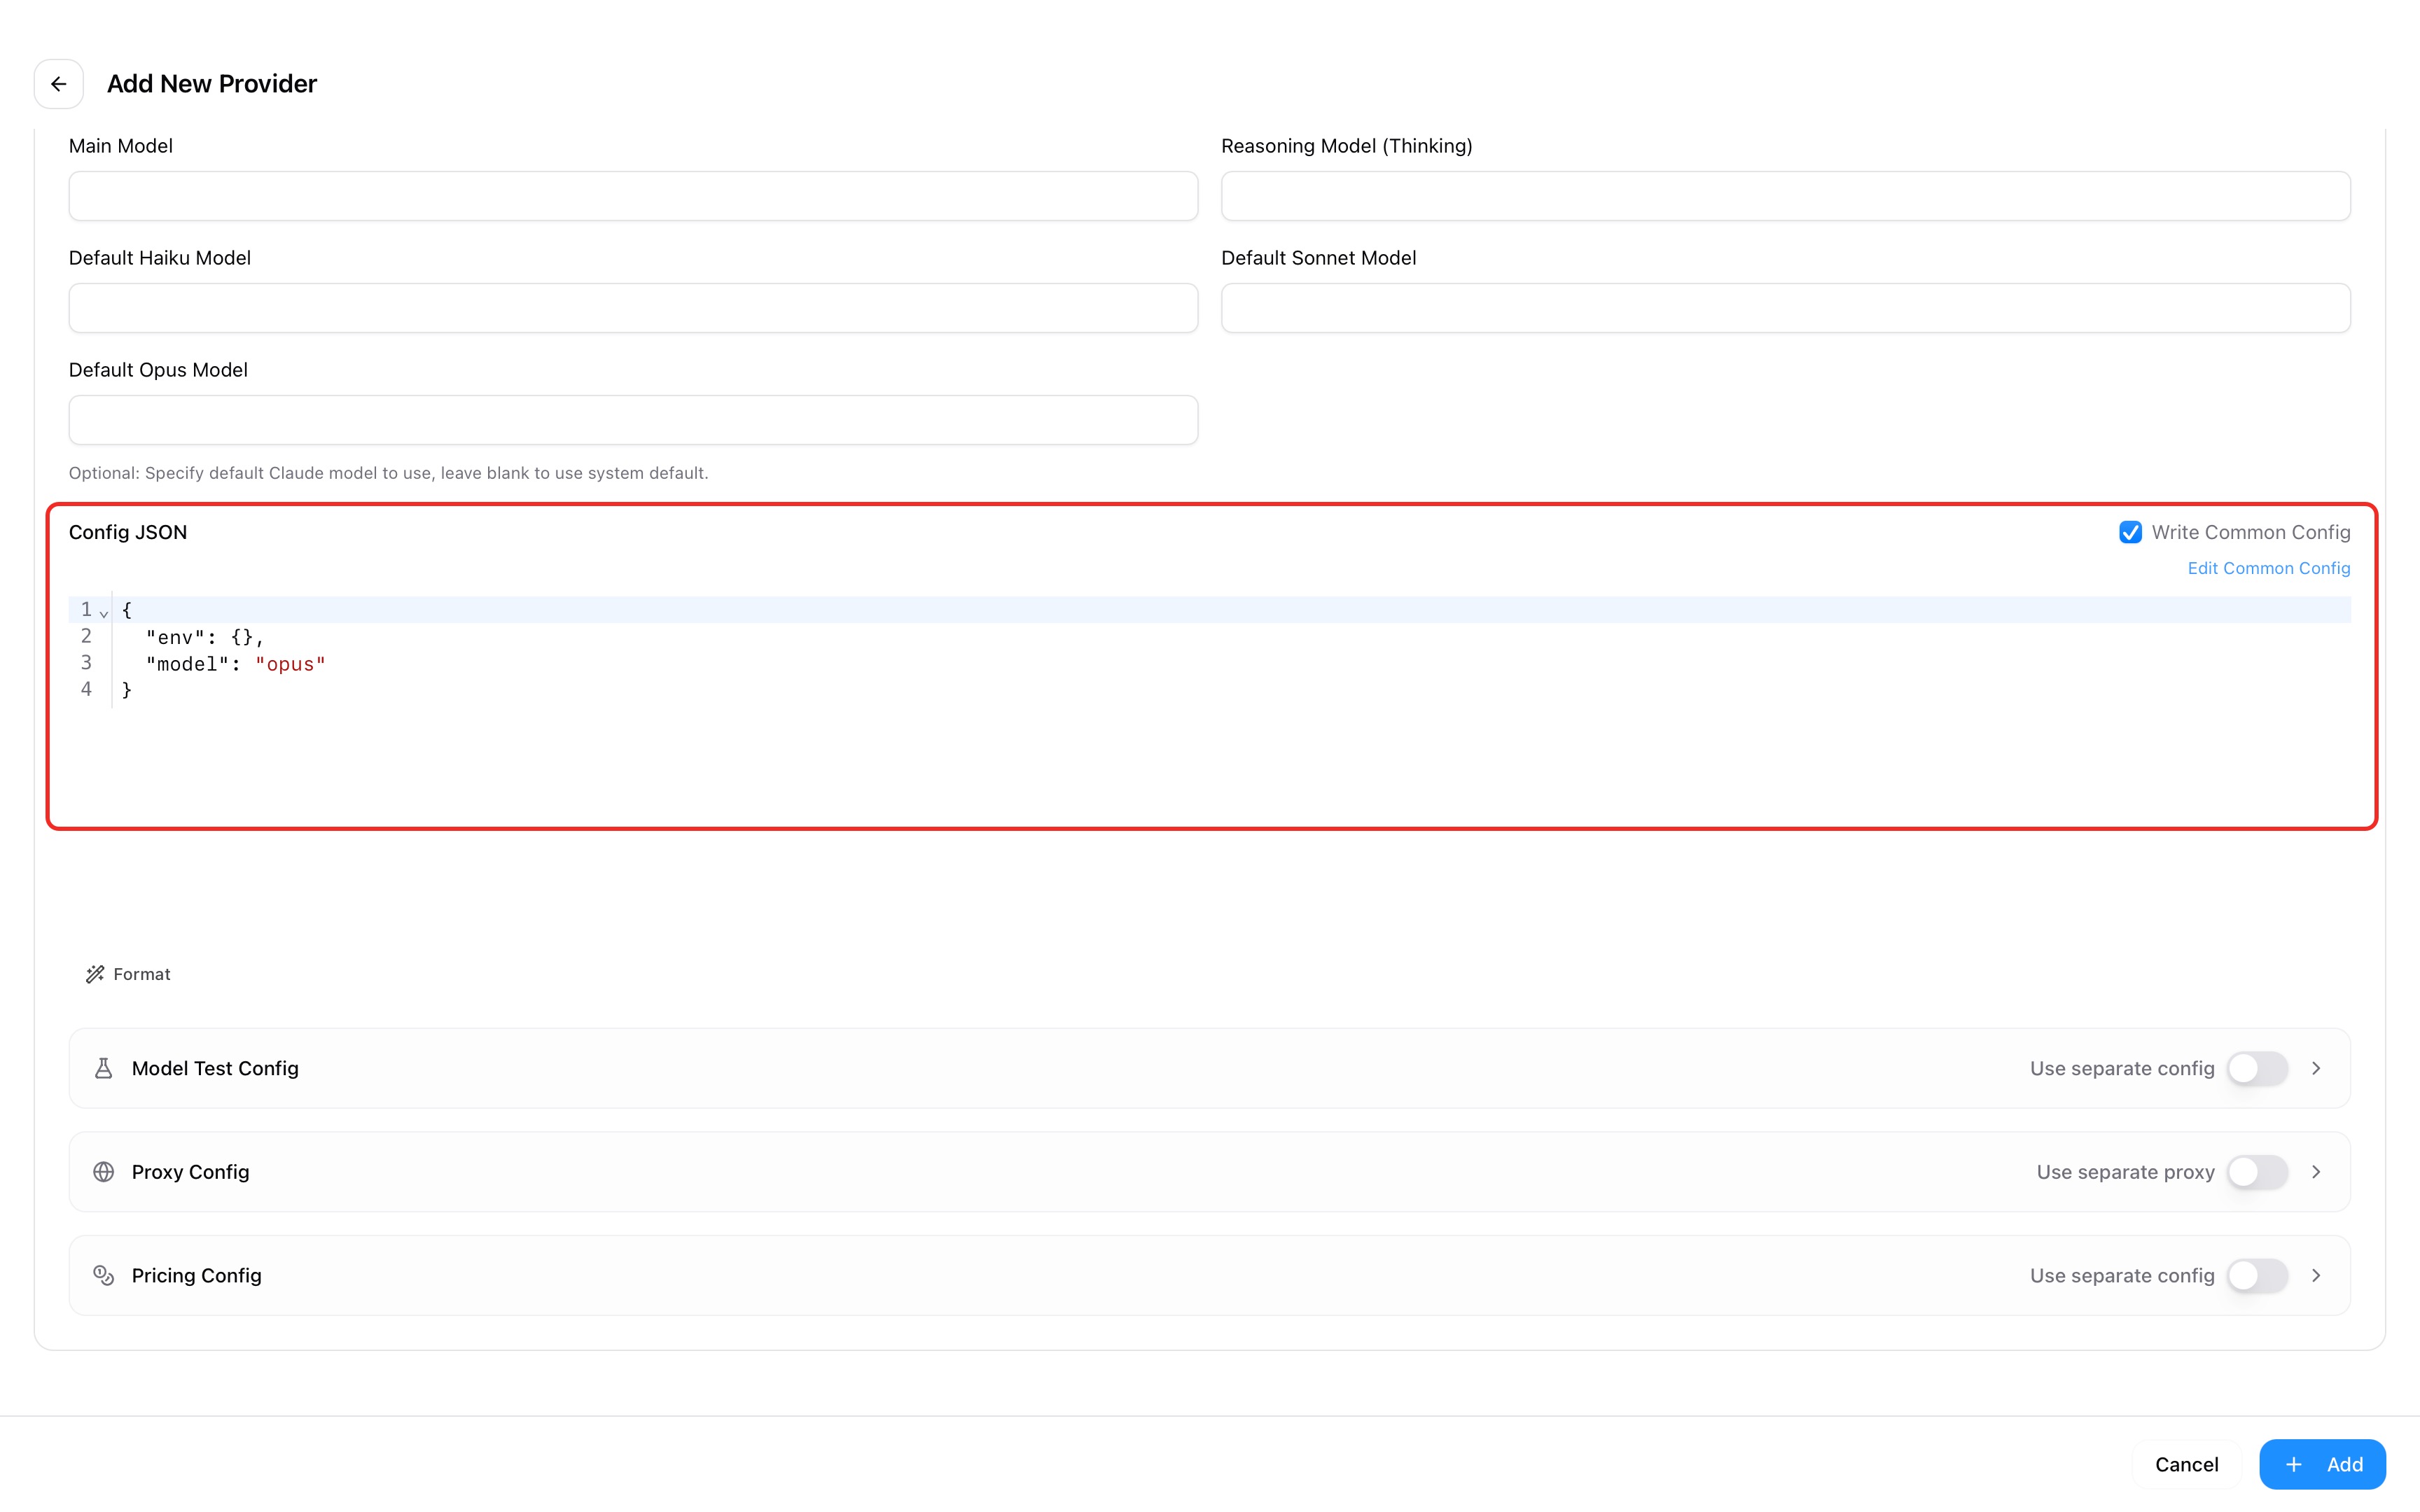 Copy and paste the configuration above into Claude Code’s config file, then save to complete setup.
Codex
| Setting | Value | Notes |
|---|---|---|
| Provider Name | ZenMux | Custom name for easy identity |
| Base URL | https://zenmux.ai/api/v1 | ZenMux OpenAI-compatible endpoint |
| API Key | sk-ss-v1-xxx or sk-ai-v1-xxx | Your ZenMux API key |
config.toml Example (Copy & Paste)
model_provider = "zenmux"
model = "openai/gpt-5.2-codex"
[model_providers.zenmux]
name = "ZenMux"
base_url = "https://zenmux.ai/api/v1"
wire_api = "responses"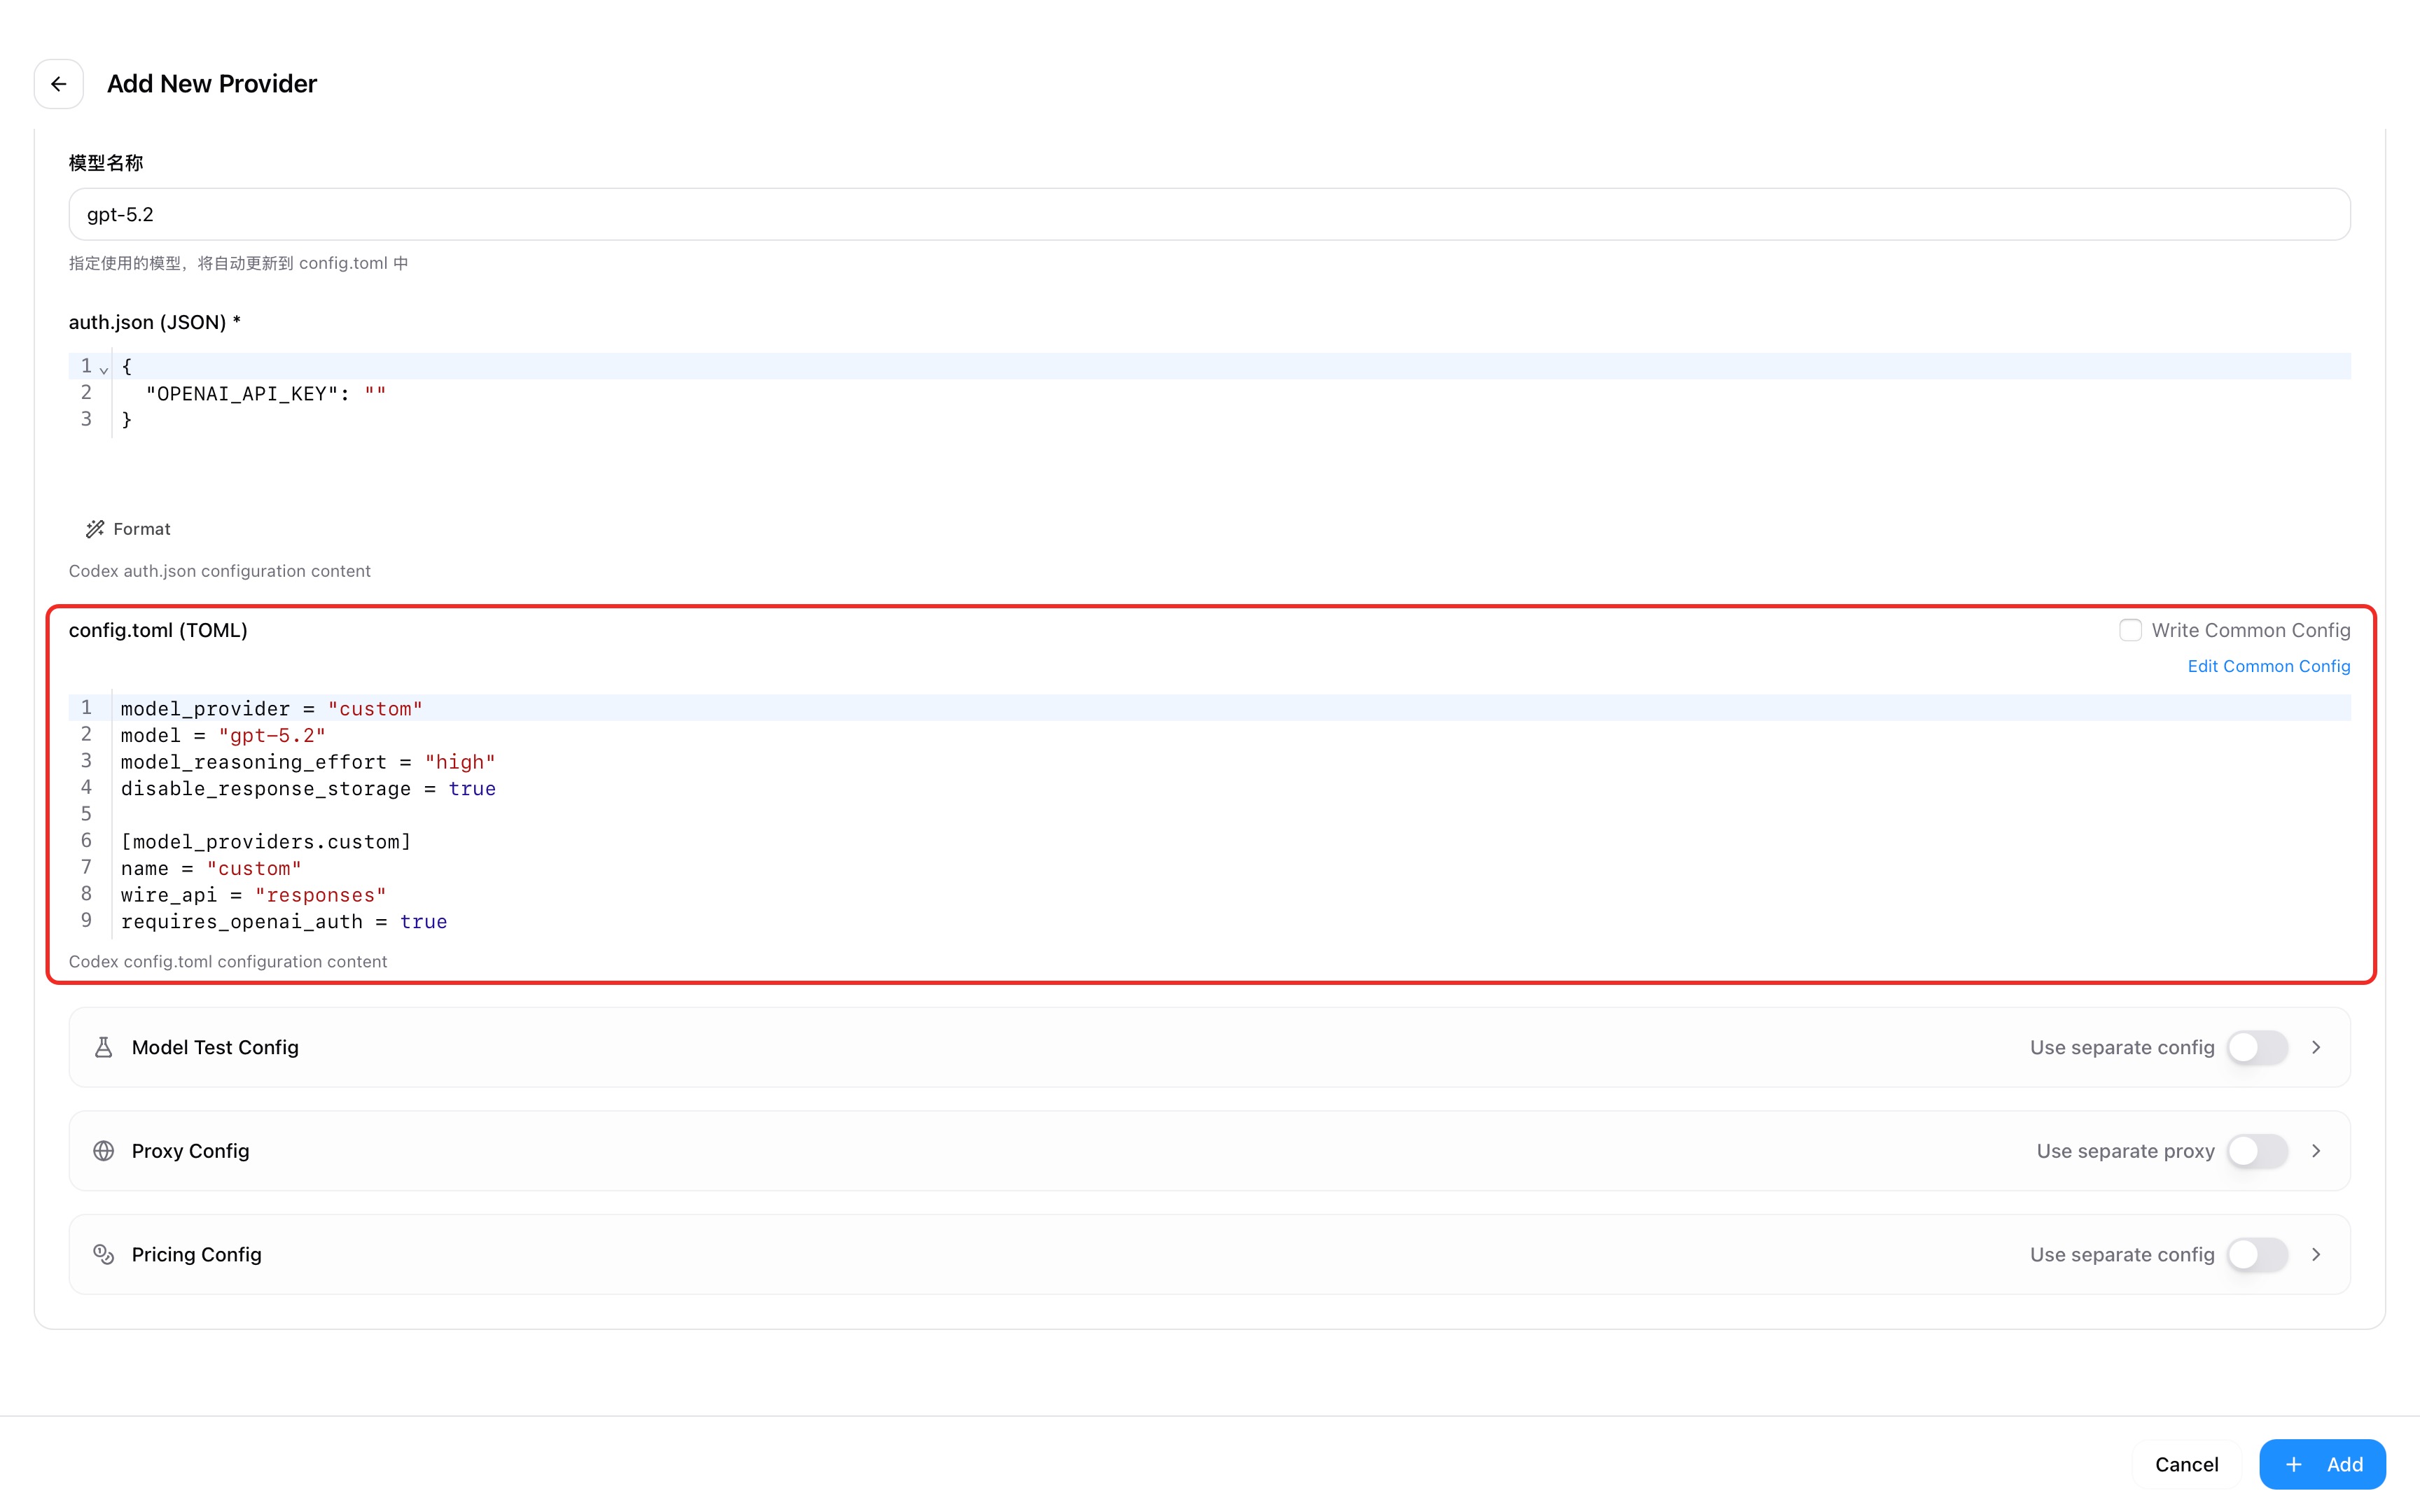 Copy and paste the configuration above into Codex’s config file, then save to complete setup.
Gemini CLI Configuration (Vertex AI Protocol)
| Setting | Value | Notes |
|---|---|---|
| Provider Name | ZenMux | Custom name for easy identity |
| Base URL | https://zenmux.ai/api/vertex-ai | ZenMux Vertex AI-compatible endpoint |
| API Key | sk-ss-v1-xxx or sk-ai-v1-xxx | Your ZenMux API key |
Environment Variable Example (Copy & Paste)
GOOGLE_GEMINI_BASE_URL=https://zenmux.ai/api/vertex-ai
GEMINI_API_KEY=<ZENMUX_API_KEY>
GEMINI_MODEL=google/gemini-3-flash-preview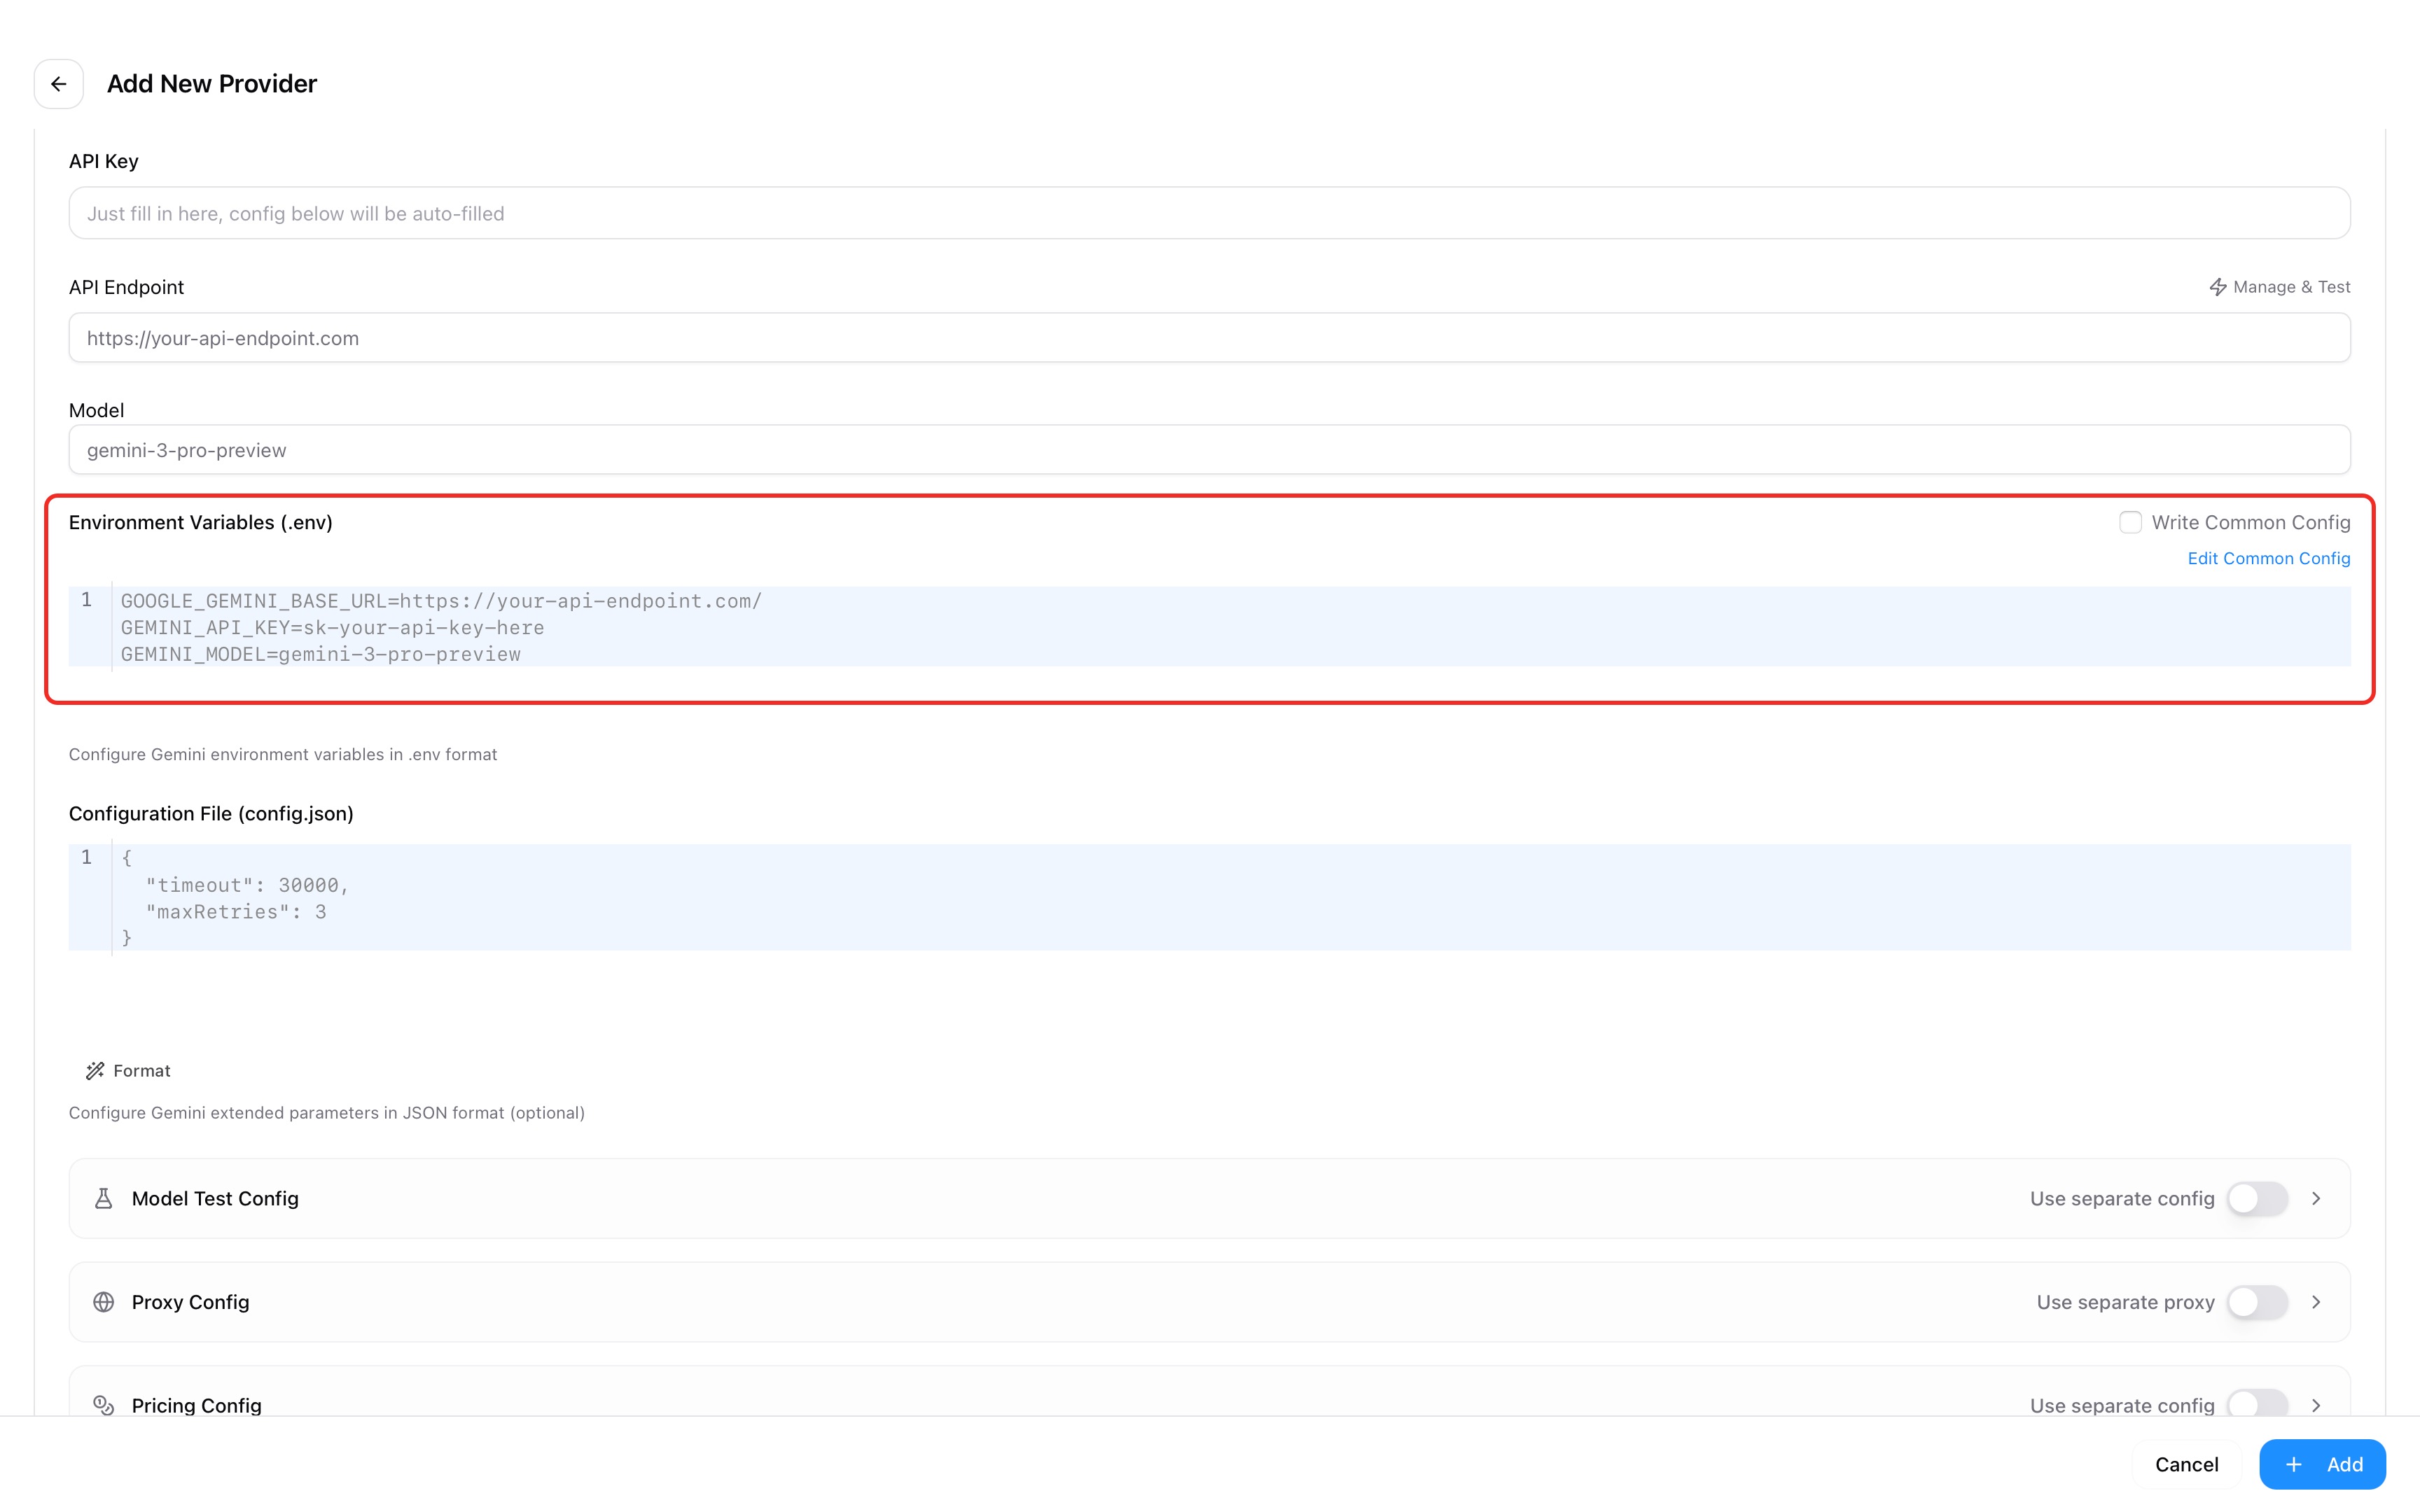 Copy and paste the configuration above into Gemini CLI’s config file, then save to complete setup.
OpenCode Configuration (OpenAI Protocol)
| Setting | Value | Notes |
|---|---|---|
| Provider Name | ZenMux | Custom name for easy identity |
| Base URL | https://zenmux.ai/api/vertex-ai | ZenMux Vertex AI-compatible endpoint |
| API Key | sk-ss-v1-xxx or sk-ai-v1-xxx | Your ZenMux API key |
JSON Config Example (Copy & Paste)
{
"models": {
"openai/gpt-5.2": {
"name": "gpt-5.2 (via ZenMux)"
}
},
"npm": "@ai-sdk/openai-compatible",
"options": {
"apiKey": "<ZENMUX_API_KEY>",
"baseURL": "https://zenmux.ai/api/v1"
}
}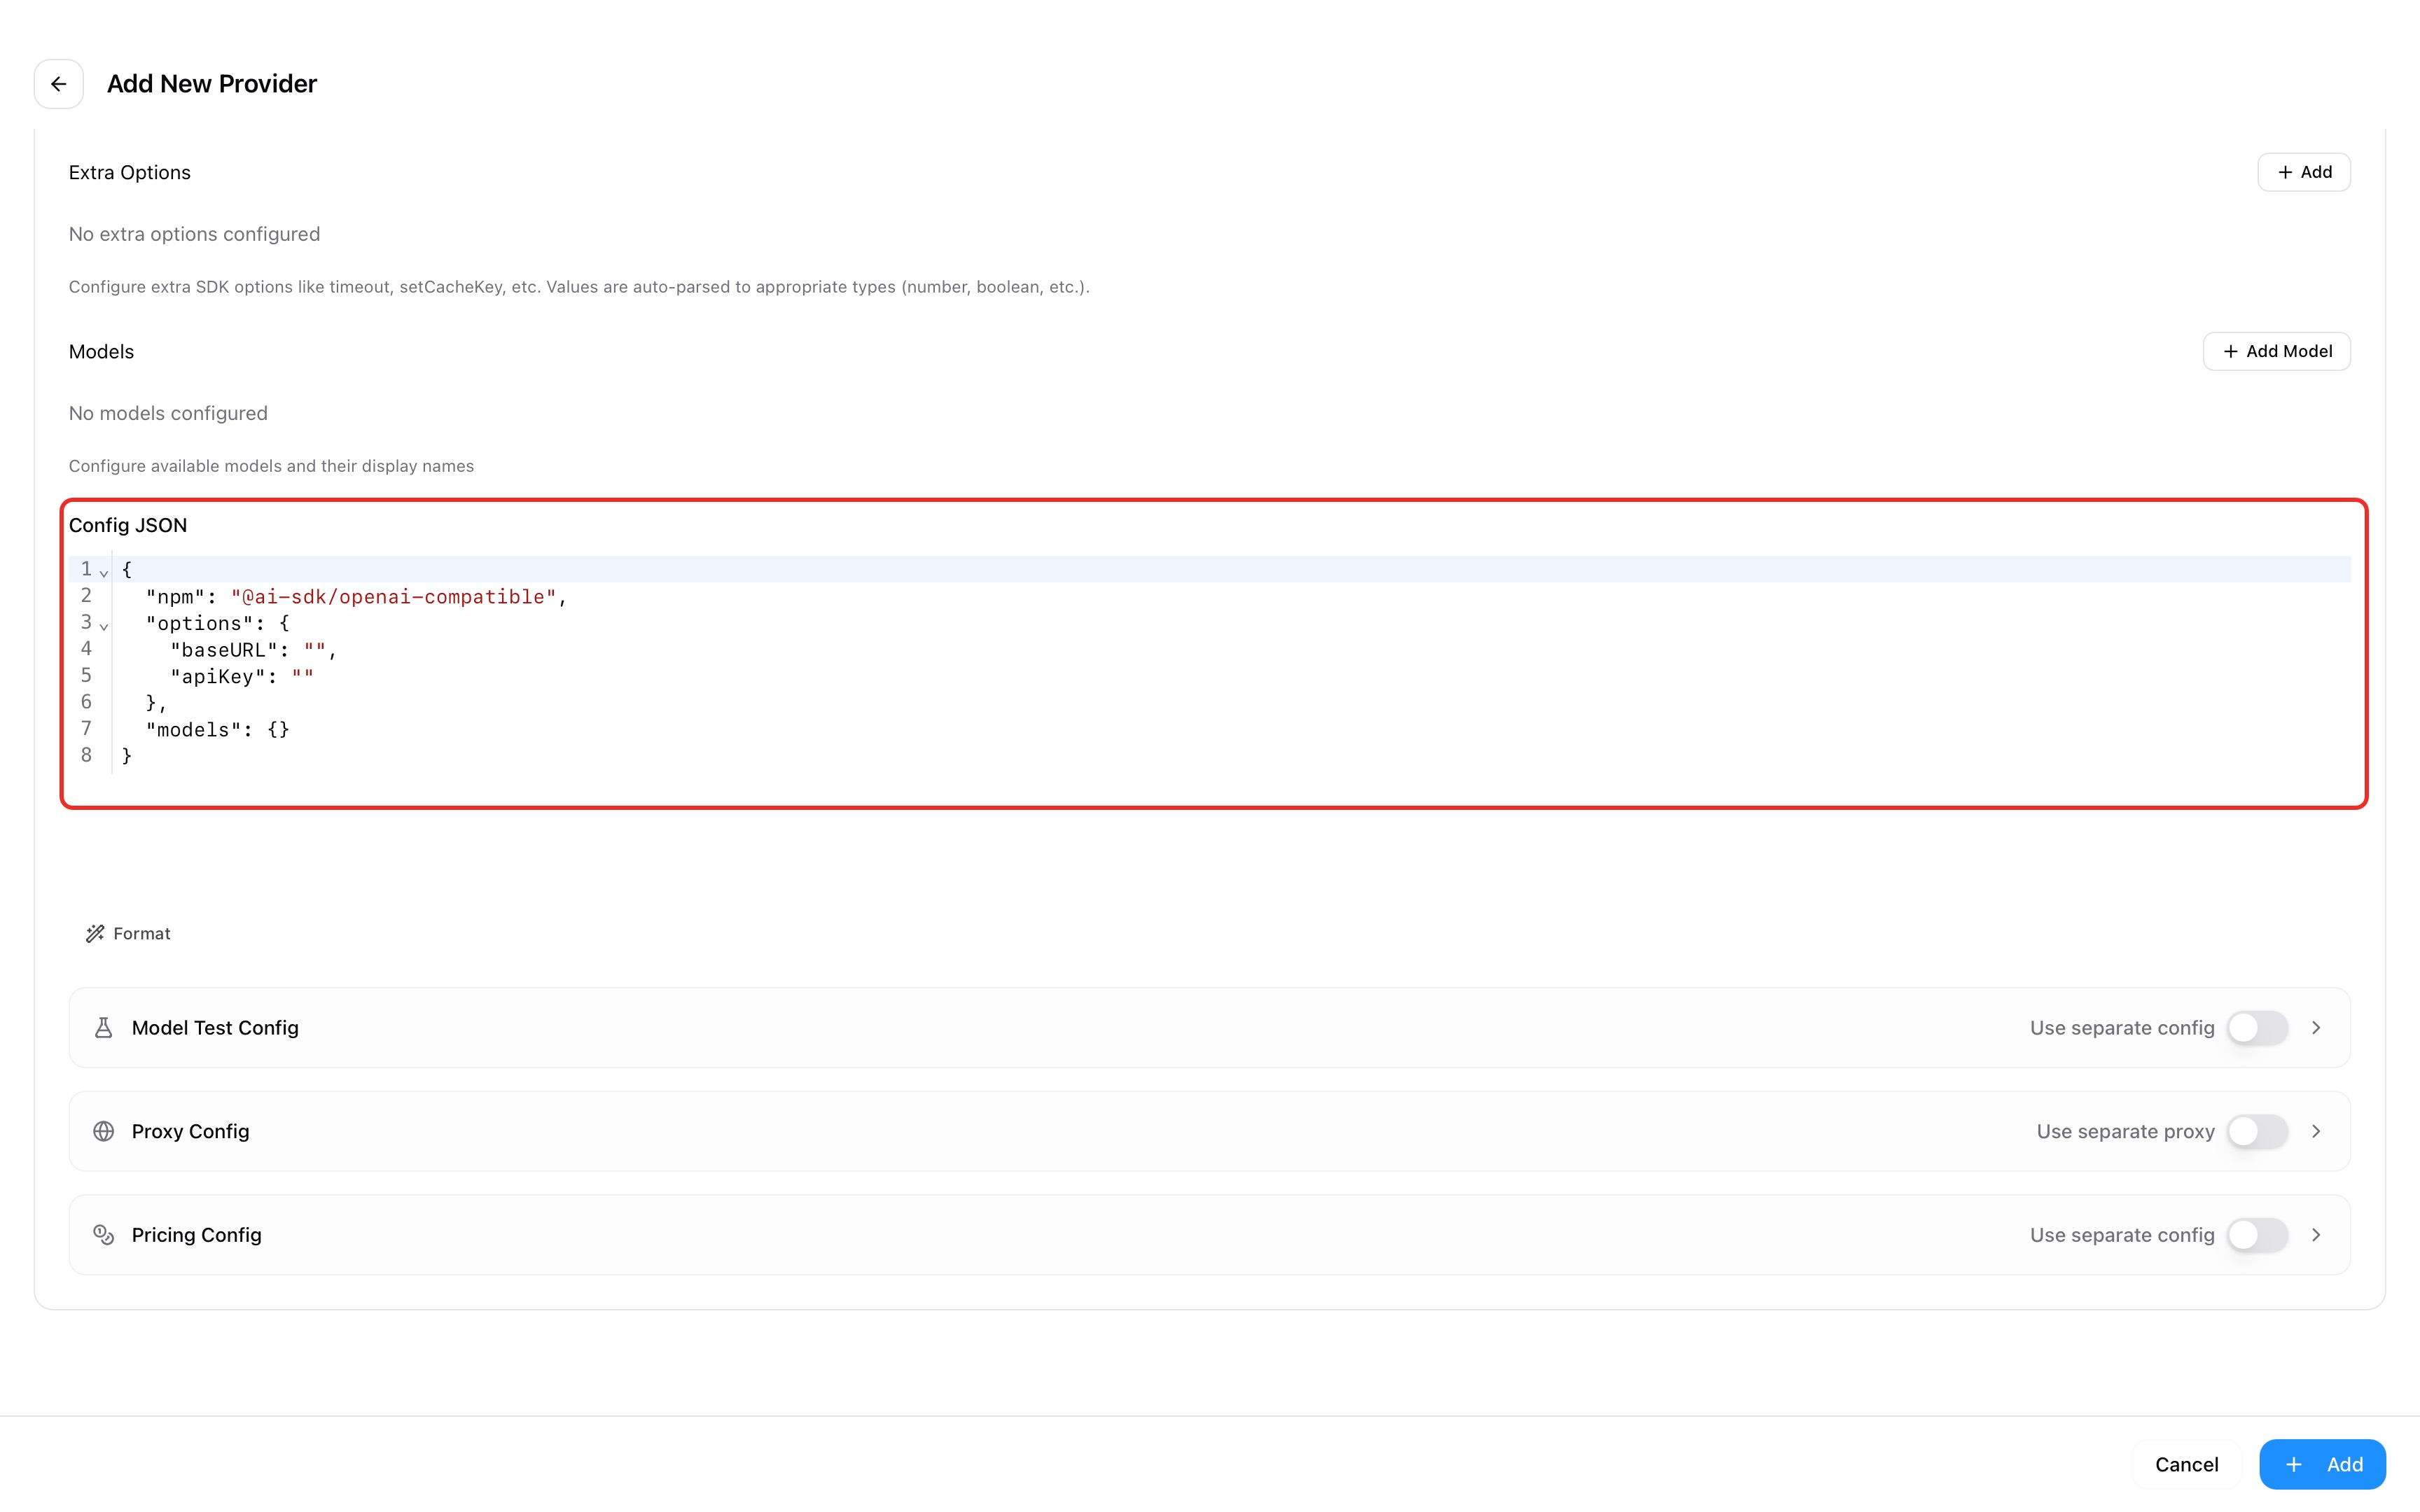 Copy and paste the configuration above into OpenCode’s config file, then save to complete setup.
🔑 Important: Replace the API Key
Make sure to replace <ZENMUX_API_KEY> in the configuration with your real ZenMux API key:
Subscription API Key (Recommended for personal development)
- Format:
sk-ss-v1-xxx - Get it here: Subscription management page
- Detailed guide: Subscription plan docs
Pay-as-you-go API Key (Production environments)
- Format:
sk-ai-v1-xxx - Get it here: Pay-as-you-go page
- Detailed guide: Pay-as-you-go docs
Step 3: Switch to the ZenMux Provider
After adding it, click the toggle button next to ZenMux in the provider list to route the current coding tool’s requests through ZenMux.
Hot Switching Supported
CC-Switch supports hot-switching providers—no need to restart your terminal or coding tool. After switching, new requests are immediately forwarded via ZenMux, and existing conversation context remains unaffected.
Step 4: Share Configuration Across Apps (Optional)
If you use multiple coding tools, CC-Switch can sync the same provider configuration across all managed apps. This is especially convenient for an API gateway like ZenMux that supports multiple protocols:
- Enable Cross-app sharing (Universal Provider) in the provider settings
- Set default model mappings for each app
- Save—this provider will automatically sync to Claude Code, Codex, Gemini CLI, and OpenCode
Supported Models
Anthropic Protocol Model Support
Models that support the Anthropic protocol are being adapted in batches. You can filter the currently supported models via the official model list and select the Anthropic Messages protocol.
The OpenAI protocol supports a much broader set of models. You can filter the model list by "OpenAI API Compatible".
Troubleshooting
Common Issues
API Key Error or Authentication Failure
Issue: After configuring the provider, you see that the API key is invalid or unauthorized.
Solution:
Check the API key format:
- Subscription keys should start with
sk-ss-v1- - Pay-as-you-go keys should start with
sk-ai-v1- - Make sure there are no extra spaces or line breaks
- Subscription keys should start with
Verify the API key is valid:
- Subscription: visit the subscription management page to check subscription status and quota
- Pay-as-you-go: visit the pay-as-you-go page to ensure your balance is sufficient
Confirm the Base URL is correct:
- Claude Code (Anthropic protocol):
https://zenmux.ai/api/anthropic - Codex / OpenCode (OpenAI protocol):
https://zenmux.ai/api/v1 - Gemini CLI (Vertex AI protocol):
https://zenmux.ai/api/vertexai:::
- Claude Code (Anthropic protocol):
macOS Shows “Developer Cannot Be Verified”
Issue: On first launch, macOS shows “Developer cannot be verified”.
Solution:
Because the developer does not yet have Apple Developer signing, macOS may block the app on first run.
- Go to System Settings → Privacy & Security
- Find the blocked CC-Switch message at the bottom of the page
- Click Open Anyway
- In the confirmation dialog, click Open
This prompt will not appear on subsequent launches.
Coding Tool Not Responding After Switching Providers
Issue: After switching to ZenMux in CC-Switch, the coding tool’s requests don’t change.
Solution:
- Confirm CC-Switch is running (the system tray icon should be visible)
- Check whether the provider for that coding tool has been switched correctly in CC-Switch (the active provider is highlighted)
- Trigger a new request in the coding tool and confirm it routes through ZenMux
- If it still doesn’t work, restart the coding tool and test again
Model Does Not Support the Anthropic Protocol
Issue: In Claude Code, a model reports that it doesn’t support the Anthropic protocol.
Solution:
- Use the ZenMux model list and filter by "Anthropic API Compatible" to see currently supported models
- Ensure the model ID in model mapping is correct (e.g.,
anthropic/claude-sonnet-4.5, notclaude-sonnet-4.5) - Use a model from the supported list above
Contact Us
If you run into any issues, or have suggestions and feedback, feel free to reach out via:
- Official website: https://zenmux.ai
- Support email: [email protected]
- Business inquiries: [email protected]
- Twitter: @ZenMuxAI
- Discord community: http://discord.gg/vHZZzj84Bm
For more contact options and details, visit our Contact page.
For CC-Switch project issues, please report them via CC-Switch GitHub Issues.