Studio-Chat
 Studio-Chat is an intelligent conversational tool provided by the ZenMux platform. It supports advanced features such as multi-model chat, PK mode, Artifact generation, image generation, and more. This document will help you quickly get up to speed with Studio-Chat’s core capabilities.
Core Features
Start a New Chat
- Visit Studio-Chat
- Enter your question in the input box at the bottom of the page
- Press
Enteror click the send button to submit your message - Wait for the AI model to generate a response
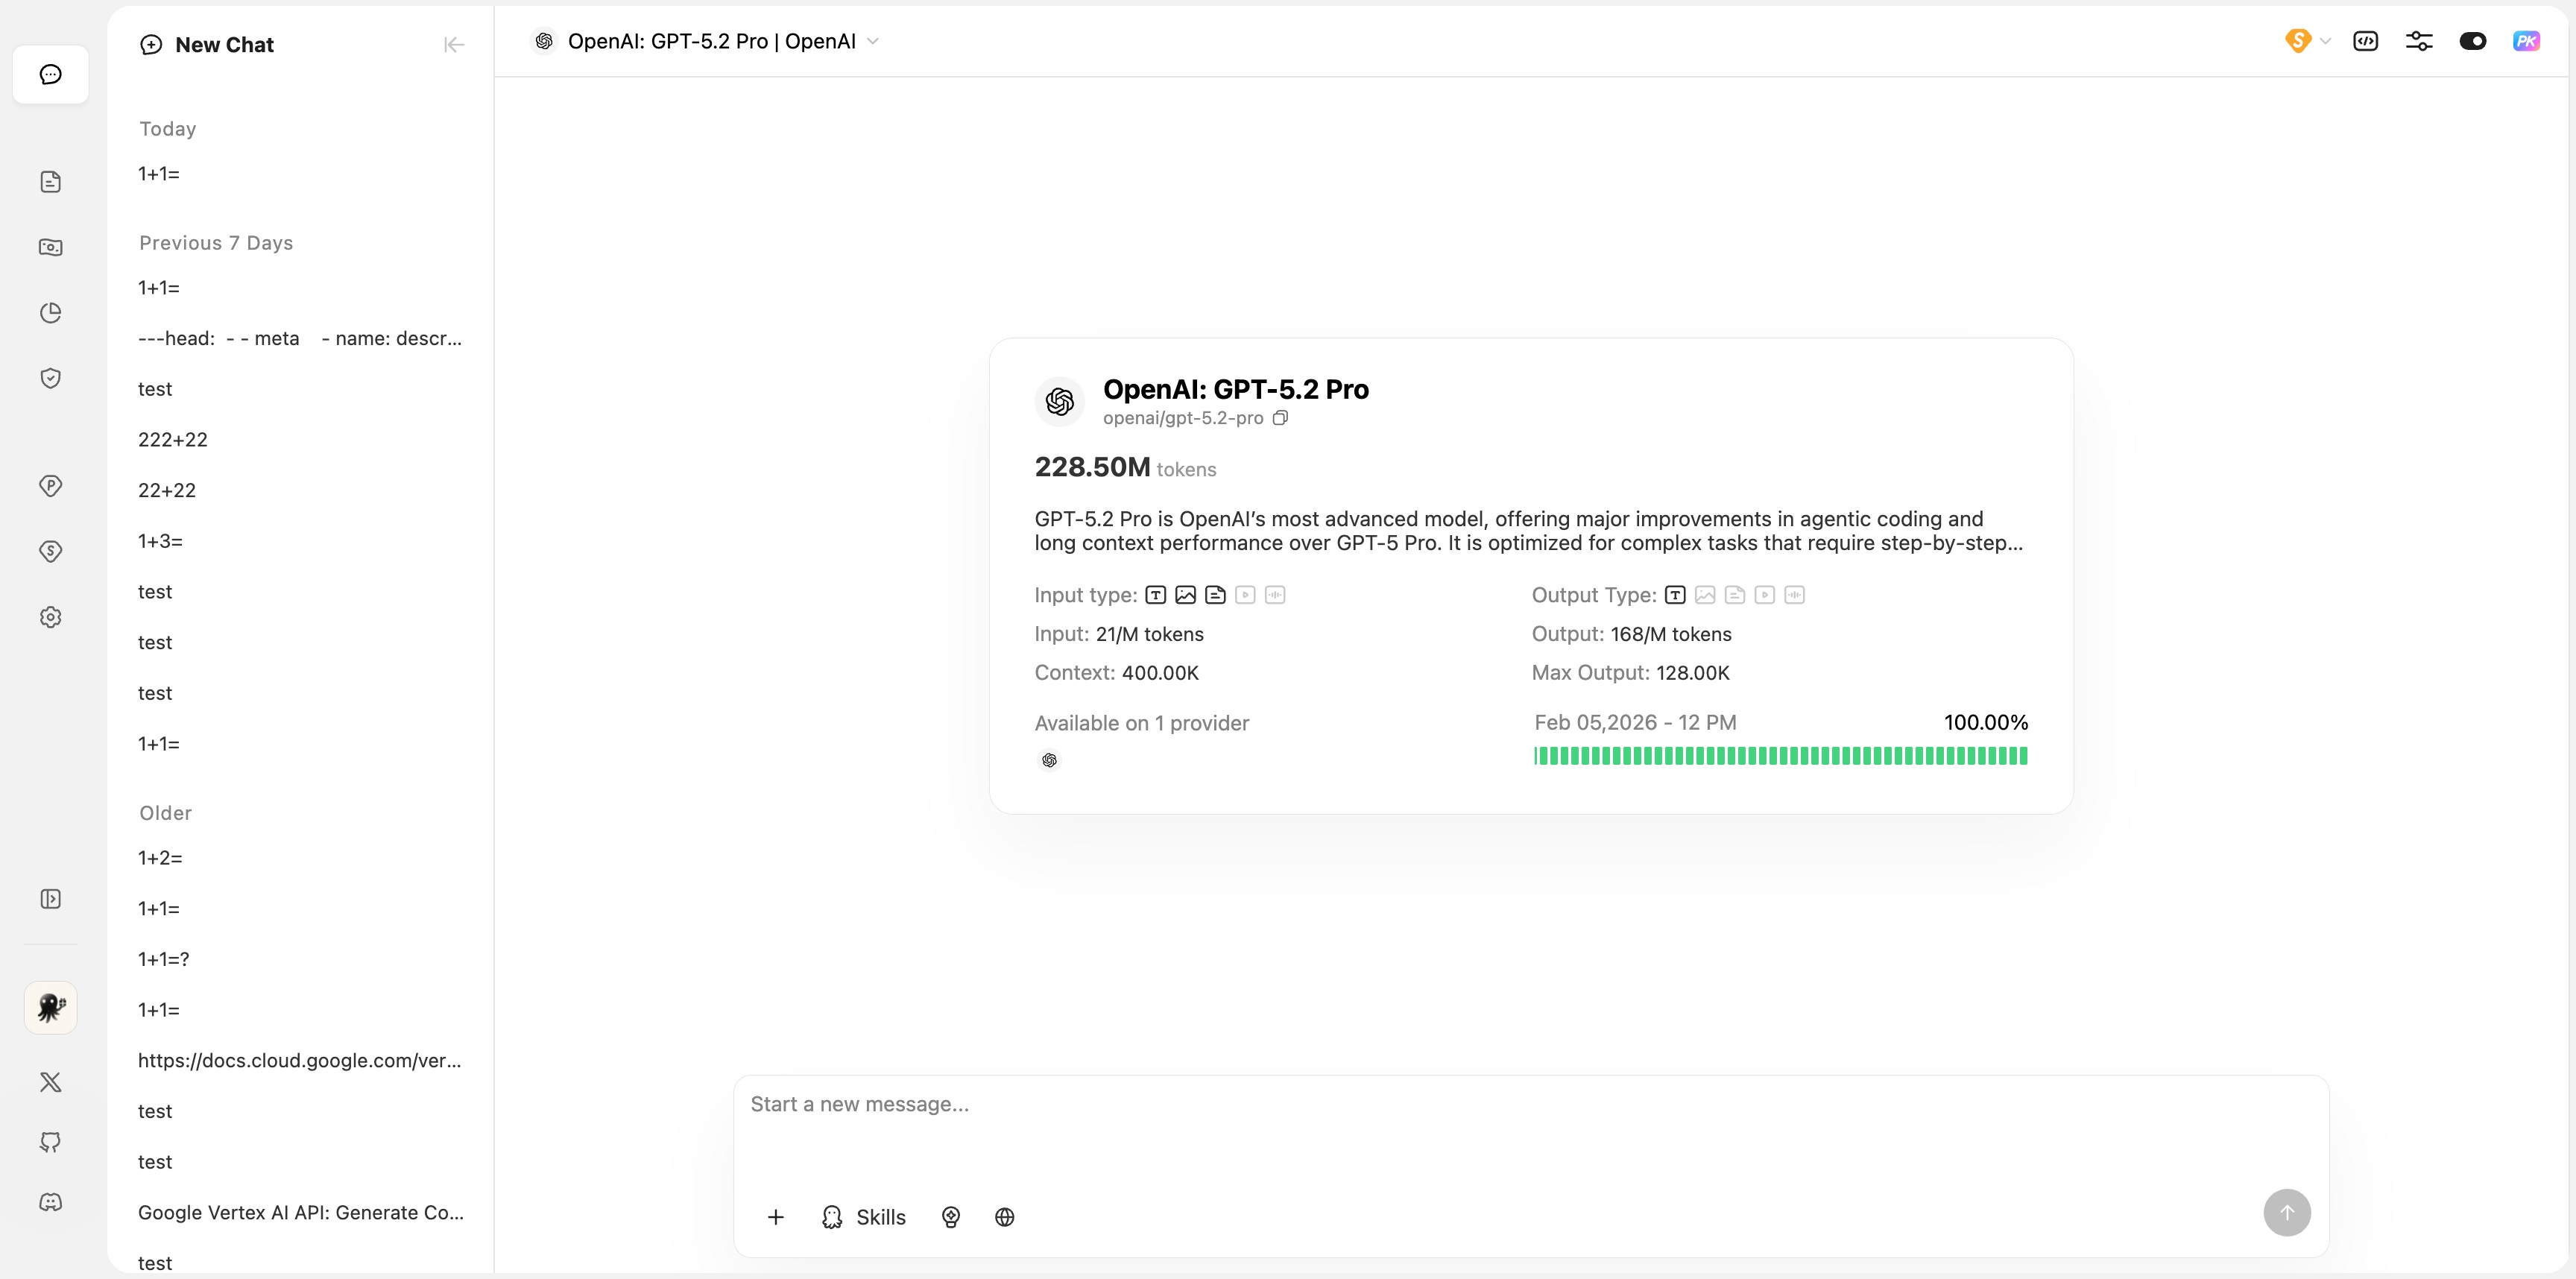
Select a Model
In the model selector at the top of the chat area, you can:
- Click the model name to open the model list
- Search for and select the AI model you need
- Different models support different capabilities (text, images, audio, etc.)
PK Mode (Multi-Model Comparison)
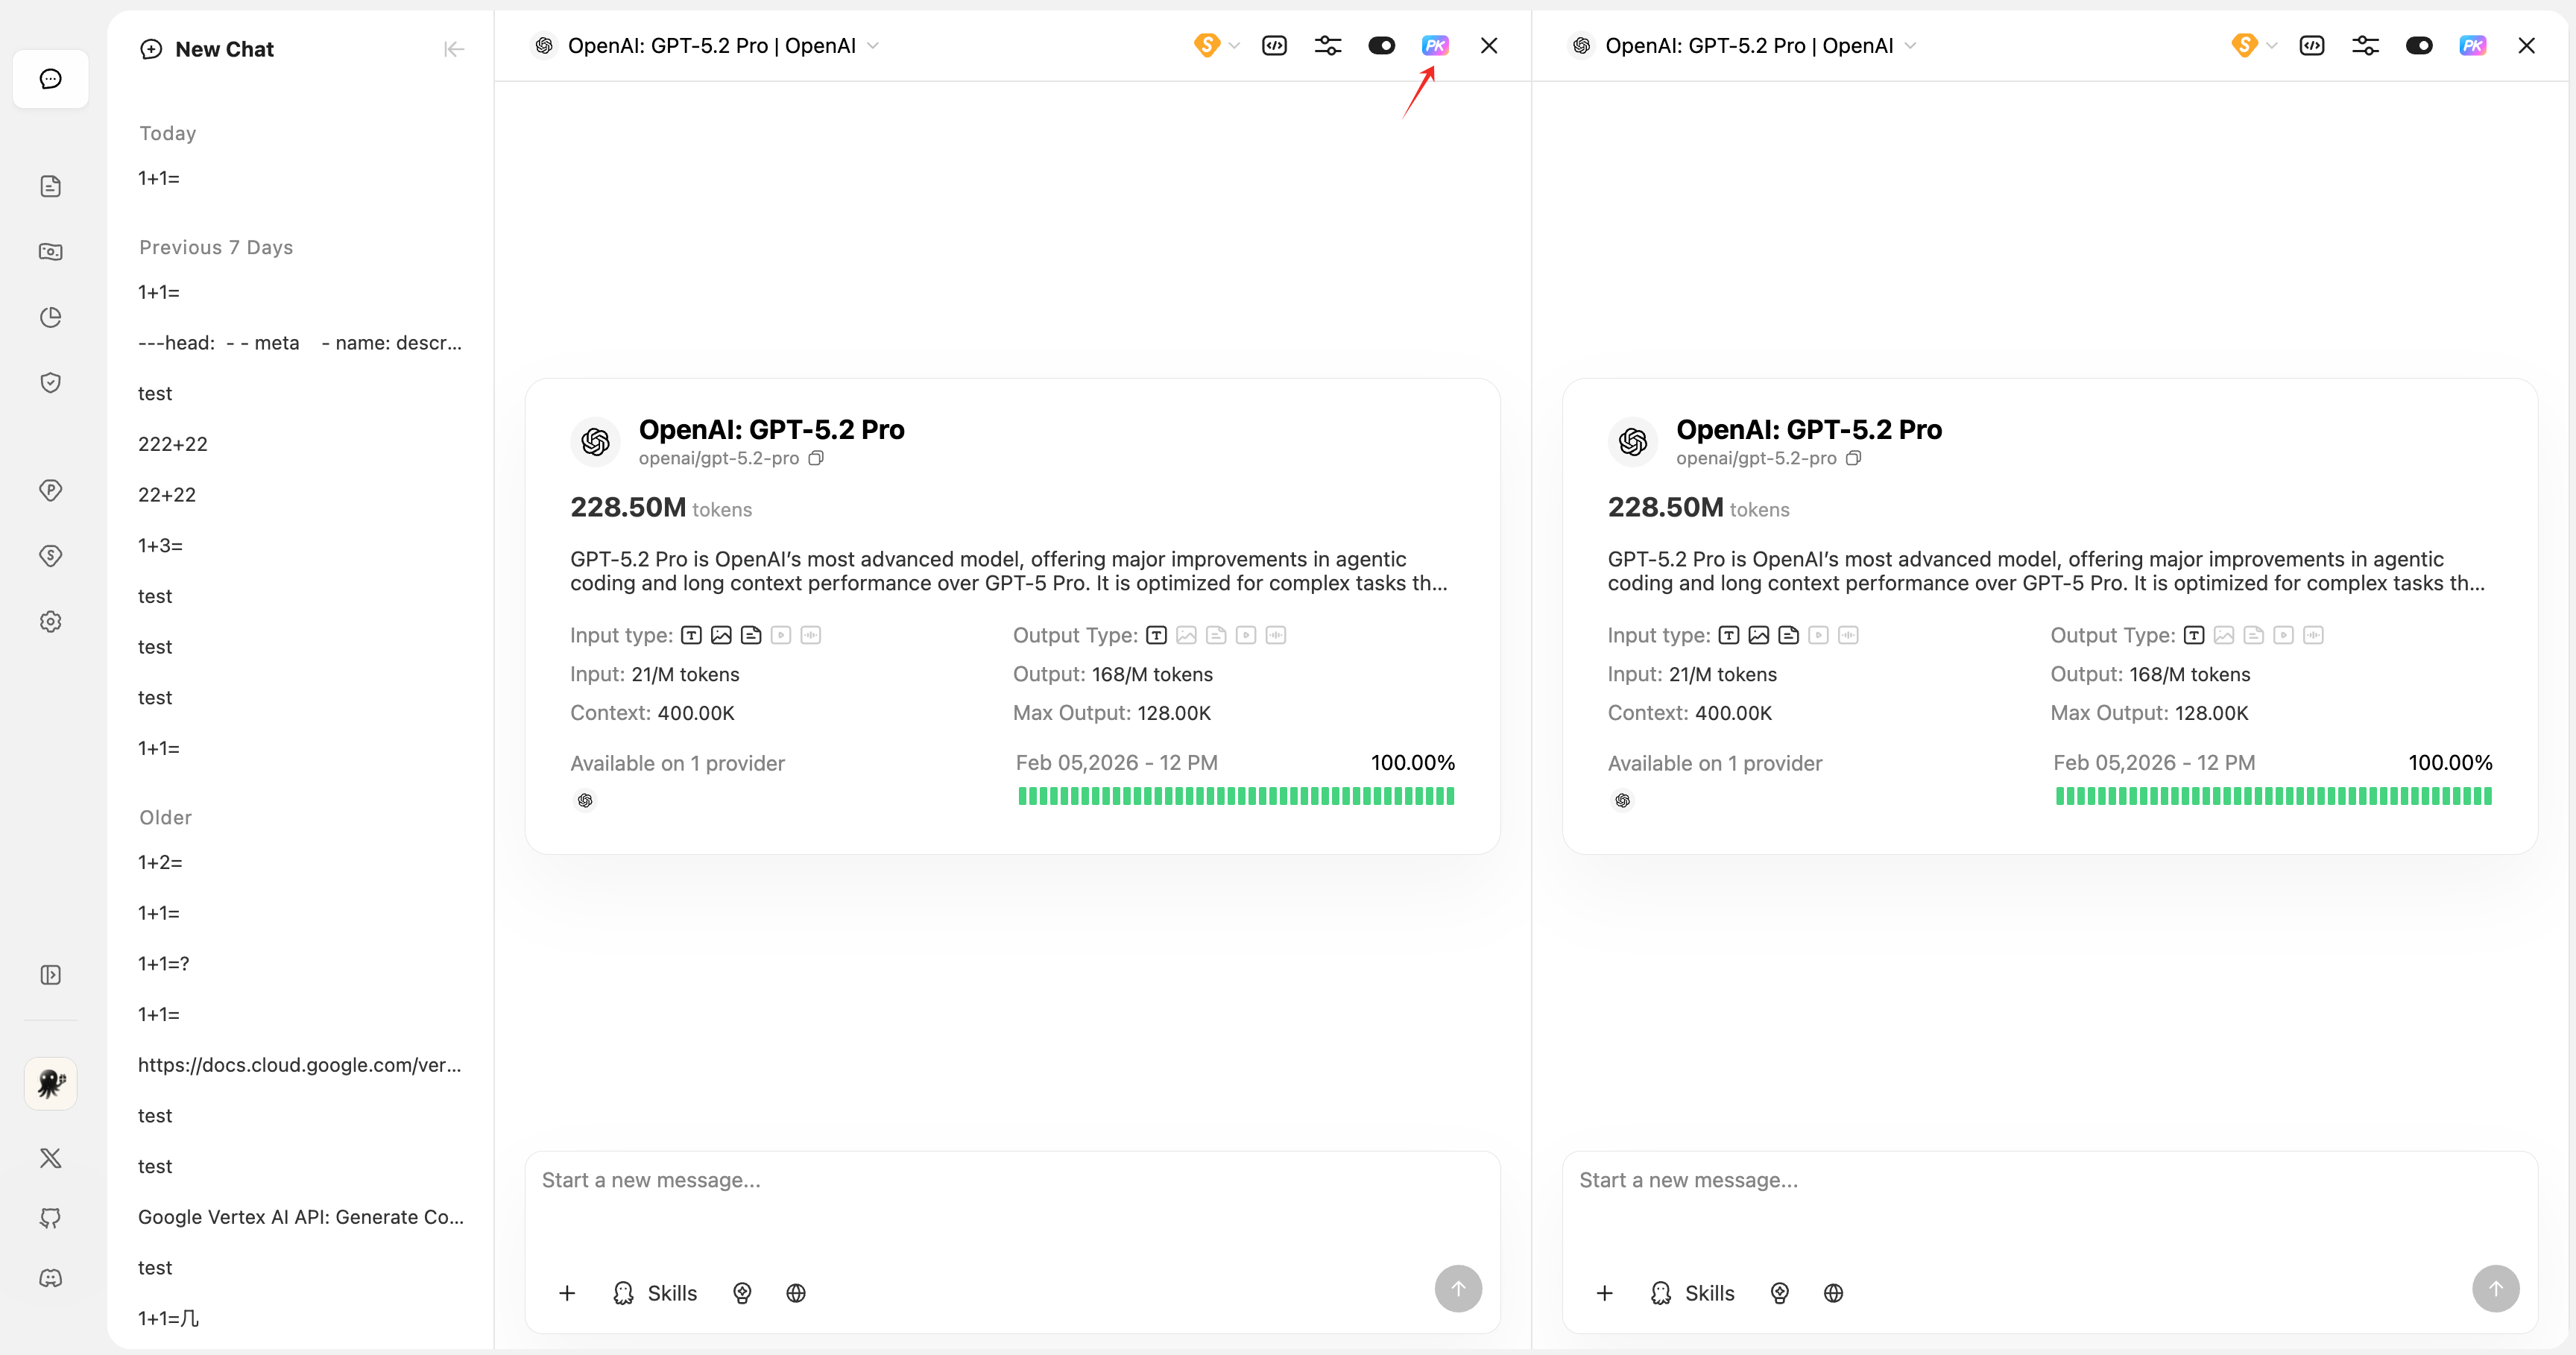
PK mode lets you chat with multiple AI models at the same time, making it easy to compare response quality across models.
Enable PK Mode
- In the model selection area, click the PK icon (➕) to add a new chat window
- You can add up to 10 models for side-by-side comparison
- Each window can select a different model independently
Sync in PK Mode
PK mode supports synchronized sending:
| Icon | Status | Description |
|---|---|---|
| 🔛 On | Sync On | When you send a message, all synced models receive it |
| 🔚 Off | Sync Off | This model window runs independently and won’t be synced |
How to use:
- Click the sync toggle icon in the model selection area
- When enabled, a message sent from any input box will be broadcast to all models with sync enabled
- When disabled, that model window requires separate input and sending
Remove a PK Window
Click the × button in the model selection area to remove the corresponding chat window.
Artifacts

Artifacts is a powerful content generation and preview feature that supports generating interactive code, charts, documents, and more.
Supported Artifact Types
| Type | MIME Type | Description |
|---|---|---|
| Markdown | text/markdown | Rich text documents |
| HTML | text/html | Interactive web content |
| SVG | image/svg+xml | Vector graphics |
| Mermaid | application/vnd.mermaid | Flowcharts, sequence diagrams, etc. |
Use Artifacts
- In the input area, click Skills and select Artifact Mode (💡 icon), or click the Artifacts button in the input area
- Send your request, for example:
- "Help me create a project flowchart"
- "Generate an interactive HTML page"
- "Draw a logo in SVG"
- After the AI generates the content, the Artifact preview panel opens automatically
Artifact Panel Features
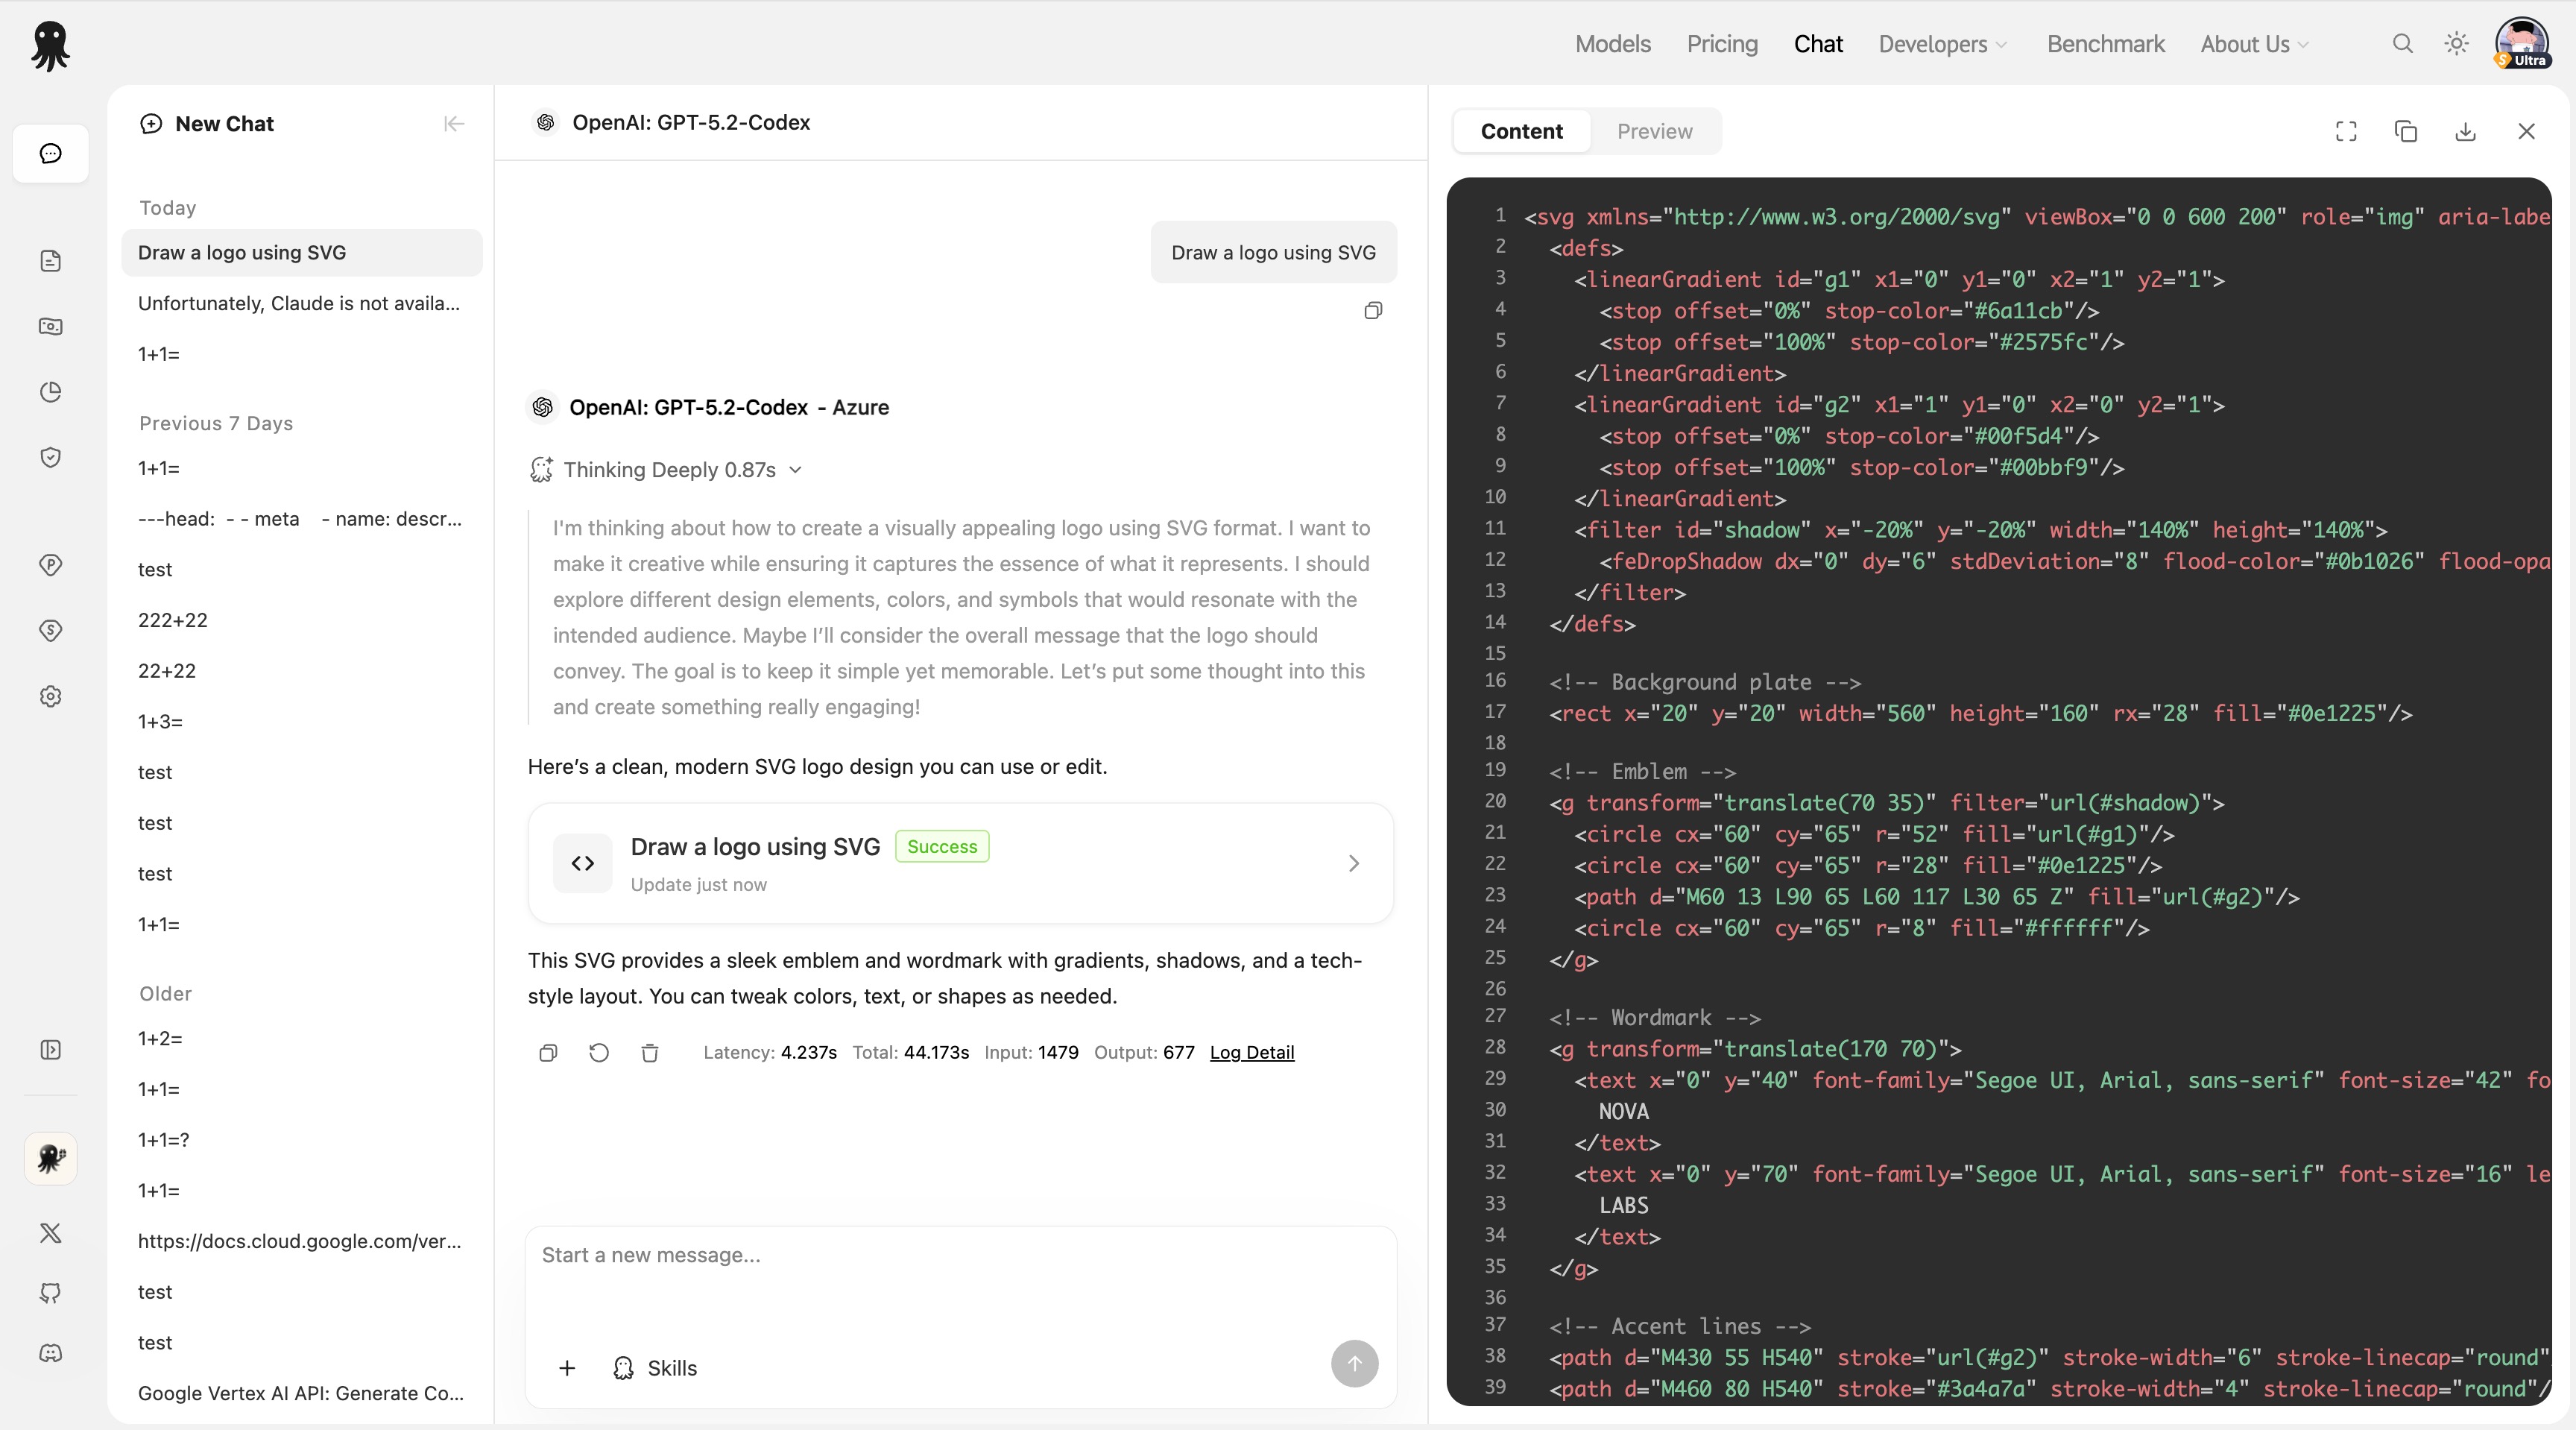
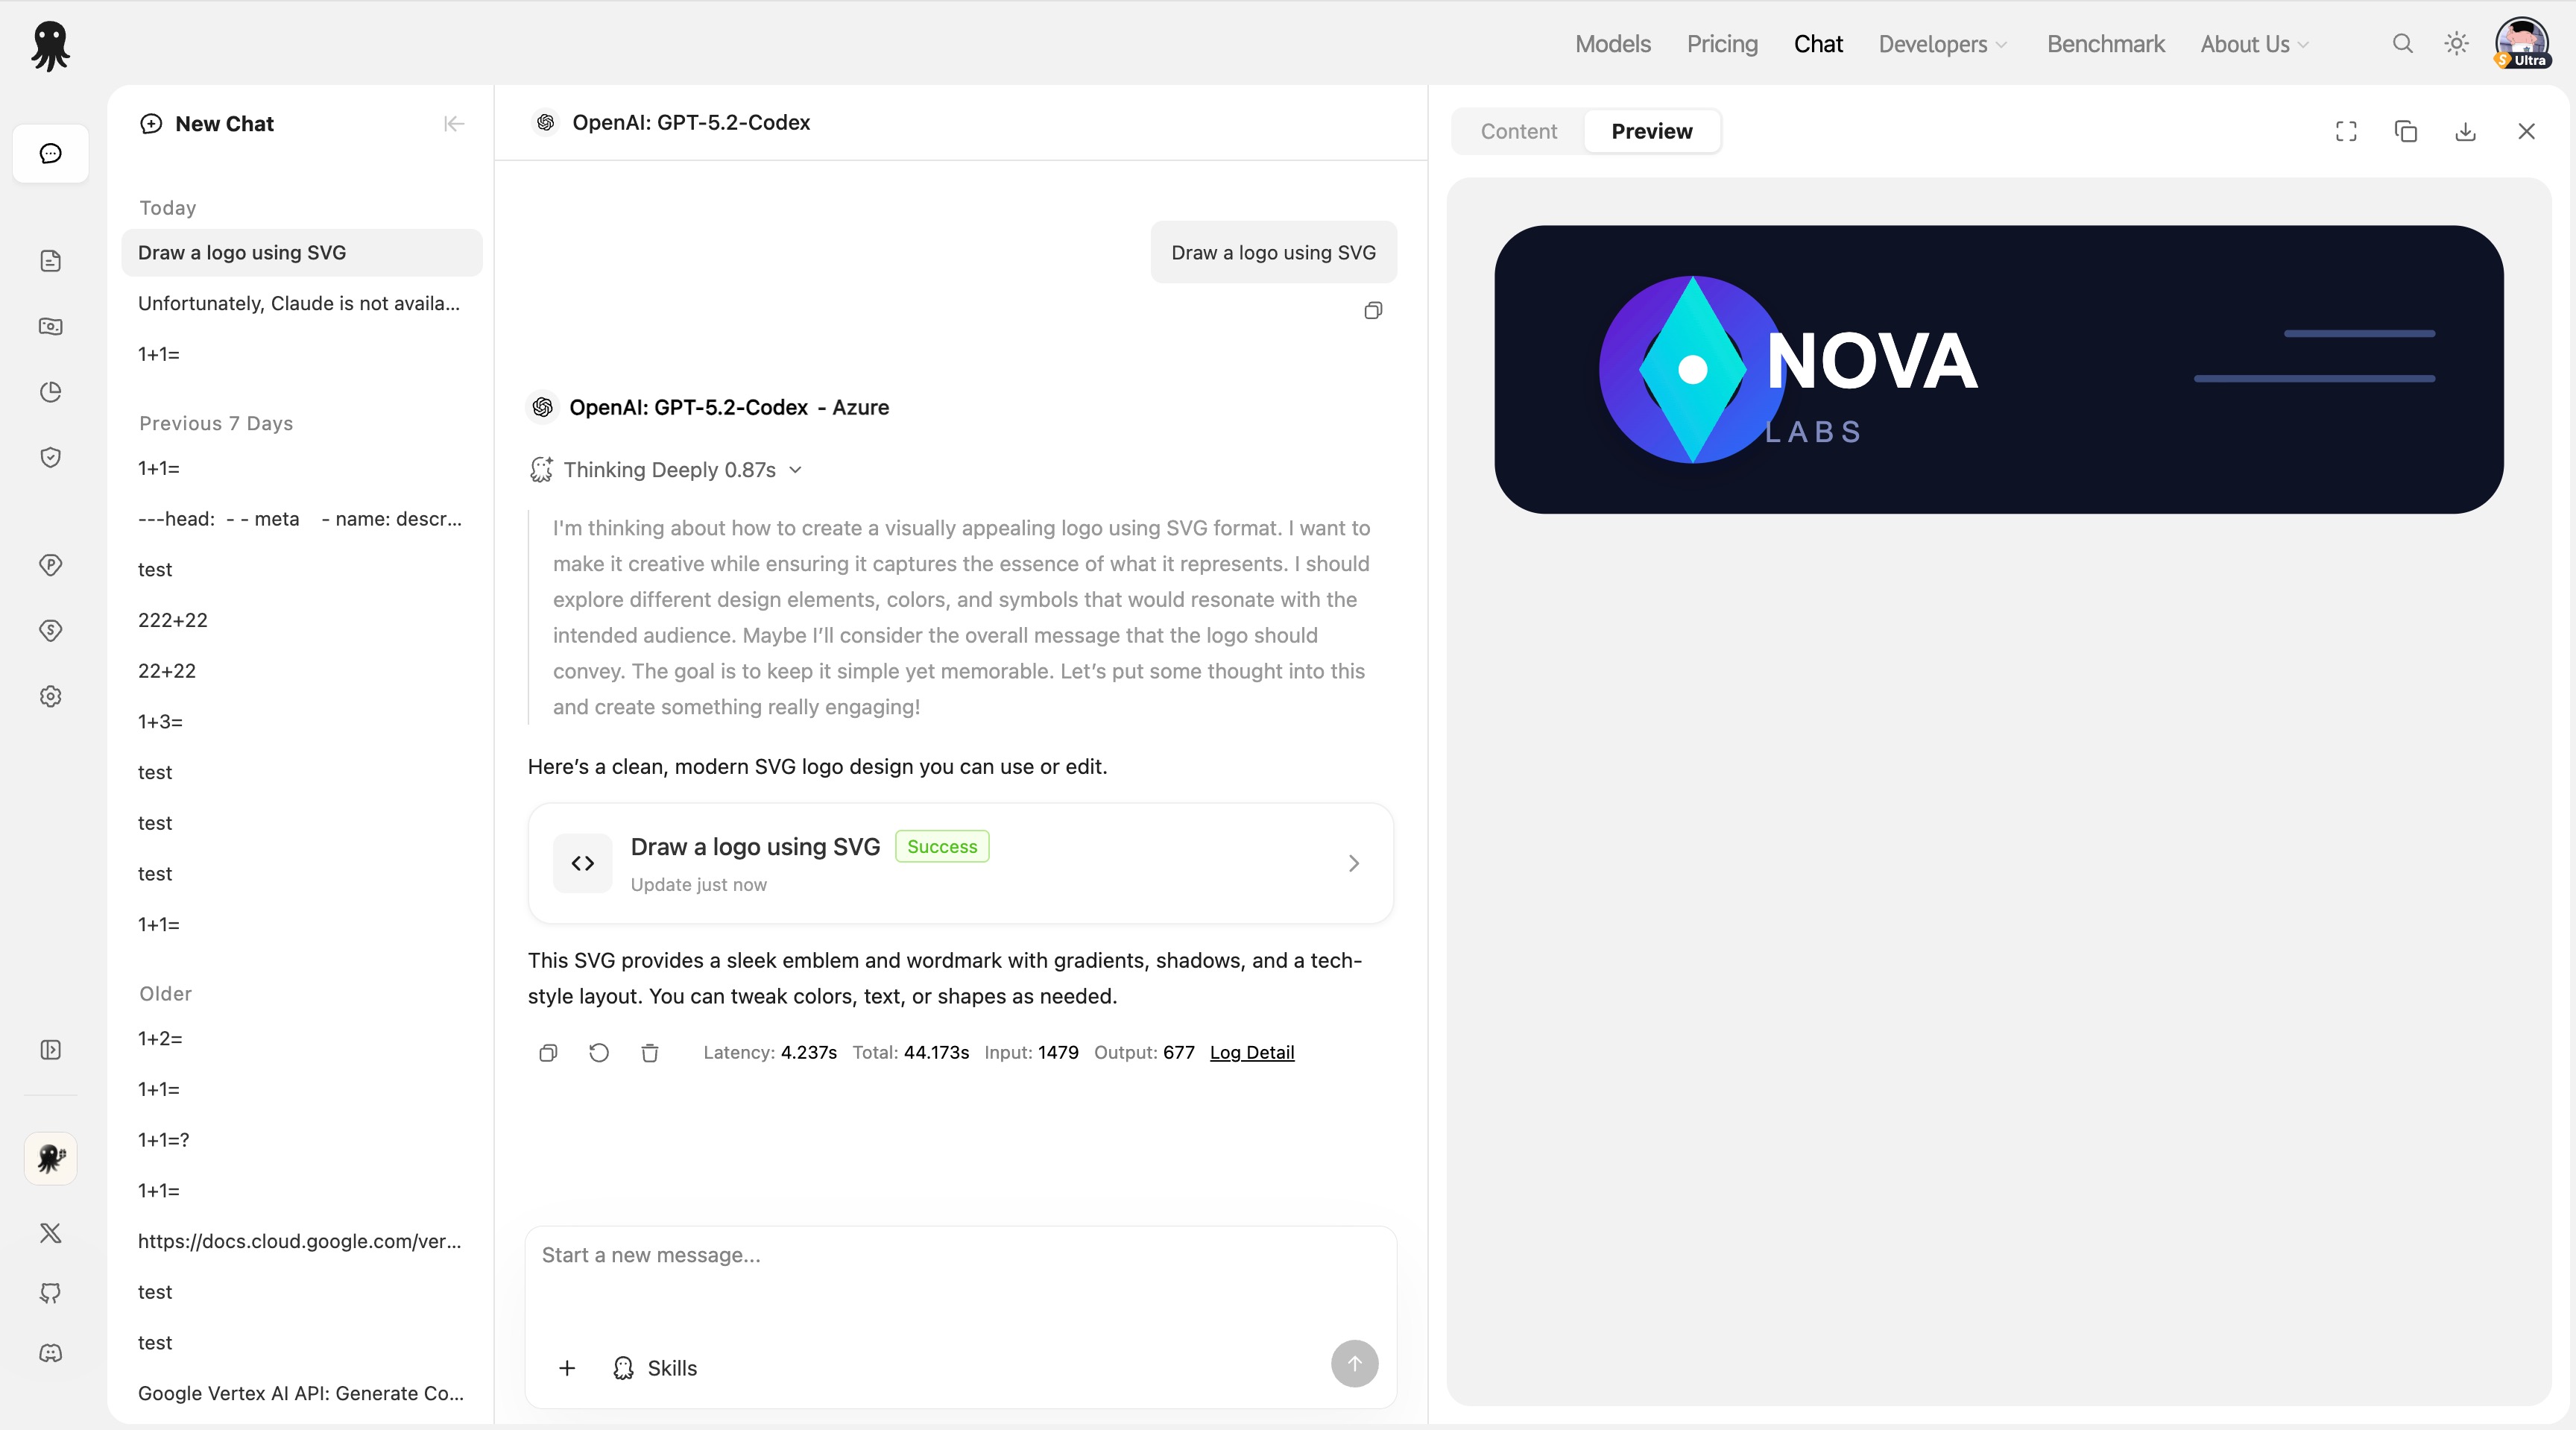
- Content / Preview toggle: View source code or preview the rendered output
- Copy code: One-click copy of the generated content
- Download file: Save the content as a file in the corresponding format
- Fullscreen mode: Expand the preview area
Web Search

Web Search allows the AI to search the internet for the latest information while answering your question.
Models That Support Web Search
⚠️ Note: Not all models support Web Search.
How to tell:
- In the Skills menu, if Web Search is clickable (not grayed out), the current model supports it
- If it’s grayed out/disabled, the current model does not support it
Common models that support Web Search:
- Models that support the
web_search_optionsparameter (e.g., some OpenAI and Google models)
Use Web Search
- Click Skills
- Enable Web Search (🌐 icon)
- Send your question
- The AI will search the web and answer based on the latest information
When enabled, responses will include cited sources (grounding chunks) to help you verify the information.
Image Generation & Editing
Image Generation Mode
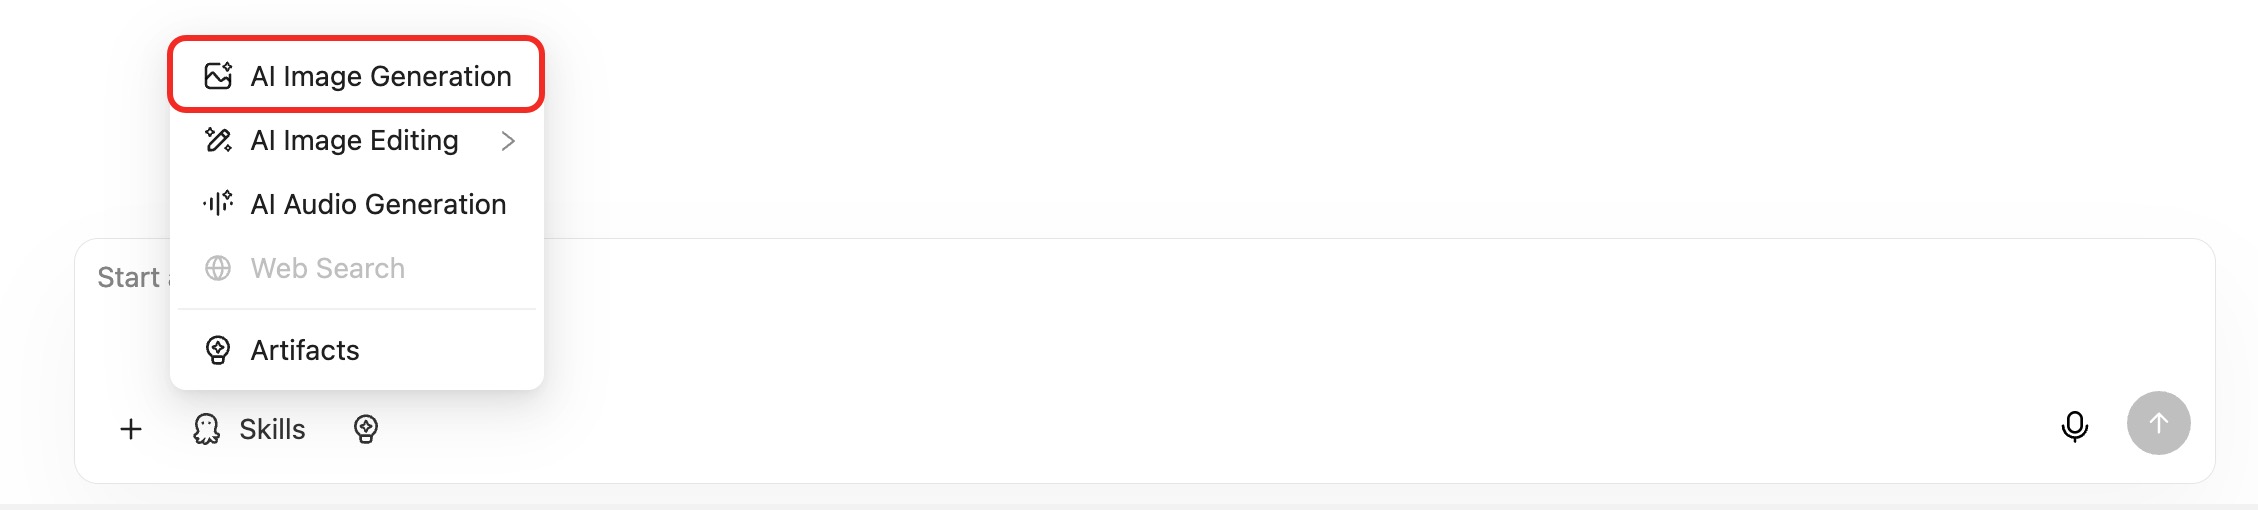
Some models support image generation:
- Click Skills
- Select Image Mode (🖼️ icon)
- Describe the image you want to generate
- The AI will generate the corresponding image
Special settings for Google Imagen models: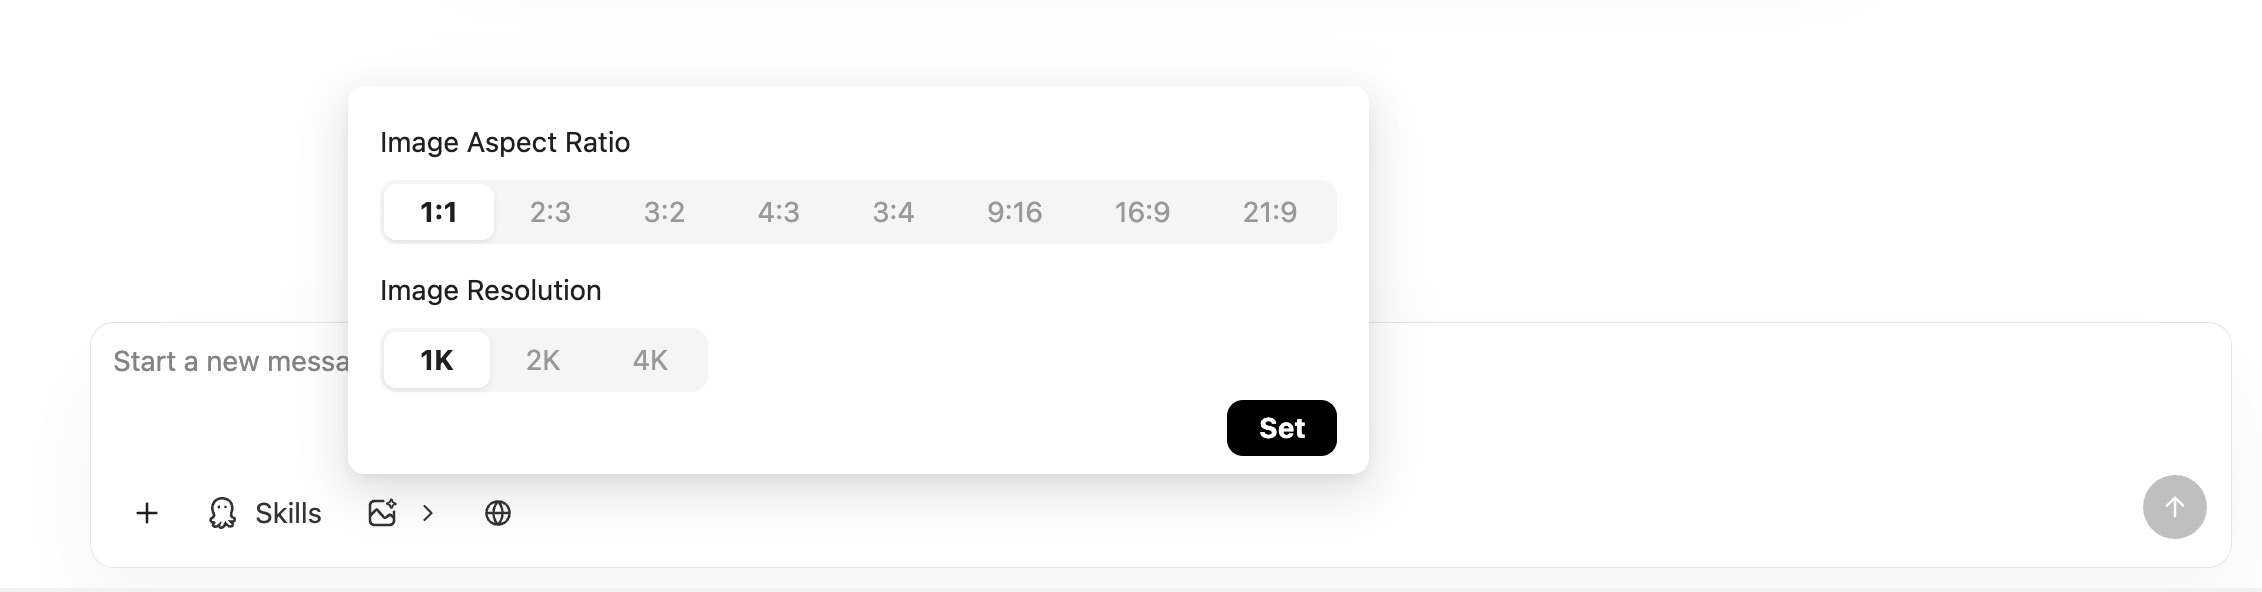
When using Google’s image generation models, you can configure:
- Image Aspect Ratio: Aspect ratio (1:1, 16:9, 9:16, etc.)
- Image Resolution: Output resolution
Image Editing Mode
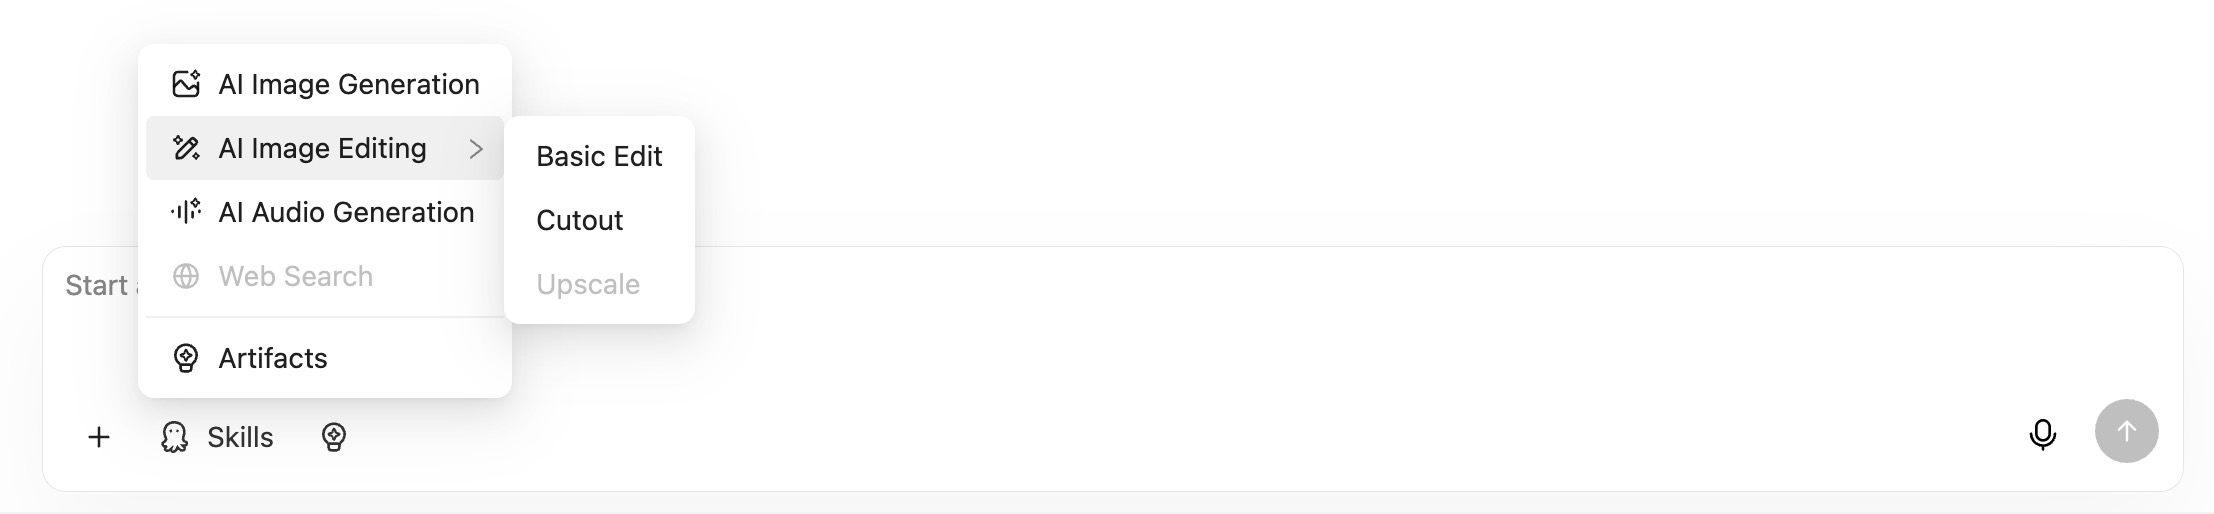
Models that support image output can also perform image editing:
| Mode | Description |
|---|---|
| Basic Edit | Basic editing to modify image content |
| Cutout | Cutout: remove/replace the background |
| Upscale | Image upscaling (not available yet) |
Steps:
- Upload an image
- In Skills, select the corresponding editing mode
- Describe the edit you want
- The AI will return the edited image
Voice Input & Output
Voice Input

Models that support voice input can accept audio messages:
- Click the microphone icon in the input box to start recording
- Once recording is complete, it will upload automatically
- When you send the message, the audio will be sent to the AI along with it
Voice Output
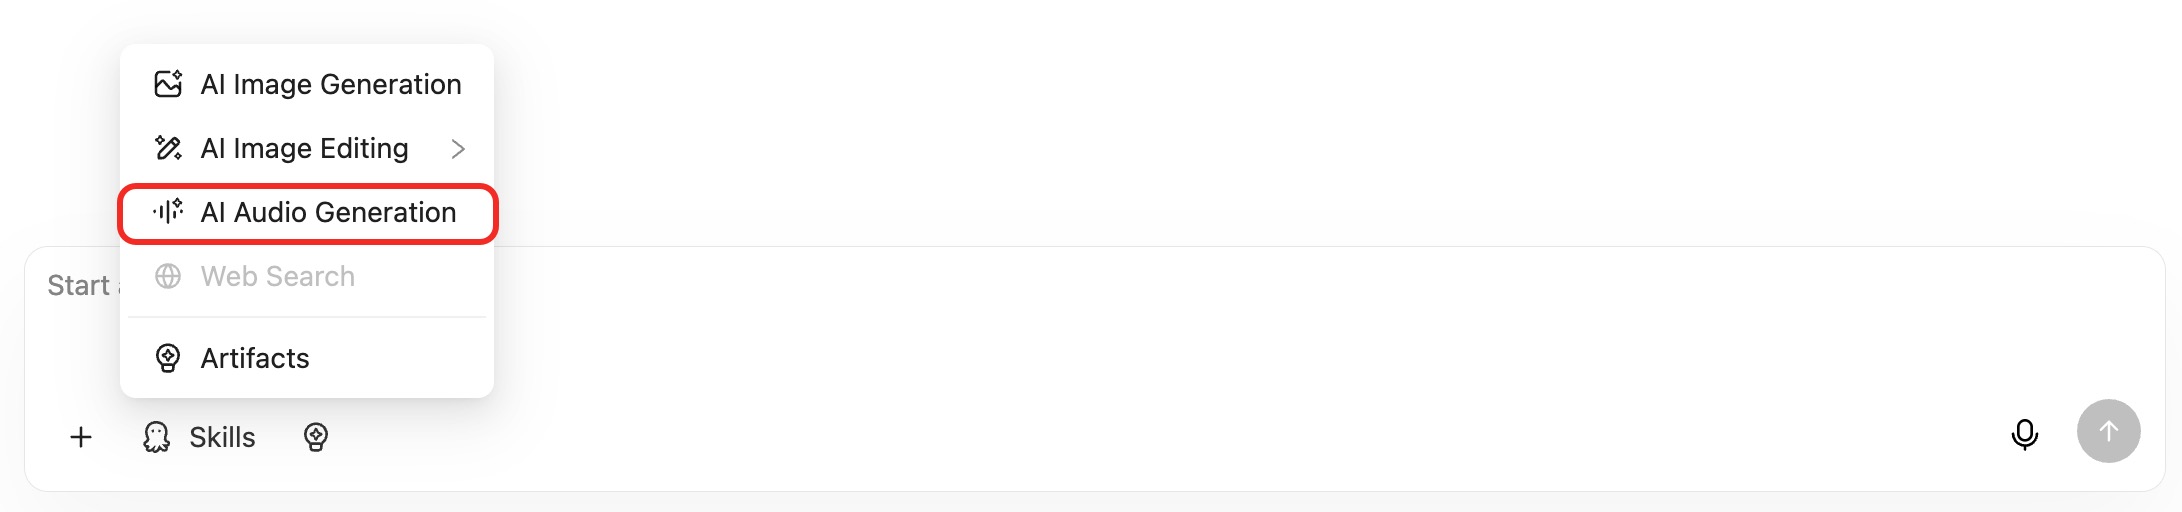
Some models support spoken replies:
- Enable Audio Mode (🎵 icon) in Skills
- Send a message
- The AI’s response will include audio content that you can play directly
API Call Example
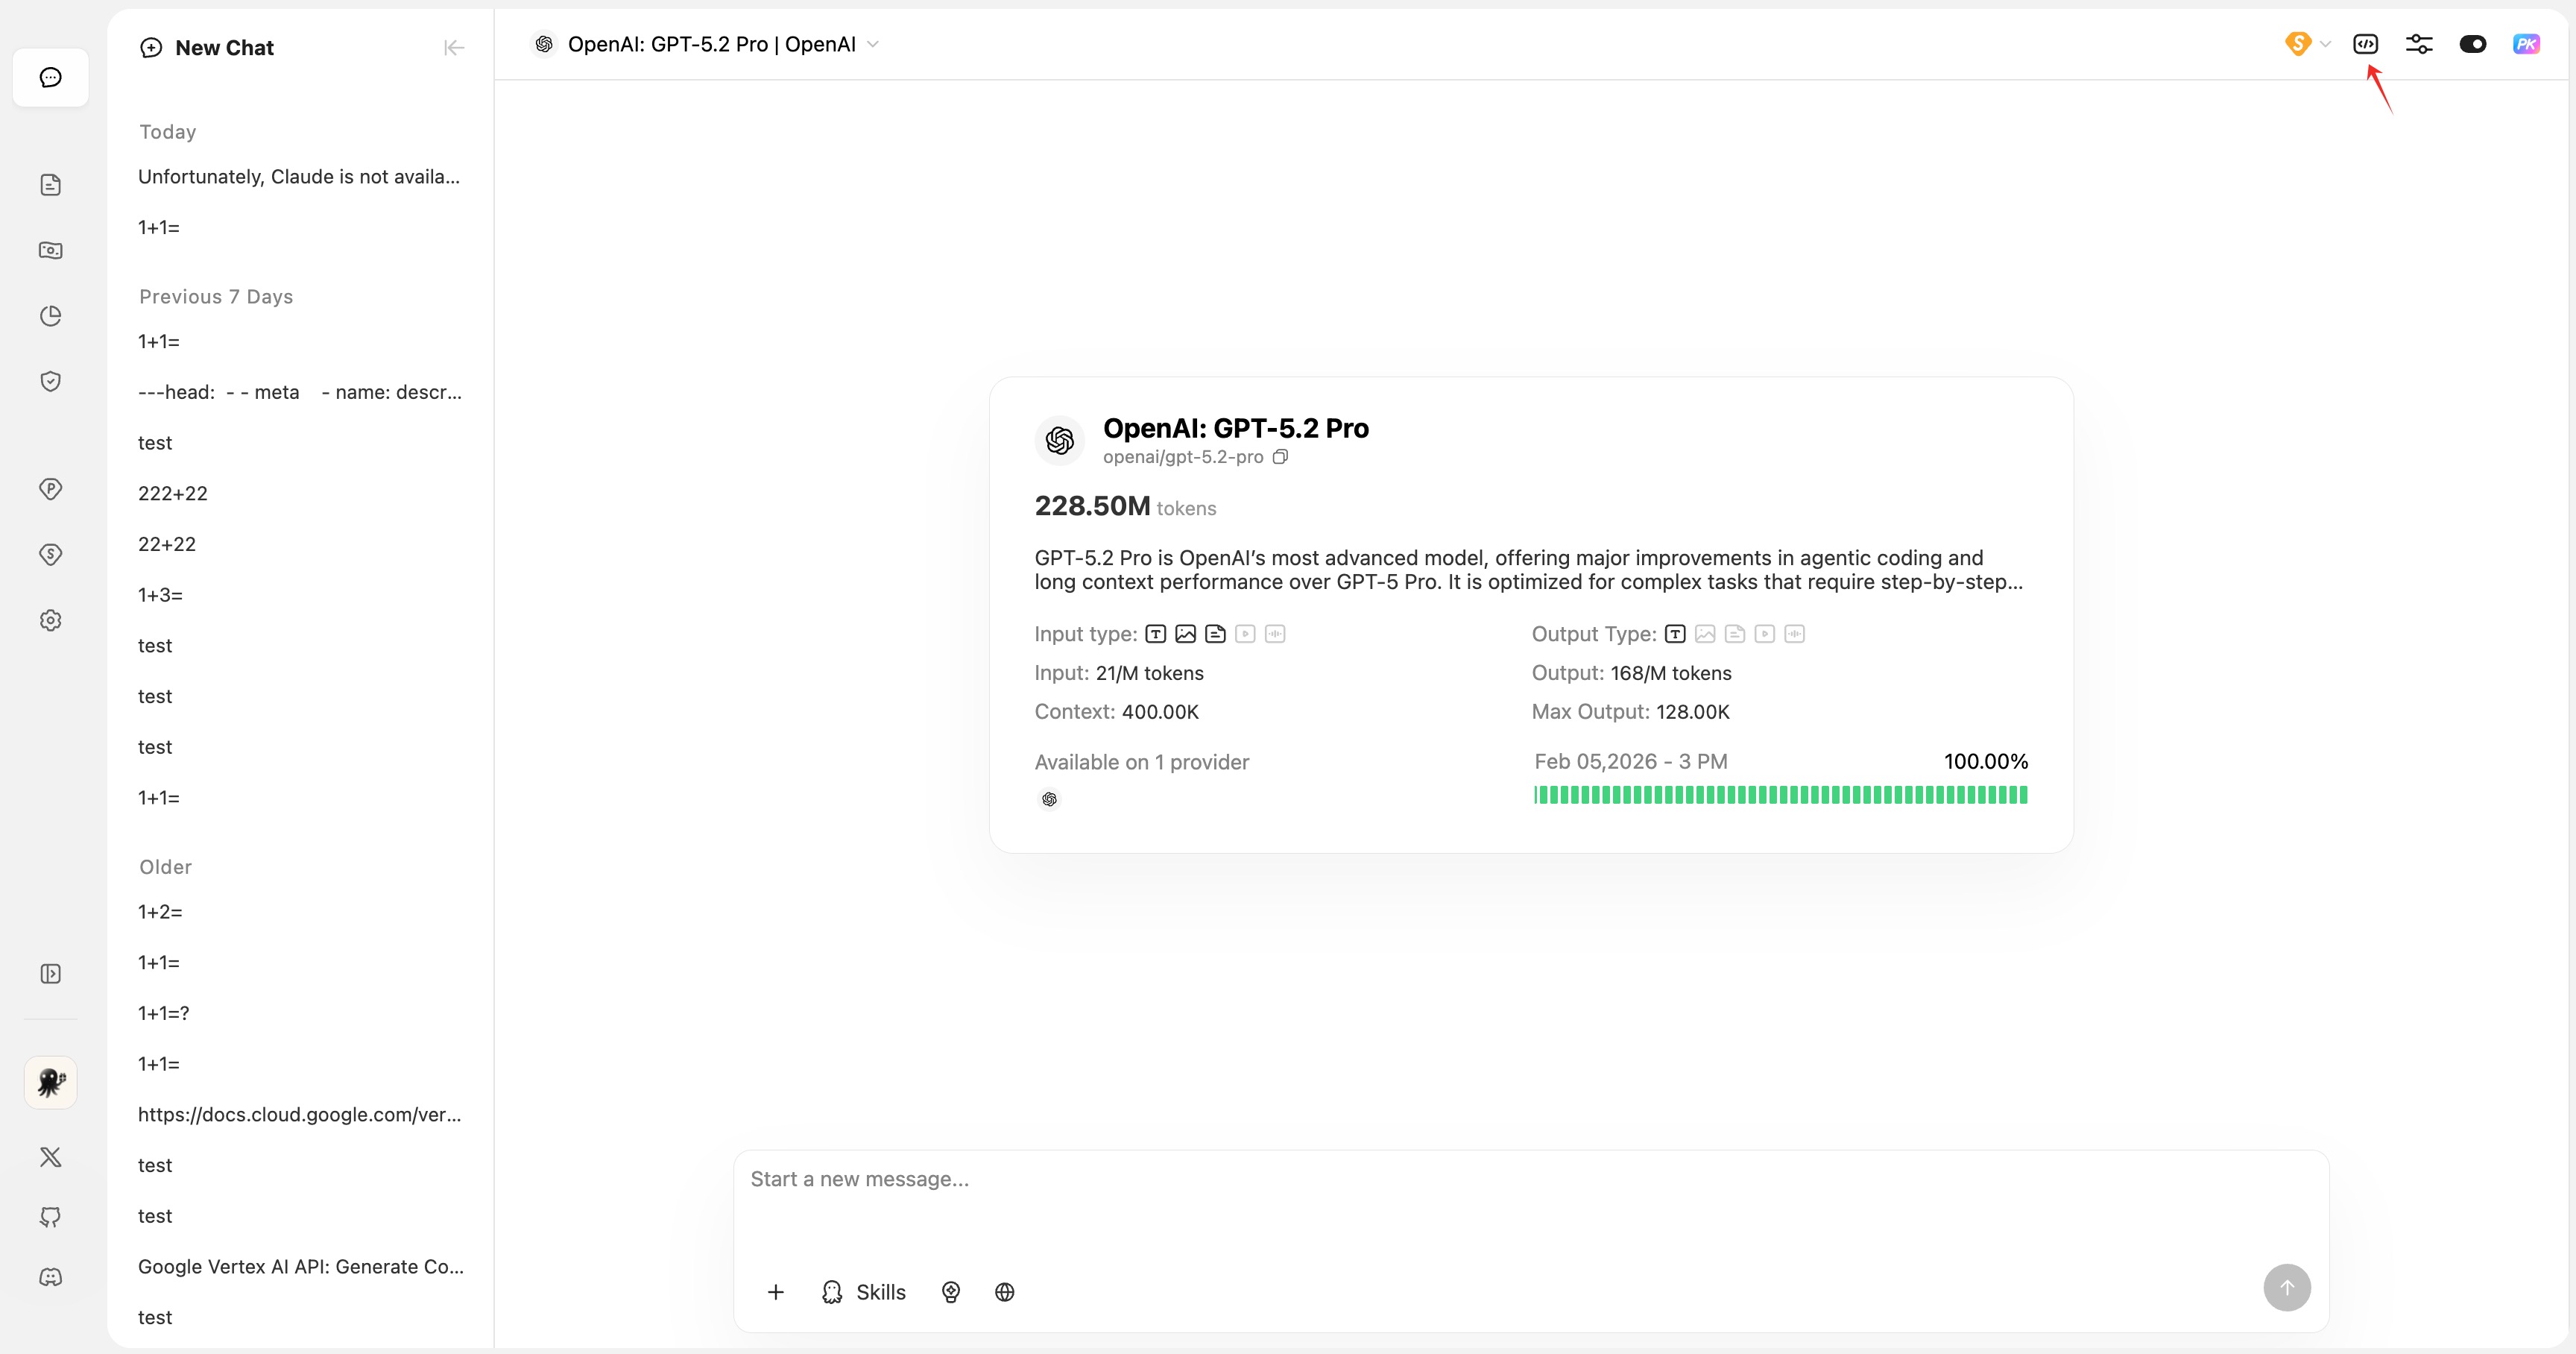
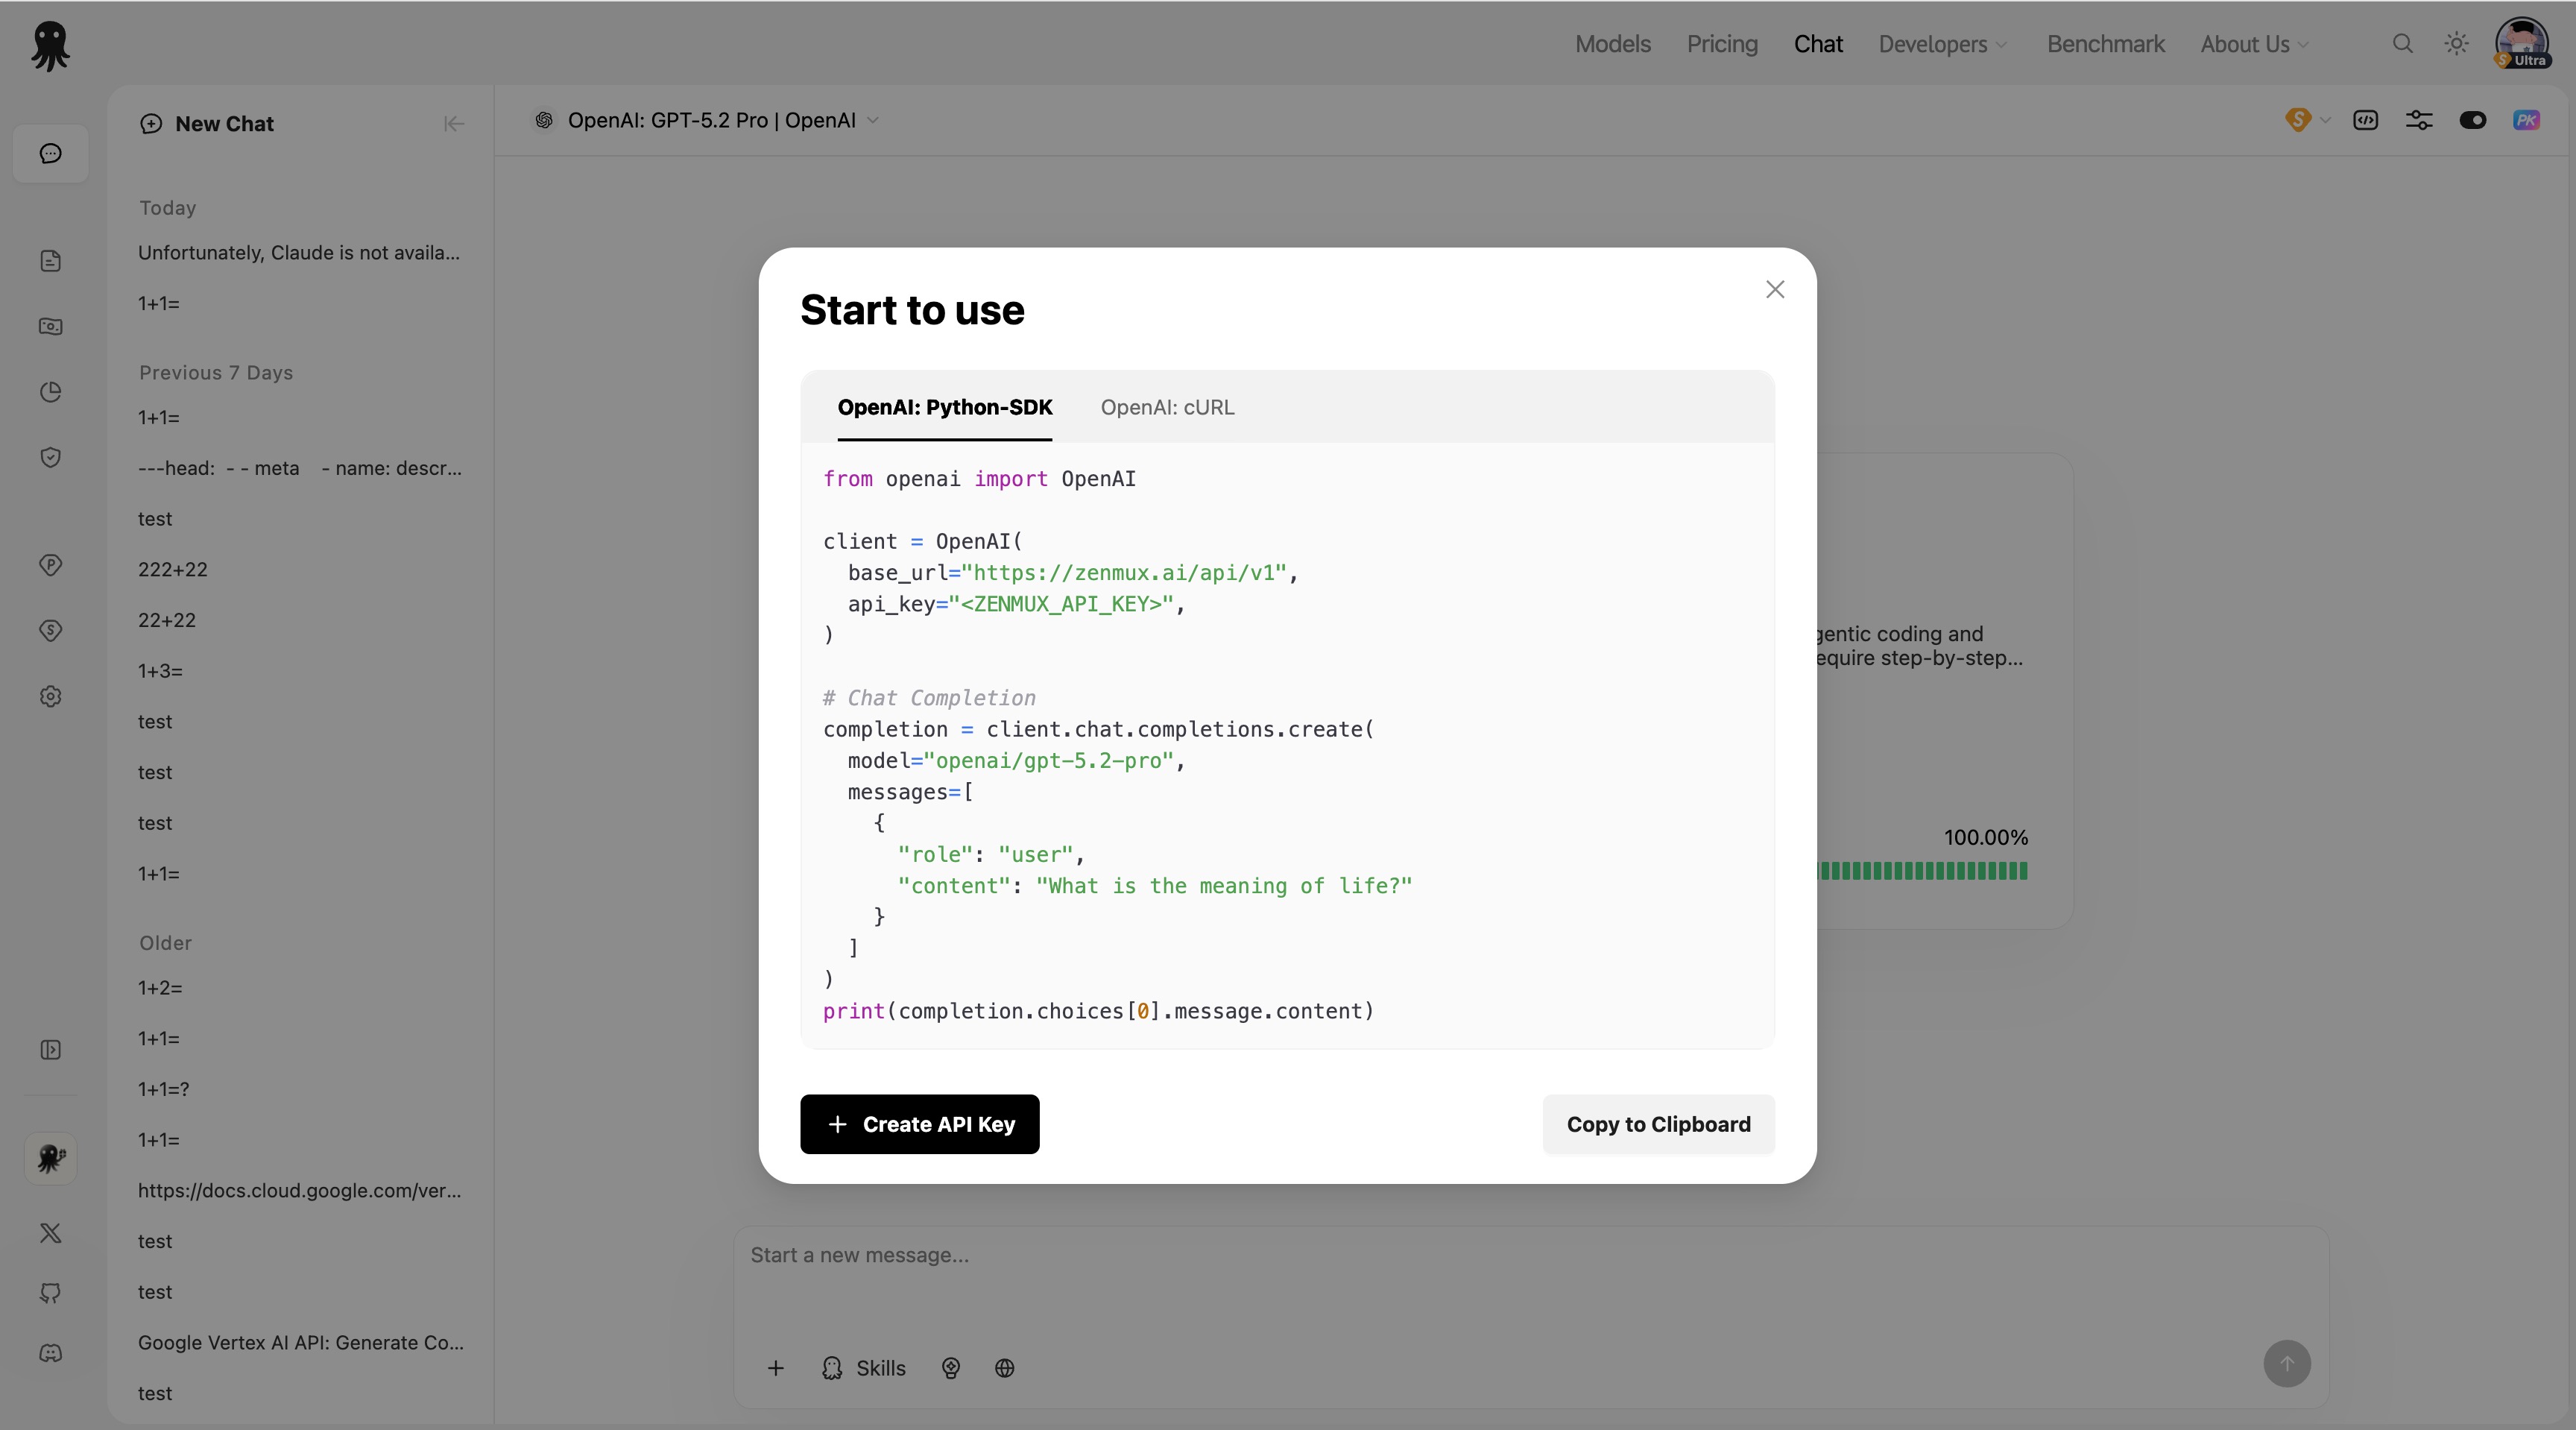
Click the </> icon in the model selection area to view and copy an API call example for the model.
Advanced Parameters

Click the ⚙️ Settings icon in the model selection area to configure advanced model parameters.
Configurable Parameters
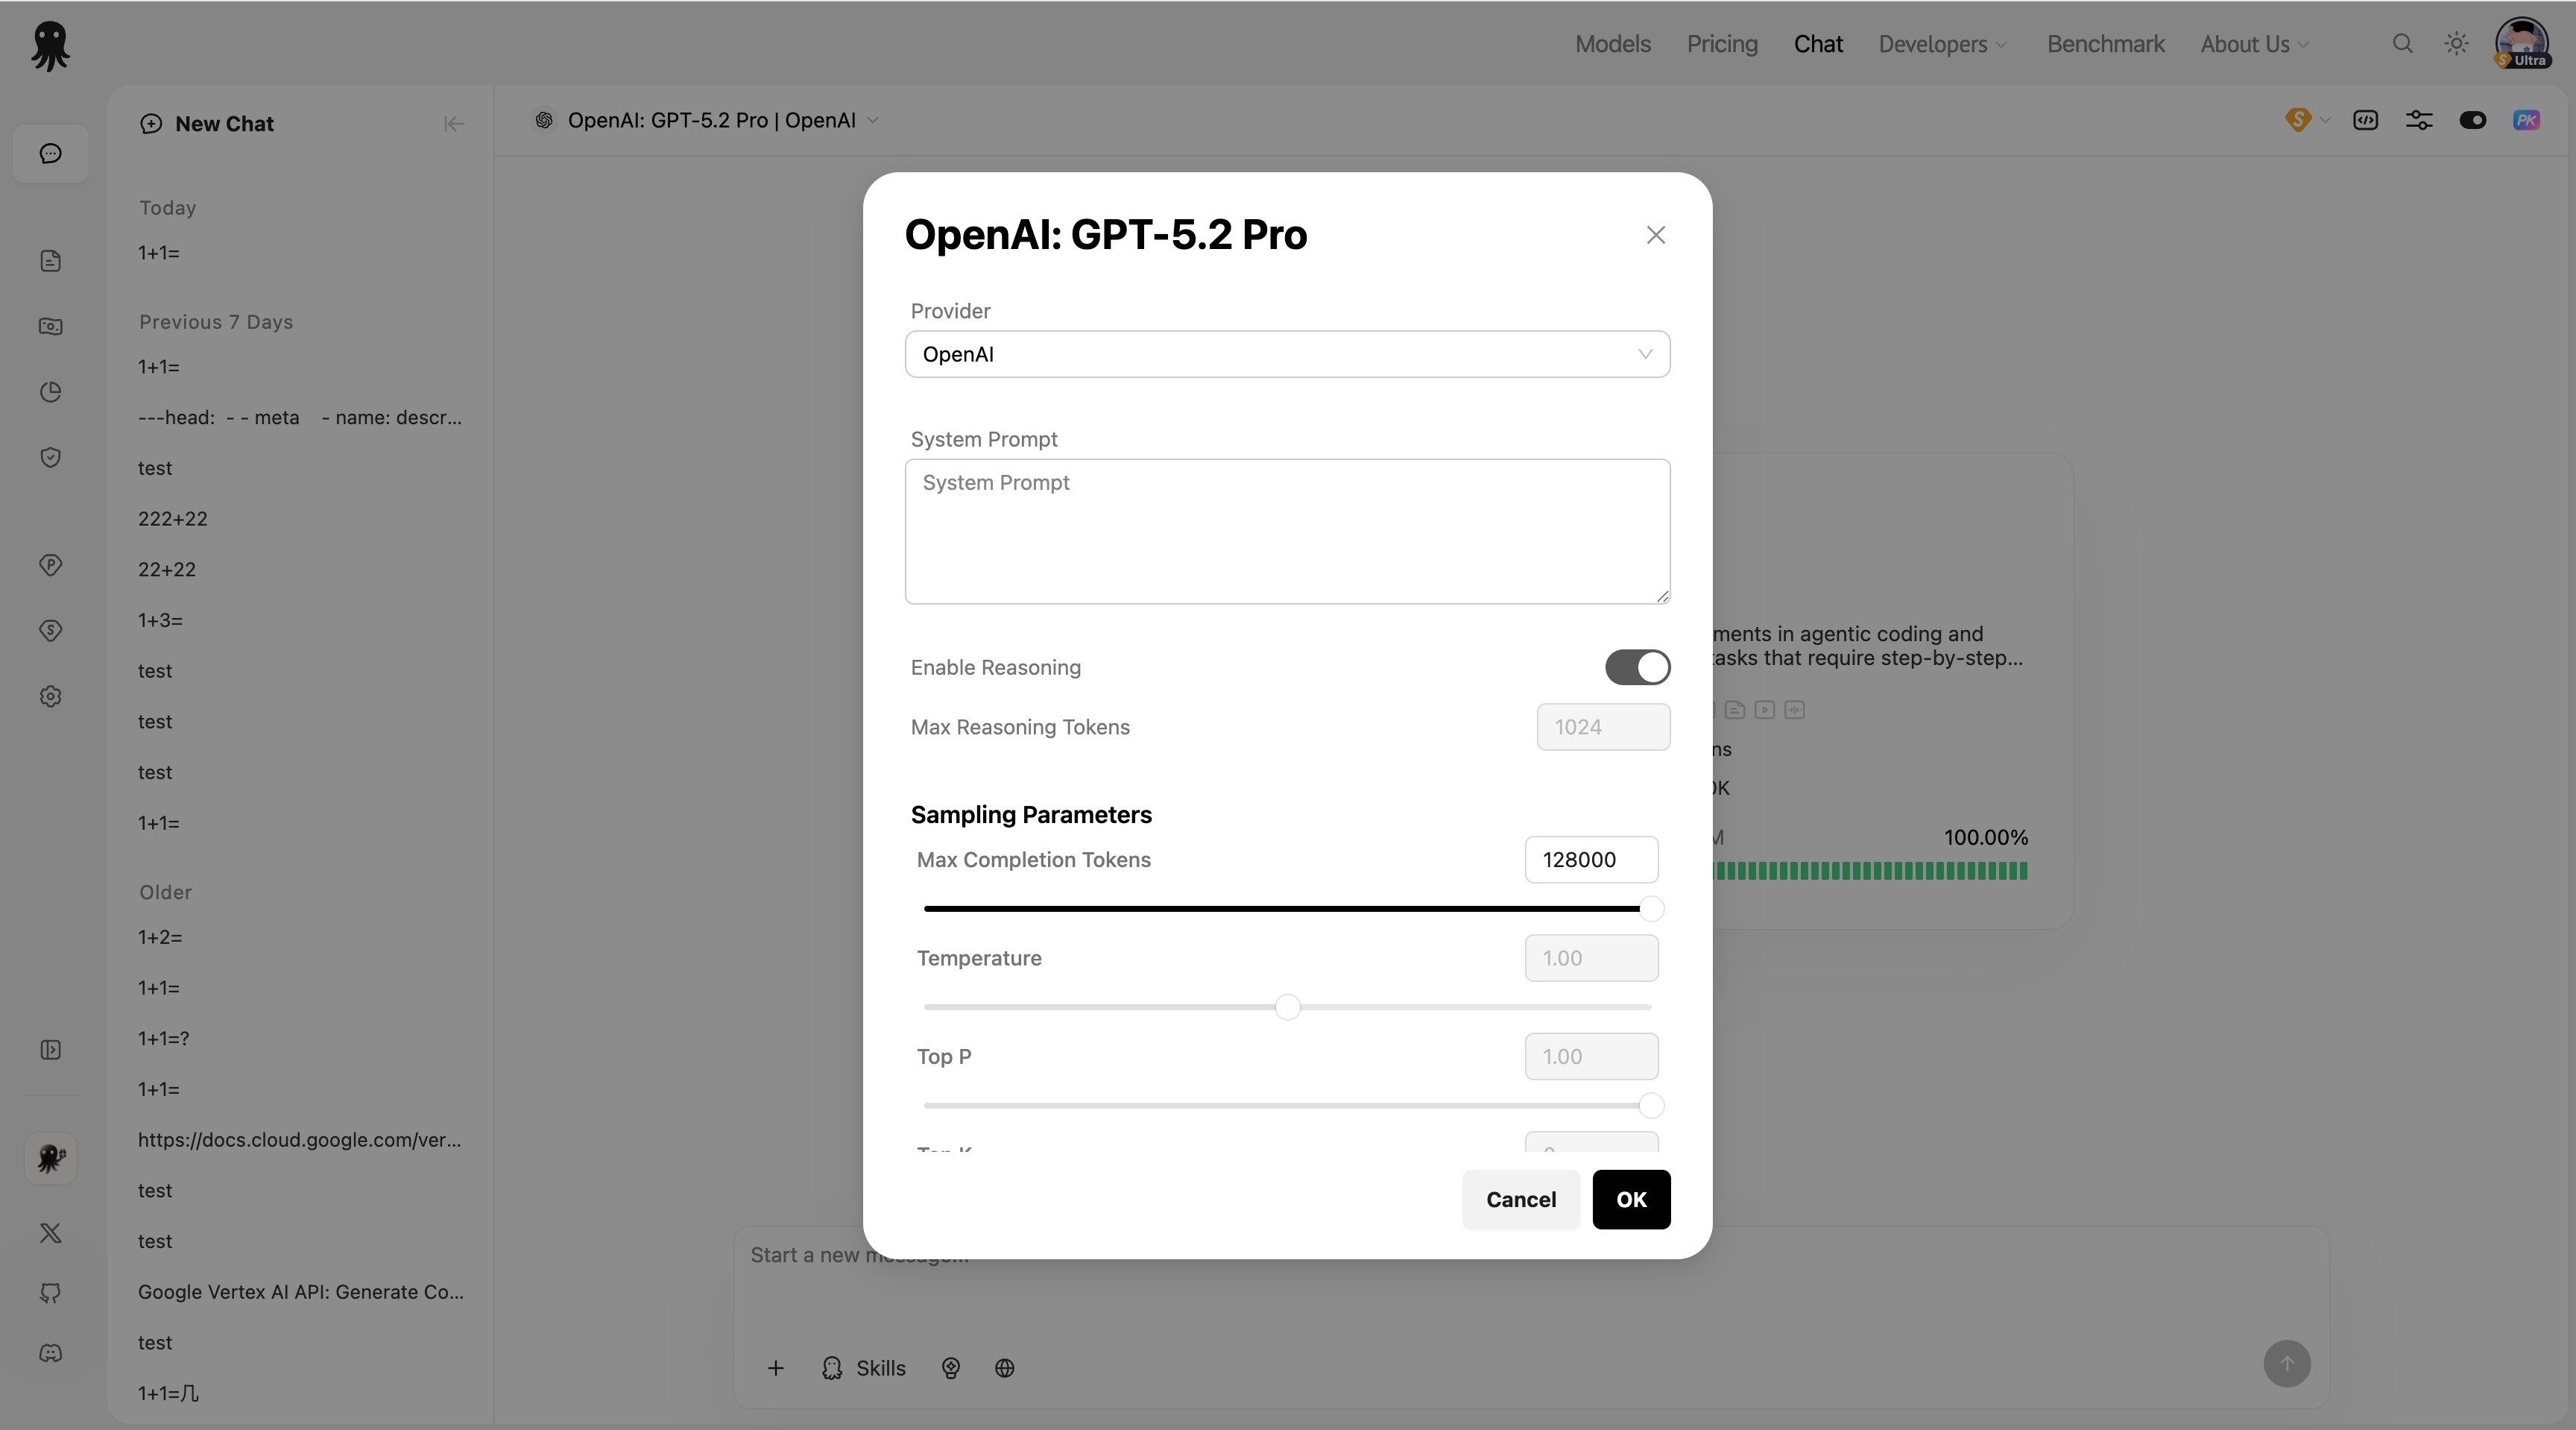
| Parameter | Description | Range |
|---|---|---|
| Provider | Select the model provider | Model-dependent |
| System Prompt | System prompt that defines the AI’s role and behavior | Text |
| Enable Reasoning | Enable reasoning mode (chain-of-thought) | On/Off |
| Max Reasoning Tokens | Max tokens for reasoning | 0-100000 |
| Max Completion Tokens | Max output tokens | 0-262144 |
| Temperature | Controls randomness of the output | 0.0-2.0 |
| Top P | Nucleus sampling | 0.0-1.0 |
| Top K | Only consider the top K most likely tokens | 0-100 |
| Frequency Penalty | Frequency penalty | -2.0 to 2.0 |
| Presence Penalty | Presence penalty | -2.0 to 2.0 |
| Repetition Penalty | Repetition penalty | 0.0-2.0 |
| Min P | Minimum probability threshold | 0.0-1.0 |
| Top A | Adaptive sampling parameter | 0.0-1.0 |
Smart Routing Preferences
If you are using an auto-routing model, you can set routing preferences:
- Performance: Prefer the highest-performance provider
- Price: Prefer the lowest-cost provider
- Balanced: Balance performance and price
Reasoning Mode Notes
- Required: For some models (e.g., the o1 series), reasoning mode is mandatory
- Optional: Some models allow you to enable reasoning mode selectively
- Not supported: Some models do not support reasoning mode
Billing Mode (PAYGo vs Subscription)
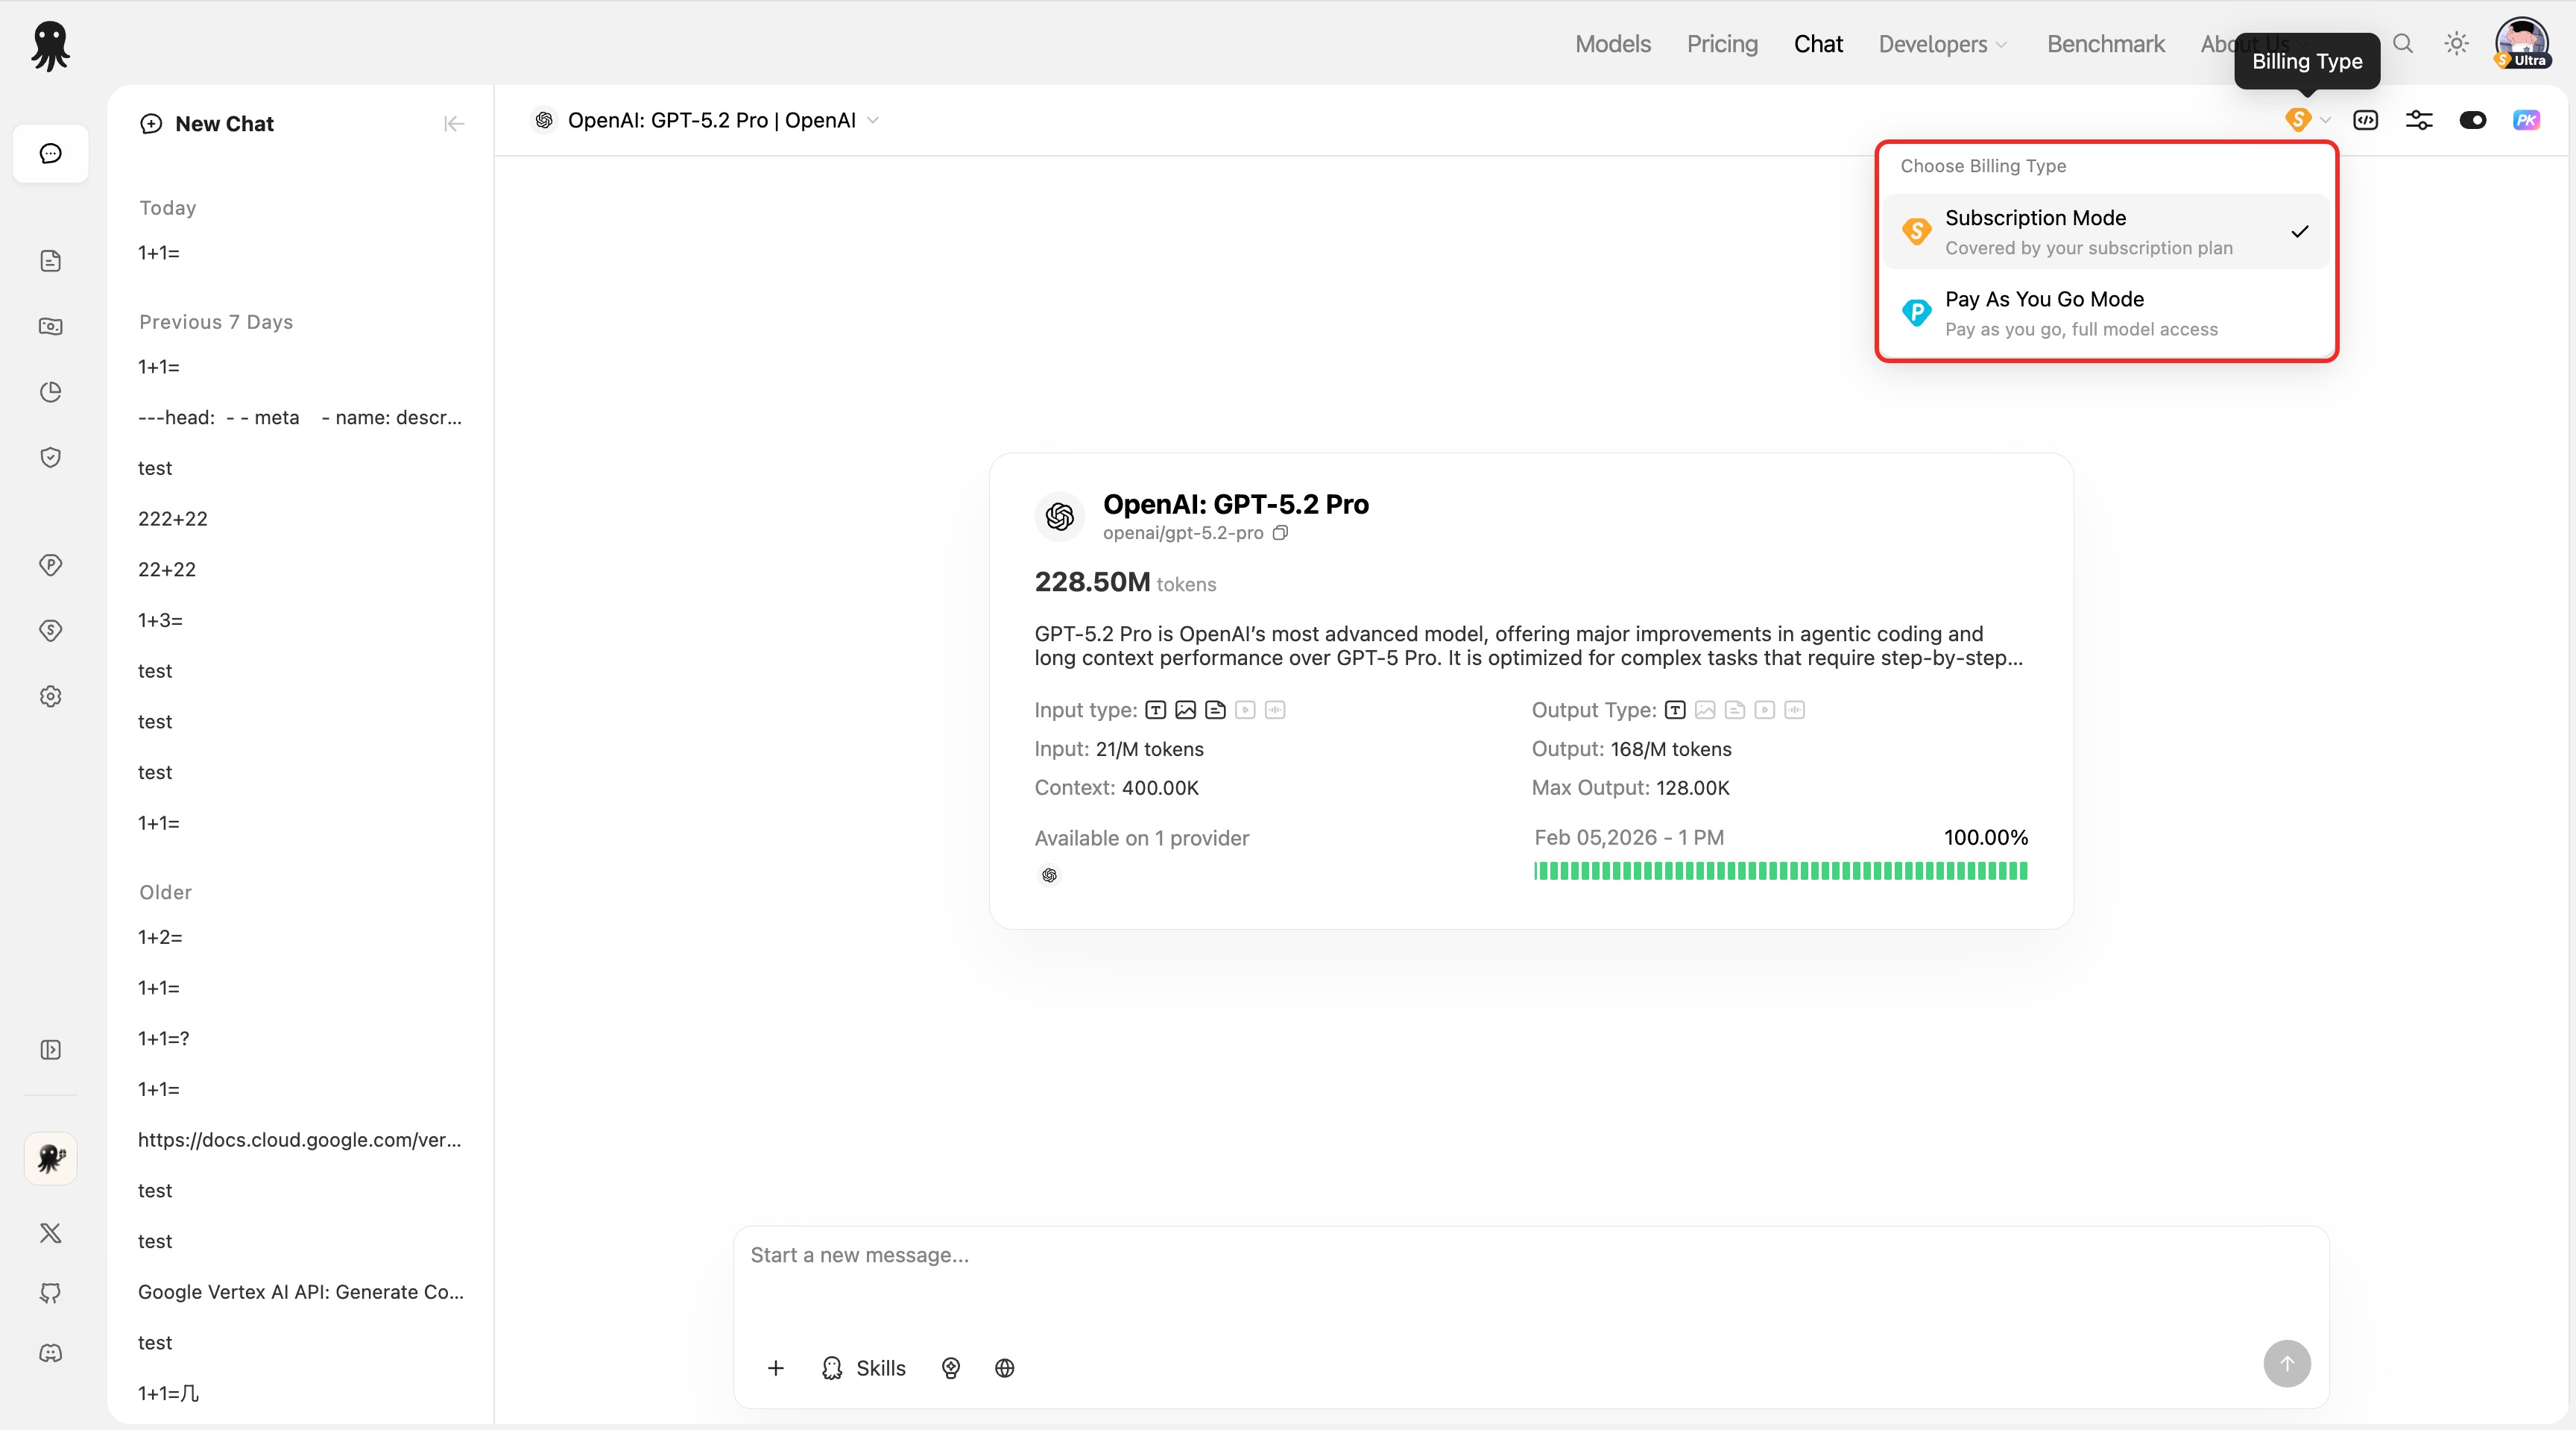
ZenMux offers two billing modes, allowing you to choose flexibly based on your usage.
Subscription Mode
| Item | Description |
|---|---|
| 💰 Billing | Monthly/annual subscription |
| ✅ Best for | High-frequency users |
| 📋 Coverage | Models included in your plan |
| 🔸 Icon | Yellow subscription icon |
Pay As You Go Mode
| Item | Description |
|---|---|
| 💰 Billing | Pay based on actual usage |
| ✅ Best for | Low-frequency usage or models not in your plan |
| 📋 Coverage | All models |
| 🔸 Icon | Blue API icon |
Switch Billing Modes
- Click the billing icon (yellow/blue) next to the model selection area
- In the dropdown menu, choose:
- Subscription Mode - Use subscription quota
- Pay As You Go Mode - Use your account balance
Notes
- If the selected model is not included in your subscription plan, the system will automatically switch to Pay As You Go mode
- Some advanced models may require sufficient account balance to use
- The system will automatically detect and prompt you to top up or upgrade your subscription
File Upload

Studio-Chat supports uploading multiple file types.
Supported File Types
Specific file types depend on model support. If an option is grayed out/disabled, the current model does not support it.
| Type | Formats | Description |
|---|---|---|
| Images | jpg, png, gif, webp, etc. | Image understanding & analysis |
| Documents | PDF document analysis | |
| Text | txt, md, json, yaml, etc. | Text file analysis |
| Video | mp4, etc. | Video understanding |
| Audio | wav, mp3, etc. | Speech-to-text |
Upload Methods
- Click to upload: Click the + button on the left side of the input box, then choose a file type to upload
- Drag and drop: Drag files directly into the input area
- Paste to upload: Copy an image and paste it into the input box
File Preview
Uploaded files are shown as thumbnails; click to preview:
- Images: view full-size
- PDF: view PDF content online
- Text: view file contents
Session Management
Session List
The left sidebar shows your chat history, supporting:
- Create a new session: Click the "New Chat" button
- Switch sessions: Click any historical session
- Delete sessions: Right-click a session item or click the delete button
- Rename sessions: Double-click the session name to edit
Session Grouping
Sessions are automatically grouped by time:
- Today
- Yesterday
- Last 7 Days
- Last 30 Days
- Older
Session Saving
- Each turn is saved automatically
- Session titles default to the content of your first message
- You can return at any time to continue previous conversations
Shortcuts
| Action | Shortcut/Method |
|---|---|
| Send message | Enter |
| New line | Shift + Enter |
| Stop generating | Click the Stop button |
| Copy reply | Click the copy icon below a message |
| Regenerate | Click the refresh icon below a message |
FAQ
Q: Why are some features unavailable?
A: Different models support different features. Make sure the selected model supports the feature you need.
Q: How many models does PK mode support?
A: Up to 10 models can be compared simultaneously.
Q: How do I know whether a model supports Web Search?
A: If the Web Search option in the Skills menu is clickable, it’s supported.
Q: Can Subscription and Pay As You Go be used at the same time?
A: Yes. Each chat window can select its billing mode independently.
Q: Is there a file size limit for uploads?
A: Yes. The specific limit depends on the file type and what the current model supports.
Get Help
Contact Us
If you encounter any issues during use, or have suggestions or feedback, feel free to contact us via:
- Official website: https://zenmux.ai
- Support email: [email protected]
- Business inquiries: [email protected]
- Twitter: @ZenMuxAI
- Discord community: http://discord.gg/vHZZzj84Bm
For more contact options and details, please visit our Contact Us page.